French Cleat Drill Station

Vložit
- čas přidán 12. 06. 2024
- Building a simple french cleat drill station for the shed. This should have been easy...but I made lots of mistakes! Free plans here: bit.ly/3PJfgBh
Evolution Power Tools R15VAC lightweight, Wet & Dry Vacuum Cleaner: amzn.to/3TBEpzY
DeWalt DWE7485 Compact Table Saw: amzn.to/49U3U5f
Hikoki C8FSHG Sliding Compound Mitre Saw: amzn.to/3IDlFcZ
WORX WX840.9 Stapler Nailer: amzn.to/3TgbSic
Jorgensen 150mm Clamps: amzn.to/3TkdHub
Enjoywood M1 Pro Angle Mitre Gauge: www.banggood.com/custlink/GGm...
MICROJIG Ripper pushblock: amzn.to/48Q4L5K
Pica Pencil: amzn.to/3IF5Q5Q
#woodworking #beginnerwoodworking #shed #wood #frenchcleat


Enjoyed your video. Good luck with your channel 👍
Always mark your faces and edges to reference off before making any cuts etc. Also lay pieces together to mirror markings accurately. Helped me as a newby to woodworking 👍. We learn by mistakes!
A great tip - thanks @RC-oi1gg!
Nice work and good luck with the channel!
Appreciate that @mattmanks - thank you!
I've made the same two mistakes when building one of my first laptop stands. Learnt from those and moved on. Just about to set up a new work area so keen to see what you do next. Also I built a very basic crosscut sled when I got my tablesaw, same as yours. I use it all the time.
I really do need to sort out a crosscut sled. I've got one modelled in Fusion based on the one from Tamar at 3x3Custom, albeit without the extendable fence. I just need to stop tinkering with the design and get it built!
Alright! Looking forward for the next video.
It's coming in the next week or so @adrianstar7387...either a french cleat router station or chisel holder. Appreciate the like and comment, thank you!
Have the Pica pencil, I like it, yes it does go dull but the lead marks very easy to locate marks. Some lead pencils are too hard, stay sharp longer but the markings are difficult to locate. Dave & The Girls
It's grown on me since this video actually and I have to say I'm now a fan. I bought some harder lead for it which I found better for my needs since I'm still working primarily with pine and ply. I did make a picture frame out of walnut the other day and found the softer lead useful for that. And, because it's relatively expensive (for a pencil) I find myself looking after it and putting it away properly, rather than the many cheaper pencils I've just left lying around / lost over the years!
best of luck. Just dont quit.
@dhavalpatl2010 thanks so much for the motivating comment! I'm just getting started...lots more videos in the pipeline, although I have to speed up my workflow as my editing skills are slow!
@@shed_time Well in that case I am a video editor myself. Let me know if you need any help.
I like everything Incramental Tools makes. I do not like the long marking thing and only got the 6 inch one. Pica are neat but the pentel pro pencils are fantastic. Either way the prices aren’t bad and I don’t buy anything unless it is on sale. Lots of patience for stuff I don’t need. Haha
Better way to explain. You can buy stuff you like and want to try. Just limit it and recognize you bought the whole store and your shop looks like the store.
I'll check out the pentel pro, thanks @FearsomeWarrior! In fairness, I bought some 'H' rated refills for the Pica and I find them much better.
@@shed_time Specifically Pentel GraphGear 1000. I remember them having the word pro in the word jumble but I remembered wrong.
Longer you do this, the more comfortable you'll become using the GRRipper with short lengths. I saw you switch (Oh nice catch @3:35 ) to the push stick on the first set. A push stick is a nice tool for that purpose, but on the chance you get unlucky and your blade pinches the cut piece between the fence, it will kickback hard. Stick with the GRRipper.
I have both the fat and thin versions of that pencil. Used them both for a while then tossed out all the grey graphite and switched back to No. 2 Ticonderoga wooden pencils. I kept the yellow and red leads for the pencil for marking waste cuts, labeling parts, and other purposes.
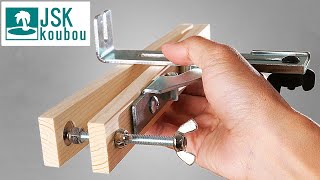
In order to avoid the mistake you made at @8:02 , during your initial layout, label each piece. Face, back, left side, right side, bottom, rail, style, etc. Draw X's where you want it cut.
While you can buy a flat tooth blade for the dadoes, you can also do this with a router. Either a full size one set up in a table, or a palm router with a jig.
Keep at it. You're doing great.
@11:43 draw a center line down the top side so you know where to toss a few brad nails in. It'll help with the strength. I personally would have put at least 2 screws in there. You're trusting end grain glue job to hold up your drivers and drills. It will fail in time, but it'll take a while, but 2 coarse thread screws would fix that problem. As far as your brad nail issue @12:17 , two clamps on the end, drive two brad nails into the center, remove the side clamps, apply a clamp over the area you just brad nailed, add two brad nails in both ends. But what you did is just fine. Again in the end, I would have added screws for more strength in that half-lap butt joint.
@15:15 Again, I can't see if you did it, but centermarked layout will give you the ability to shoot the brain nails exactly where you want them. I would have put a few in the actual drill/driver holders as well. Just more strength. It looks nice. Well done.
I do like the GRRipper and it actually saved me the other day - was cutting some very thin pieces of walnut for a picture frame and it fell through the face plate gap, and then kicked back hard. GRRipper got pulled into the blade and took some damage but bought me enough time to react! You're right though, I do tend to swap depending on how confident (or not) I'm feeling.
I want to make an exact width dado template for the router and that will probably be one of my next builds. I definitely need to build my router skills up and don't use it enough.