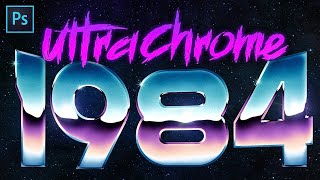
Grungy LIVE-TYPE Chrome in Photoshop OR After Effects!

Vložit
- čas přidán 7. 09. 2024
- In this tutorial, we’ll check out a grungy chrome text effect, side by side in both Photoshop and After Effects! Along the way, we'll create a high end effect while highlighting some interesting similarities, differences, and unique features of both programs. Written project descriptions below…
Free downloads of the assets used in these projects:
texturelabs.or...
Check out the Texturelabs Channel for more content:
/ texturelabs
Connect:
texturelabs.org/
Instagram: @texturelabs
PHOTOSHOP 16 Bit Document (Layers are listed as they appear in the document, "➔" represents elements in Clipping Mask)
1) Curves Adjustment Layer for extra contrast
2) Texturelabs_LensFX_155: Screen mode, Opacity 50%
3) Texturelabs_LensFX_139: Screen mode, Hue/Saturation with Hue at -180
4) Texturelabs_LensFX_139: Screen mode, Hue/Saturation with Hue at -180
➔ 5) Texturelabs_Grunge_122: Overlay mode, 40% Opacity
➔ 6) Texturelabs_Sky132: Blend-if underlying layer white sliders at 16 and 84, Hue/Saturation with Saturation at -50
➔ 7) Gradient Map Adjustment Layer: Grungy Chrome preset
➔ 8) Texturelabs_Grunge_155: Overlay mode, 10% Opacity
➔ 9) Layer with Black to White Gradient: Overlay mode, 60% Opacity
10) GROUP FOLDER
10a) Text Layer: 50% Grey text, Bevel and Emboss with Depth 200% Size 10px Global Light Angle 80, Inner Shadow Effect with Opacity 50% Distance 0px Size 35px
11) Black Background Layer
AFTER EFFECTS (Layers are listed as they appear in the composition)
1) Overall Adjustment Layer: Noise Effect 7%, Gaussian Blur Effect 2, Unsharp Mask Effect Amount 100, Curves Effect for extra contrast
2) Glow Adjustment Layer: Screen mode, Levels Effect with Input Black 18500 and Input White 31500, Fast Box Blur 30, Solid Composite set to black
3) Texturelabs_LensFX_155: Screen mode, Opacity 50%
4) Texturelabs_LensFX_139: Screen mode, Hue/Saturation with Hue at -180
5) Texturelabs_LensFX_139: Screen mode, Hue/Saturation with Hue at -180
6) KNOCKOUT Solid Color Layer: Stencil Alpha Blending Mode, Set Matte Effect with Take Matte From TEXT LAYER
7) Texturelabs_Grunge_122: Overlay mode, 40% Opacity
8) SkyBlend Photoshop Layer: Exported from Photoshop with Blend-if settings listed in Photoshop instructions above, or download the PSD using the Texturelabs link above
9) Adjustment Layer: Apply Color LUT Effect with GrungyChrome LUT (download link above)
10) Texturelabs_Grunge_155: Overlay mode, 10% Opacity
11) GRADIENT Solid Color Layer: Gradient Ramp Effect with swap colors and start/end points matching top and bottom of underlying text, Turbulent Displace Effect with Amount 100 Size 50 and Evolution keyframes from 0 to 360 degrees over a few seconds
12) TEXT LAYER: 50% Grey text, Bevel and Emboss with Depth 200% Size 10px Global Light Angle keyed from 80 degrees to 40 degrees over a few seconds, Inner Shadow Effect with Opacity 50% Distance 0px Size 35px


"Loosely inspired by my teapot" Strap in boys, we're in for another banger
Haha, think I'll also try that opener next time I pitch something to a client
Shout out to the amount of work that goes into a double utility tutorial like this one! Thank you!
Appreciate that Stephen! I figured it's pretty similar to a few other reflective-ish PS videos I've posted, so it might be a nice way to put a spin on it. Thanks!
Absolutely agreed. 🤘🏼
to do a "blend if" in after effects you can use a effect called "extract" (inside Keying). use the dots like the arrows of photoshop, separate the lower/upper dots to do a fade transition. If you are having a hard time controlling the "colorama" effect you can change the "user preset palette" to a more friendly option like alpha ramp, take the alpha arrow tint black and made it opaque, start to build from there, it will be easier. Awesome tut!
can you please elaborate ? When I did this it looked really horrible no matter what :/ Going between photoshop and aftereffects is a really unfortunate workflow so being able to do these things in AE is crucial
Wow, I'm just floored by how much you can replicate Photoshop specific things in After Effects using some crafty methods and tricks. These tutorials are amongst the best on all of CZcams. Love it!
You're a life saver! Thank you for showing the After Effects process! I have tried to translate your previous Photoshop tutorials for use in After Effects, so it's nice that you've tailored this video for both.
Thats great to hear! I was hoping this one might be relevant to some of the other tutorials, hitting a few of those place where the approach is kind of the same and kind of different
Great tutorial! I like seeing the setup in both AE and PS. One thing to note about the gradient map in AE. You can sort of simulate the one that's in PS by using the gradient ramp effect that you've already added in AE on the text layer. On an adjustment layer add colorama and in Input Phase, use the text layer that has the Gradient Ramp already. Make sure to pick Effects and Masks instead of Source to drive the ramp. It's not exactly like in PS, but you can come close. I use Ramp Grey to start with in the Output Cycle and then just start adding the colors that you want. Make sure to uncheck Modify Alpha if you're getting aliased edges as well. Thanks again for the great tutorials!
Nice! Alright, I'm making a point to really dig into Colorama... something tells me I've just gotta find the right approach with that effect. I'll definitely try this out, thanks!
Never knew what adding phase from a layer could do. Nice trick, thanks!
This is awesome! I only have photoshop, but not having the program never stopped me before I had PS, so I’m more than happy to learn after effects too! I think I went about 7 years watching Bert Monroy’s Pixel Perfect show before I ever got my hands on the program.
Haha I hear ya... like Photoshop, even if you can get an old version loaded up, you'll have 95% of the features!
Fantastic tutorial! I work with Photoshop and After Effects on a daily basis and still discovered new things by watching this. The fact that you give us a two for one tutorial, AND include the assets is just awesome and much appreciated. Keep it up!
That LUT trick... Brilliant! AE users have been asking for gradient maps since forever.
"blend if" in After Effects would be a game changer. Love this!!
This video is extremely well done! I like the overall effect a lot but for me the real gem here are all those little bits and pieces of fantastic tips, tricks and workarounds. You are insanely knowledgeable. Keep up the great work!
I'm always blown away by all these nifty tricks you pull out of the hat to bring these amazing ideas to life.
That's awesome, thank you!
Thanks for the great tutorial! Loved the side by side explanations in AE and PS. One small tip: there actually is something really similar to BlendIf in AE: The effect 'Gradient Wipe'. You would just have to precomp the layers beneath the sky-image and target that precomp as a map for the gradient.
Very quickly becoming the best digital graphics channel on youtube
I really like the comparisons and work arounds used... You continue to enlighten me with these glorious secrets with every one of your videos... Very Cool...
Just a heads up you can do a complex gradient ramp in After Effects. If you use the shape tool, and set the fill to gradient, you get the nice complex gradients like you would in PS ;)! Thanks for the great tutorials! :)
Just WOW! DAMN you totally nailed it! t
Transferring knowledge this way, from Photoshop to AfterEffects is a real game changer!
Please keep this formula! I can't wait for another tutorial more than ever!
PS I could be wrong but AE Colorama effect can do the same thing that GradientMap in PS does.
My man just made two tutorials of the same effect at different programs in one video.
Awesome af! Nice one dude!
Can we just appreciate the fact that texturelab is here! Compete lesson and resources in front of you! Much respect to this channel! ❤
So awesome that you are showing it in both AE and PS!
4 dislike, seriously?? Why you don't like it?? This one is the best useful tutorial 🏵
YOUUU'REE SOOO TALENTEEED
A beauty once again Mr. Labs.
I think he is revealing secrets that you are huding guys 😄😄 just joking i like u both
This is SOOO COOL!!
This gradient mapping technique blows my mind. It looks so good!
I have never seen those two techniques for Gradient Map to LUT and importing the PS layer with baked in layer style. Very helpful to know that's possible.
This is the best CZcams channel for learning photoshop effects, I always watch all videos Texture labs. Great thanks !
What a way to flex, doing two tutorials in one! As a Photoshop veteran that feels completely out of his depth in After Effects, this is incredibly helpful! Great techniques as always, especially loved the simple gradient + complex gradient map combination to create the chrome look
Wake up babe, texture labs uploaded!
You my friend will become a legend !!
Best Effects Channel on the interwebs! This is real Pro shizzle.
Using a picture of the sky to express a metallic feeling is too genius.
this was amazing - need more AE tutorials this is so high quality
Your problem is that you are too damn good at this.... NEVER STOP!
Wow, you deserve a top spot on an adobe Adobe Max session! You're such a pro.
Amazing video finally been able to copy my ps text into ae after days learned so much brilliant
You never fail to impress and inspire me! Love the content! :)
That's really awesome, thank you!
The smooth blend-if trick was the gem in this for me. Great work!
Amazing!
For the Gradient Map in After Effects, I believe that you could use a Shape Layer with a Gradient Fill, there you can edit the gradient as you edited it in Photoshop.
Moving docs with embedded values between programs is a neat trick, thanks.
ALERT! ALERT! After Effects does have blend-if, it's called the gradient wipe effect. May be slightly more of a hassle to use than the "blend-if passed through advanced blending" workaround (because your layers have to be the same dimensions, so you have to pre-comp, etc, but at least it's adjustable).
awesome video
Awesome tutorial mate, really opened my eyes for the possibility with the Gradient Map as a chrome source...
As for the after effects solution for Gradientp Map, you could be using the native effect "Colorama", is a bit pain in the *** to figure out and set the proper values of colors on to the color wheel, because it's After Effects and the things are as it is hahahahah, but worth the try, and you can set different channels, you can rotate the color wheel, add more loops. Etc.
I am definitely going to try replicate it with Colorama to have more possibilities with the color phases! Thanks again!
EXCELLENT VIDEO!! The way you replicate actions between the programs is amazing! THANKS!!!!
Excellent tutorial friend, Thanks for share
INSANEEEEEE
This concept is GOLD! Please make more of themm
How you offer this level of instruction for free puts all paid tutorials to shame. Kudos.
omg what a masterclass, i'm learning stuff every 2sec it's just crazy, thanks a bunch man !
Since I've always wanted motion(or the option to add it) added to any of my art I've been using AE more and more and PS less and less. I just needed to learn a few more techniques to parallel stuff from PS to AE. And it's win-win since I don't lose my touch with PS but now I don't have to recreate tons of PS art in AE from scratch. I can build it start to finish in AE. Great tut.
Thank you for After Effects content!
Bro your the teacher I’ve always been wanting to help with PS. Thanks for your hard work on these videos.
Wow good video. This is the first time I see tutorial video creating design with different software in the same time.
I like the blur-sharpen adjustment, as I use that since many years as well, especially on cgi images. Simulates the in camera sharpening in my opinion.
You´re a hero!
I just found this channel today, but i already fell in love with it! Great content!!!
Best tutorial channel on the planet.
This is really a great format - I'm always wondering how to recreate photoshop effects directly within AE and it's helpful to see them lined up in this way
I like this text effect.
This is awesome! I'm so inspired to create something with this technique! Becoming your patreon supporter was such a great decision! Top quality professional education man!
Amazing tutorial! Just to clarify, the layer styles works differently from the effects from the effects menu. For example, the gradient overlay in the layer styles will follow the layer in wherever position you put it. The grandient ramp (similar effect) doesn't do that. Also, layer styles will always overwrite any effect you had added to your layer.
If you precompose the layer. Then can you add affects to it. Then dont the layer style not overwrite the effect
again, mind blowing, love seeing techniques and effects i've never seen before
Thanksss you are the best channel!!!
Max's name in the original script was Schluber? Haha, that's news to me :) Great job I'll make use of this technique for my next video and I used the watercolor bleed text in my latest video, so thanks a bunch for your tutorials!
Haha, ya Mad Schluber Bible doesn't quite have the same ring to it... That's awesome though, glad you can put some of the stuff to use! Checking out your channel now!
Just a small tip, because this looks sick as f***! When you drag in the lens flare in after effects, the black square of the object can be seen on brighter screens. I say this because I have said screen and it is a problem that often occures with movie titles being made on a mac computer. You can probably see it if you change the exposure with the "adjust exposure" function.
Awesome. just found ur channel new subscriber now great content. love anything 3D. lol
So much of knowledge. Brilliant. Thanks for this.
My god they are super useful. You should do this type of tutorial moreeeee!!!
Just stunning. Incredible work and fantastic tutorial. Thank you!!
waooo!! amazing project!! incredible!! congrats!! and thanks for show us how to do it!
You are a genius 🙌🏻🙌🏻🙌🏻🤗
That is crazy good!🔥🔥 So advanced, yet simple and flexible
Superb video ! Very usefull !
This has to be one of the Best tut ever sensei... Thank it's Fire💥💥💥
I am in love with your style.
YOU ARE THE BEST BRO!
You could use an inverted luminance key as your "Blend-if" in AE. Then you have flexibility with your adjustments.
Great tutorial!
You have great skills and high level of program understanding. Thank you so much for sharing your method. :D
And your tutorial video just got 400 likes.
Congrats.
Awesome! I haven't used After Effects before, but it was interesting to see the differences from Photoshop!
you are so helpful tysm for the vid
I just recreated this to show my friends. Their immediate response ''Meh...feels too iron man to me'' man, tough crowd :P I love it either way. Sub from me.
goat in photoshop tuts
You're a legend man
Dude! I can't thank you enough for the amount of stuff I just learned from you today. Wow!
So. Much. Knowledge.
That was a pleasure to watch. Great approach showing these in parallel and as always - a sharp and tight execution! Do you record these tutorials in one go?
Thanks very much! At some point I'm hoping I'll be able to get em in one go... I break it into 3 or 4 minute sections, mostly cause it's insanely hard to talk for 20 minutes straight!
@@Texturelabs talking AND being engaging for 20 minutes is difficult. Thanks for sharing your expert knowledge!
What a cool effect. Thank you for this!
Really COOL! Thank You!
My pleasure!
very nice ! thank you.
PRESERVE TRANSPARENCY CHECK BOX WTF! I MISSED THAT ONE FOR FAAAAR TO LONG!!!!
LUT into AE, great tip, thank you :D
Amazing stuff as always. I'm going to try making something with this over the weekend!
So cool to see this software comparison. Love it :)
2 in 1. Great tutorial!
Love it!
Awesome👍
Awesome thanks Imran!
Just amazing resoult)
Beautiful. Thank you!
Your tutorial is so great!!!