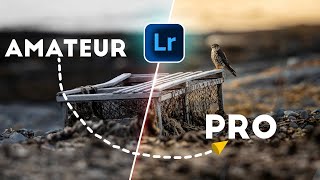
How to light lanterns in your Lightroom Day-to-Night transition

Vložit
- čas přidán 3. 08. 2022
- One of the main features of any Day-to-Night post-processing transition is how the streetlights or lanterns are illuminated. This tutorial focuses on the specific process for lighting the streetlights or lanterns in a scene. Hopefully, this will be useful when you carry out your own Day-to-Night transitions. Any questions please feel free to put them in the comments, and as always I welcome your feedback.


Wunderbar! Grüße aus Deutschland!
vielen Dank 🙂
Amazing
😀😀
Excellent demonstration. Your competence is inspiring. Thank you.
I am glad I could be of assistance 😀
THIS TUTORIAL REALLY WORKS I AM FROM PHILIPPINES! THIS MAN DESERVES A SUBSCRIPTION!
thank you
Wow! It works! The first time i tried it took forever to activate and when I disabled my antivirus it worked like in less than a minute! Thanks bro!
Thanks so much, Jamie. A very detailed method resulting in very refined and beautiful images. I am looking forward to seeing more of your work.
I am very much looking forward to continuing to share my work with you all :-) I will try to do at least one video per week, and share additional posts on my Facebook page, feel free to follow me there as well. facebook.com/JRMathlin
How enjoyable. Creative
I really enjoy your work. Videos are outstanding!
thank you very much 😀
Thanks a lot for your time and for sharing this amazing editing process that turns a grey and dull image in a eye catching beauty.. Well done. Subscribed
thank you for your kind words
So interesting and informative. And so very kind of you to share your expertise with us, and help us to take our photography to the next level. I'll be watching this video again as I've done with your other videos. Once is not enough, as there's so much information packed into each tutorial. Thank you!!
You are more than welcome :-)
Everything works at its best!!
Thank you very much! I will definitely try this method!
Outstanding again, as we've come to expect. Please keep them coming. I'd appreciate it if you'd be able to allows us to receive a download copy of the source file for practice.
Wow this will totally work!
handy tricks! thanks
great video. thanks!
Hell yeah man good work
Thank you, it means a lot:)
You are most welcome 🙂
good hack, good job man
Wow! I mean WOW! Do you teach any Lightroom/Photoshop classes?
I do run workshops, but most of my tutorials are here on CZcams, I hope you enjoy them 🙂
Awesome video thank you. I assume it works the same way in Luminar Neo?
yes you can add and subtract the masks very similar in Neo 😀
like and sub!
can you show how to do this in photoshop as well?
thanks for the question, I do not do it in photoshop as it takes longer to do, plus the key to the success of my technique is the power of the lightroom radial filters :-)
@@jamiermathlin I am all about easy. Would you suggest LR over Photoshop?
@@funkycoldmedina67 they each have their own advantages, generally, I do most of my work in Lightroom, and use Photoshop for reflections, sky replacement, and object removal. When it comes to using radial and gradient filters Lightroom for me is the best approach 🙂
@@funkycoldmedina67 Photoshops CRF is basically the same as lightroom