DIY LED COVING + PICTURE RAIL - On A Budget!

Vložit
- čas přidán 7. 08. 2024
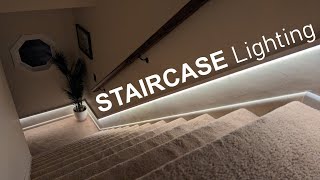
- On a tight budget but want to install LED lights above your coving? This is the video for you! In this one I help my brother install new coving, COB LED lights and picture rail before the room gets painted black!
Mitre adhesive and activator amzn.to/46T7WJu (Amazon UK) geni.us/1CEOTgo (Amazon Worldwide)
Grab Adhesive amzn.to/3tIPzZj (Amazon UK) geni.us/ZMhO8 (Amazon Worldwide)
LED Aluminium Profile/Diffuser amzn.to/40etMF6 (Amazon UK) geni.us/8j04Fu (Amazon Worldwide)
LED COB Lighting amzn.to/3tM36PN (Amazon UK) geni.us/EZTgfd (Amazon Worldwide)
Decorators Caulk amzn.to/3Mf4gJX (Amazon UK) geni.us/BVqF (Amazon Worldwide)
🔴My channel is supported by Milwaukee🔴
Check out their full range here: uk.milwaukeetool.eu/?...
Tools used in this video:
Lazer Level uk.milwaukeetool.eu/en-gb/usb...
M18 Mitre Saw uk.milwaukeetool.eu/en-gb/m18...
M18 18g Finish Nailer uk.milwaukeetool.eu/en-gb/m18...
0:00 Picture Rail Installation
3:15 Coving and LED Preparation
5:37 How To Cut Coving On Mitre Saw
7:35 Coving Installation
8:22 Total Costs
#coving #decoration #home
Thanks for watching! Please subscribe, click like if you like, and hit the bell icon for future video notifications
🔨 MY TOOLS 🔨
For links to the tools I use, plus some of my favourite consumables, finishes and more see links below. As an Amazon associate I may earn from qualifying purchases
UK affiliate store: www.amazon.co.uk/shop/ragnbon...
US affiliate store: www.amazon.com/shop/ragnboneb...
🤝 HELP SUPPORT THE CHANNEL 🤝
Support with CZcams channel membership: / @ragnbonebrown
Support with Patreon: / ragnbonebrown
Support with PayPal paypal.me/ragnbonebrown
Shop With Amazon using my affiliate link: geni.us/iWD3K
💰 SHOP 💰
Etsy: www.etsy.com/uk/shop/KeithBro...
teespring.com/stores/rag-n-bo...
🎧 WORKSHOP BANTER PODCAST 🎧
/ workshopbanter
Also available on Spotify, Apple, Google and most other podcast platforms
🔗 LINKS: 🔗
Website: www.ragnbonebrown.com
Facebook: / ragnbonebrown
Instagram: @ragnbonebrown
Twitter: / ragnbonebrown
Email: ragnbonebrown@gmail.com
Second CZcams Channel (non woodwork videos): / keefykeef - Jak na to + styl


Mitre adhesive and activator amzn.to/46T7WJu (Amazon UK) geni.us/1CEOTgo (Amazon Worldwide)
Grab Adhesive amzn.to/3tIPzZj (Amazon UK) geni.us/ZMhO8 (Amazon Worldwide)
LED Aluminium Profile/Diffuser amzn.to/40etMF6 (Amazon UK) geni.us/8j04Fu (Amazon Worldwide)
LED COB Lighting amzn.to/3tM36PN (Amazon UK) geni.us/EZTgfd (Amazon Worldwide)
Decorators Caulk amzn.to/3Mf4gJX (Amazon UK) geni.us/BVqF (Amazon Worldwide)
0:00 Picture Rail Installation
3:15 Coving and LED Preparation
5:37 How To Cut Coving On Mitre Saw
7:35 Coving Installation
8:22 Total Costs
🔨 MY TOOLS 🔨
For links to the tools I use, plus some of my favourite consumables, finishes and more see links below. As an Amazon associate I may earn from qualifying purchases
UK affiliate store: www.amazon.co.uk/shop/ragnbonebrown
US affiliate store: www.amazon.com/shop/ragnbonebrown
🤝 HELP SUPPORT THE CHANNEL 🤝
Support with CZcams channel membership: czcams.com/channels/VyE_6jEtVZGmYGXtUOL5FQ.htmljoin
Support with Patreon: www.patreon.com/ragnbonebrown
Support with PayPal paypal.me/ragnbonebrown
Shop With Amazon using my affiliate link: geni.us/iWD3K
💰 SHOP 💰
Etsy: www.etsy.com/uk/shop/KeithBrownMaker
teespring.com/stores/rag-n-bone-brown-merch
🎧 WORKSHOP BANTER PODCAST 🎧
czcams.com/users/workshopbanter
Also available on Spotify, Apple, Google and most other podcast platforms
🔗 LINKS: 🔗
Website: www.ragnbonebrown.com
Facebook: facebook.com/ragnbonebrown
Instagram: @ragnbonebrown
Twitter: twitter.com/ragnbonebrown
Email: ragnbonebrown@gmail.com
Second CZcams Channel (non woodwork videos): czcams.com/users/keefykeef
$253 for materials.....brothers that help......priceless! I like the way it turned out.
Keith, I always marvel at your creativity, but the saw hanging on the wall trick has to be one of your best of all times. Hey, the lights and the entire decoration of the room are outstanding. You and your brother are to be congratulated. Thanks for the video.
Thank you!
Nice job. The end result looks really good. I'm a big fan of indirect lighting!
George & Lenny sprucing up their alfalfa farm. Makes for a more wholesome ending than the book.
Sheer genius with that laser level!
Also, excellent cat content! 😊
Glad you enjoyed it! Cheers Tim
Came to say the same thing. I'm definitely using that in future
Lovely cats. Oh yes, the lighting installation and coving was very good, too!
Thank you very much!
That aluminium channel for led strip is great and comes in different profiles as well. Loving the cats as well.
That turned out better than i could have imagined!
Excellent stuff, mate. When I was doing some coving a while back, I bought two of the pre-made corners, and then used them as templates on my mitre saw to cut the full lengths. Wish I'd seen this video with the LEDs before, looks absolutely brilliant. Thanks for all of your very practical, easy to follow videos. Cheers
Pure class! Looks so amazing I love the hidden LED lights great idea, keep it up Keith love it!
Great tutorial for mitering. Definitely easier than the others I've seen online. My rule for mitering... "Do your best and caulk the rest." 🤣
I live by that too
Did coving once a few years ago - be prepared to measure it twice, cut it then swear profusely after having cut the end wrong. Before doing it again!
Haha yes!
A lot of much needed cat content. Thank you!
Realy nice, that light and the satin black. And well made!!
Great video! All the explaining and instructions and it looked great. Really nice 😊
That looks really classy! High end
Looks fantastic! There's a tip that I've used for coping skirting, but I imagine it would work just as well here on the picture rail, which is to cut a 45 as if you're doing an internal mitred corner then use your coping saw and a slight back cut to remove the exposed MDF bit. Perfect fit every time.
Before I even finished watching you solved an annoying issue with my Lazer level tripod, I hadn't thought of the saw trick 🤯 great job and well explained, thanks.
That looks very cool... Mr TCD now wants us to install that around our whole house 😅
Cheers Vikkie
Love ur cats :-) looks great.
Well bloody done , regardless of peoples post, you’ve explained it very very well and the cartoon slides have been well shown , thank you , as your post has helped and it shows you’re a real thinker , out of the squares and it’s thinkers as yourself that really add to , there’s always a way to finding a fix to a problem , never a way to not wanting to , cause it can’t be done !!!!!
That came out ✨️clean✨️
Thank you so much for the pic of how to cut. That'll give me a bit more confidence to redo mine
Great job and very well explained !
Stunning work
The channel was definitely a good way to go having tried to get straight strip without!
Great job and cool idea, nice!
Turned out nice.
I've done coving a few times and getting the cuts right always does my head in!
No matter how long I look at it and cogitate...it inevitably turns our wrong!
Such a simple thing messes up your mind .😵💫
Nice job Keith, and quite reasonable prices for the materials as well.
I fitted LED lights behind our lounge coving, the coving has a channel down the back to take the lights. The lights did suffer from voltage drop as they went round the room so had to run extra cables in the channel to connect far led strips in, I couldn’t rely on just connecting the cobbled strips together. Then had terrible trouble with the led lights shining through the polystyrene coving. It took coat after coat of paint before I finally blocked the light so it only shone up above the coving.
Nice end result but loads of effort!
Lovely, nice vid. Wouldn’t have minded seeing how the electrics were hooked up as I’m a novice (at best) with that side, but thanks.
looks good , might do this on my bathroom install
VERY well done. Looks great. I'd even live there. Neat trick with the saw and level. LOVE that solution. So much of my stuff is aluminum that I never think of magnets. Saw table (Craftsman) Miter saw table and fence - aluminum. Etc. That hanging Laser level would probably work well as an earthquake detector too..... ( I live on a large fault line - the New Madrid Fault.)
Love the lights and the cats 🙂
Nice job. The laser level was pretty genius
Can I ask how you ran the cable to power the LED strips? That's the part I was looking forward to seeing. Thanks in advance. Great job, both of you.👍👍👍👍
There's a bit of trunking behind the door in the corner of the room behind a bookcase
Was looking for this very question before I commented. Thanks for asking Cliff, and thanks for responding Keith
I always learn sómething from your videos!
Nice job.Like the finish of the alcove with the led lighting.The colour scheme also looks great.
Thank you! Cheers!
Love your videos.greetings from Zagreb.
I've never been a fan of textured ceilings, but I really love it here in combination with the LEDs.
Me neither, and me too!
awesome, looking to do something just like this in our master bedroom. I the spacing with MDF is quite simple and yet effective!
lol @ being a moth in a previous life, that must be me as well, love it. Great video thanks for sharing ❤
Great job 👏🏼
The room looks great!
Thank you!!
really clever idea with the saw for the level. For the coving I use 'Magnusson Plastic Coving mitre box' it shows where to place if internal or external cuts. Much easier and accounts for the arcing.
Helpful video as always.
Great job
Beautiful
They look brilliant, sort of makes the room ‘pop’ a bit. Lovely cats too 😂 I quite like the look of those lights for my office/shed/workshop/retreat from nagging 👍👍👍
Thank you! 😊
Nice job mate. Quite a nice effect innit. Dimmed in the evening would create a cosy atmosphere no doubt 👌
The Wickes coving jig (the blue one you showed) is a great piece of kit, makes it so easy to visualize the cuts, only problem is that it is size specific to the coving and 127mm seems to be the easiest to find.
I recently did coving all through my house and only one regret is that I cut too tight to central heating pipes, when the heating is on, the coving clicks as the pipes expand. I had to make better clearance and filled with a flexible sealant and the annoying clicking has gone thankfully.
The saw / laser level method is straight out of the Gid Joiner playbook.
Great video 👍👍
Great stuff.
Dude, you can cut the picture rail at 45 degree to save doing the scribe with a compass.. Just cut 45 for inside cuts then scribe, use the outside line to cut too, much cleaner and precise.
I can definitely go along with you on cutting coving Keith.
I made a few mistakes and as luck would have it,
I brought more than I needed but in the end it didn't go too bad for an amateur like me lol.
The lighting looks fantastic and a really great job done there mate.
Thank you!
Looks really cool! Nice job! Love the video overall, great editing and fun content. Really enjoy watching your videos! 😃❤
Thank you so much 😁
Keith, what a super cool bro you have.
@ragnbonebrown... I'm super aroused by this comment. When lambo?
I liked the finished look! the retro textured ceiling gives a funny touch. I did some of those styrofoam covings, much cheaper and easier, but the joints of longer pieces where at 90° an you can tell, I wish I knew better! :D Anyway loved all the cats stravaganza
Cool, thanks!
I did a similar thing. I basically built a tiny 90mm deep shelf 50mm down from the ceiling all the way around the room then attached the coving to the underside the standard way and used a huge length of rope Led the whole way around the room.
Looks great I think....👍
Pretty lights
Looks great! Plus, extra cats!
Thank you very much!
When cutting coving, I always “view” it from above and be mindful of those two marks you already spoke about!
I hate that polystyrene stuff!! I used it once knowing that the kitchen ceiling was not “flat” so it would bend slightly 😬
Had to watch twice as I didn't realise you had lighting to put up, I was too focused on the cats 🤣
🐈
Great job on explaining the installation process! If anyone's ever in need of some high-quality coving, feel free to reach out to us!
Andy Mac does a good trick where instead of scribing, you cut that edge at 45 degrees and remove the non primed material. See his renovation video on architraves (from memory).
Looks great, really good job
5:13. That's some nice decorators COB. It's pridddy 😅
This looks amazing... can you ask your brother how do you conect the cob to the make them come on? cant wait to try this
Love this video as I would not have thought of putting LEDs around the ceiling until seeing this. Would like to have seen this at night with no other lights on to see the affect it has on the room.
EDIT: We're soon to move into a bungalow which has coving and I've never been a fan of it before but recently that attitude has been changing, warming to it a bit now as it can help make a room look less boxy.
My best tip for cutting coving mitres is have 4 small pieces all cut 2 for internal 2 for external. and mark them then use as a reference.
Always wondered how I could get a piece of metal that high up on a wall. I never have anything with me that I could mount for the level. Recently started using a metal 30cm ruler the same way you did with the saw but I’ll stealing your idea now! 😊
Nice job on the motion graphics for all the text in the video.
👍👍👍.Thanks
Great video, although I’m not 100% certain on this but I’m pretty sure the lock-in points on the bed and back bevels at 33.9 and 31.6 are to enable you to lay the coving flat and cut mitres. I could be wrong tho.
Sure looks nice.
0:38 Yes, where did you learn this?? Neatly done, Keith!
I don't remember but I've seen a few people do it, it's not my trick! 👌
Great video and very affective.. Can I ask how you done the wiring.. Many thanks
Would love to have seen how you got power to them and what power adapter you used and control them.
Also at the length did you need to inject power at two places ?
I can remember dad taking out all the picture rails in our mid 1940’s in the mid sixties 🤦🏻
I can’t believe your cutting the mdf on the floor with no dust collection!
How did you tackle the corners for the LED strips and aluminium profile (the Amazon link seems to the be going to the wrong thing I think)? Thanks for this video, it's been a great help.
I will give it a couple of weeks and then claim the saw hanging the laser trick as my own 😀😀
Nice cats! 😁
They are!
Moth in a previous life... I had to clean coffee off my monitor! Lights looked awesome and the finished room looked very stylish! I know your pain with coving angles though
Awesome! Thank you!
Years ago when I fitted coving as part of my job, a customer asked how do I work out the cuts, I said that's easy, just remember to cut it upside-down and back to front
Good work, my missus would go mad cutting the wood on the carpet. All that dust everywhere 🤬
If you cut a 45 on the end of the piece, you have a perfect line to cut to for the scribe
Love the video! Quick question might be a bit stupid. What kind of LED lights were they in the sense of power supply? Were they battery or plug ins and how (if did) did you hide the power area or manage the wires?
The Spice Lounge has some competition 😂😂
🤣🤣🤣
Looks great keith! I wonder how you guys did the wiring and hid the cables running from the LED lights to the plug?
Just a bit of trunking behind the door in the corner of the room
Really beautiful work, Keith! It turned out amazing!!! 😃
But yeah, I guess we just found out the secret identity of Mothman. 😬
Anyway, stay safe there with your family! 🖖😊
Ha ha! Thank you very much!
Ha, I have to hang some pictures next week, and my laser / Tripod is also too low for what I need. I will definitely use the saw trick 😁
Love this think it looks wicked. Have u managed convince rhea to allow you to do it in your dining room? (Yes i follow the podcast) hooe your well and baby brown and you 2 are well. 🏴👍 Ps i turned my fitst project today. 😮
Do you and/or your brother know you can get coving that by design accommodates led strips? More expensive like but it is a thing.
So @RagnBoneBrown is it bright enough as the main source of lighting in that room?
Another great video Keith, but is there any chance you could show us a cross-section plan of how the LEDs and coving were fitted? It's not quite clear.
Thank you, that's a good idea - I will try and find time to add a bit in to the video ready for Friday! Cheers
Love the job and idea, but bit confused, if the MDF strip was set to the 90mm line wouldnt the led profile pop out from the coving rather than be inset? Wouldnt u set the mdf strip back a bit by the size of the profile?
would be interested in the answer to this too
How did you power the led strips?
Yeh those guides are like £6 from wickes I used one did the trick with a Stanley knife to guide along the jig