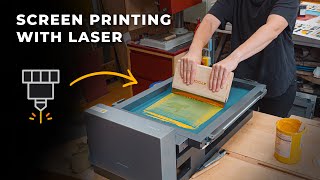
How to Set Up the New xTool Screen Printer + First Project!

Vložit
- čas přidán 25. 07. 2024
- I got to test out the new xTool Screen Printer and I am so impressed. I cannot wait to try a multi-color design-- so make sure to subscribe to my channel so you don't miss that video!
Subscribe to my channel:
/ @karleyhall
If you'd like to buy any of the items shown in this tutorial, check out the links below. Some links are affiliate links. By clicking on these links I may earn a small commission at no cost to you. Some products may have been provided to me by vendors, however, all opinions and reviews are strictly my own.
xTool Christmas Sale | Craft Sincere Love to Someone Special (Dec 13-Dec 26 PT)
✔️ xTool Screen Printer: bit.ly/3RD1AZH
✔️ xTool D1 Pro: bit.ly/4arZ4g6
✔️ xTool M1: bit.ly/3RsiQRM
Shop on Amazon below:
✔️ xTool D1 Pro: amzn.to/3RtLKiX
Shop My Cricut Faves Here: www.amazon.com/shop/karley.hall
Shop My Favorite Vinyl Here: www.143vinyl.com/starcraft-hd...
*use code KARLEY
Website: karleyhall.com/
CZcams: / @karleyhall
Instagram: / karley.hall
Facebook: / karleyhallcreative
Facebook Group: / cricutcraftswithkarley
*Disclaimers
Some links above are affiliate links. By clicking on these links I may earn a small commission at no cost to you. Some products may have been provided to me by vendors, however, all opinions and reviews are strictly my own.
Karley Hall will not be liable to You or anyone else for any decision made or action taken in reliance on the information given by this video or for any consequential, special or similar damages, even if advised of the possibility of such damages. - Jak na to + styl


Thank you, Karley!
You can print on the clear film so you know where your image is printing and then place whatever you are printing underneath it in the correct spot.
cool you got it to work, my attempts have not worked out -- the laser did not remove any material, upped the power and it barely removed anything,.. so weird.
My tip, avoid pull and push when squeezing, otherwise the paint can bleed under the mesh. Only squeeze in one direction.
Normally you just flood the paint in one direction without pressure and then always squeegee it in the other direction with pressure.
Thank you so much! This is great advice!!! 🥰
Thats what I wanted to say too. The result will be much more precise: load the screen with color, then squeeze in the other direction. If you want to squeeze another time you should squeeze always in the same direction.
Afterwards you will probably have a little bit of color below the screen that will make a not so sharp picture so put a normal sheet of paper squeeze without color to clean the screen and your ready for another result.
What you were making with taped edge is what professionals do! But take a piece of cardboard with the same thickness of the result. Then it will be much easier to work.
@@heinzknorzel2966 thank you so much!! I’m so excited to try again with these tips! 😍
Thanks!
Great video. helped me set up my screen printing gear from xtool. Appreciate seeing you make mistakes!
Which xtool engraver are you using. 5w, 10w or 20w?
Can the screen printer be used with the Xtool M1 engraver? I do not see the screen print option on the list of operations.
It technically cannot… but I will be testing that!
When I went to X tool site they said the M1 can be used with the screen print
@@tinamarizetts6675 I’m looking at the site right now and it says the M1 and F1 are incompatible. Where are you seeing this info? I’ll let the xtool team know to adjust that if it’s on their site!
Hi! This is Dev from India and you are just great, I have a few questions for you. 1. the mesh used here are pre emulsified so does that mean you do not need to prepare the screen. 2. can i engrave with my 60 watt laser on to the screen and then what should be the ideal setting maybe trial and experiment?
why is this not for sale in belgium ?