Arduino Tutorial 22: Understanding and Using Active Buzzers to Add Sound to Your Project

Vložit
- čas přidán 7. 08. 2019
- You guys can help me out over at Patreon, and that will keep this high quality content coming:
/ paulmcwhorter
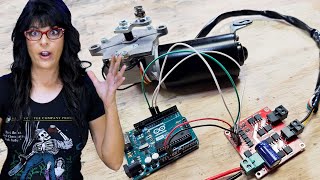
In this lesson we describe the difference between active and passive buzzers. We show how to incorporate sound in your project using an active buzzer.
You can get the kit I am using for this series at the following link:
amzn.to/2I7N4Ek
You can follow along at our WEB site HERE:
toptechboy.com/arduino-tutori...
[Disclosure of Material Connection: I am a participant in the Amazon Services LLC Associates Program, an affiliate advertising program designed to provide a means for sites to earn advertising fees by advertising and linking to amazon.com. This means if you visit the link and purchase the item, I will receive an affiliate commission. Regardless, I only recommend products or services I use personally and believe will add value to my readers.]
#Arduino - Věda a technologie


I’ve never been able to stay focused with any other youtubers to be able to get through 20+ tutorials. Thanks man. Appreciate the lecture style, it feels like I’m in class.
Agreed, want to be hyper focused, do the iced coffee BUT I put him on 1.5 speed. I'm forced to focus.
I like that it doesn't feel like a class 😂
Same here, he makes the lessons enjoyable to work through!
Also, the production quality of the new arduino lessons is really better. You really have the guts and energy to re-do the lessons. Bravo!
You're legit the best teacher any student can have... Love you so much Sir
So about 4 years ago I discovered you when learning how to use Fusion 360 and now I am interested in adding electronics to my 3D printing projects and here you are again coming in hot with these great lessons. Thanks for all you do!
Great to hear!
I love you Paul you are a good man. You’ve taught me a lot.
I love the way the lessons are arranged. This is like the start of a new chapter. Blessing from punta cana paul! Hope you come soon!
I love the way you teach, it seems we are in the garage playing together. Thank you, and tack from Sweden!
Great idea doing the homework during the video. during your early videos there wasn't much to go on in terms of knowing if you did it correctly or not. It also allows people to grow a better level of understanding about the lessons you are trying to teach.
Really well done to you Sir!!!
From the U.K
Having fun with the family as well now. I am teaching them what I am learning here. My wife and kids also had fun with making different RGB colors on the last video.
Thank you sir!
I added a red LED in series with the buzzer to add to the warning idea. I really enjoy the Arduino programs you teach. I bought my Arduino Super Starter Kit and have been following along with all your project lessons.3 years later you are still teaching someone. I'm 59 years old and feel like I'm back in Vocational School for electrical engineering classes. lol
Hey Paul, Thanks for the wonderful lesson. I used a combination of IF and ELSE function for this lesson instead of WHILE. Worked perfect.
Hi Paul. Thank you so much for these lessons. As a throwback to my old college days, I watch your lesson completely, just watch. Then, I do the setup and programming from memory with your video turned off. If I fail or get stuck, I sit and watch your video all over again, turn it off, and try to do the set up and programming from memory. If I can do the lesson from memory, I am confident that I learned the material. I am one third through your course, and anxious to learn more. Thank you, Tony
Catched up after playing with rgb led and 3 potmeters to change colors. Thank you for this new lesson.
Thank you so much sir! These tutorials are really helping me a lot! Who would even want to binge watch TV shows on Netflix when we have someone like you who is so entertaining and knowledgeable! You are the best teacher ever! Wish I could meet you some day :)
Thanks paul for this lesson, i was able to make the buzzer sound according to the number of times i set in the serial monitor.. that was my personal assignment.
Thanks for the Videos. Great work! Keep em coming!! I'm just getting started with Arduino. It's a lot of fun.
Cheers from Australia
Thank you Paul for doing these. Im saving this one for tomorrow because I've been watching and learning from you whole day and its already night. Better be silent :)
I made it. It was really fun. I added a LED too. Thank you for your great teaching!
Cheers from the UK. Enjoying your videos and doing my homework! BOOM
this was a fun lesson. I never clear my bread board so I still had my potentiometer and the RGB still hooked up. I used the Potentiometer and the RGB both come on when my volts went above my set number. I also wrote in to, flash and beep buzz above my set number. Thank you Paul always good lessons.
Great lesson and thank you for challenging us with the homework! I do enjoy that. I had to go back to lesson 13 to remind myself of some of the coding but that's really good reinforcement. Also I did two IF statements one for >1000 and the other for
Assignment is completed using if statements! Thank you so much for the amazing lesson!
Excellent Paul, thoroughly enjoyed this lesson, great video as always, thanks again!
THIS is the Teen's favorite channel, thanx
Again, very well explained and organized. Thanks.
Great job, as always
Your a Great Teacher, Thanks for the Tutorials! 😁
I also like to thank you for all the good work you're doing and tell you something funny, I was looking for a way to get all of the kids in the family like niece and nephews busy with something other than playing games on iPad all day since the stupid virus started. So I started a class at home playing your videos for them LOL my favorite thing about your videos is the homework at the end keep up the good work.
Hi Paul, great lessons!
Another great tutorial. Enjoyed the assignment, especially the annoying my family part.
Sir, I was just able to achieve it with
if (PotVal>=1000){
digitalWrite(Buzz,HIGH);
}
else
digitalWrite(Buzz,LOW);
so that solved clicking issue too. Thanks again, for enabling us to think alternatives for same solution.
I Love your tutorials, and your way of teaching. Many thanks!
Boom! Another great lesson!
I'm back to study some buzzer coding. Love the second part of the vid wher the difference in approach is shown between While and If statements.
very very helpfull thank you so much from bottom of heart for these tutorial. they help a lot.
Great lesson! Thanks!
Love you Paul, your an inspiration, GBWU.
Another good lesson, thanks Paul.
My pleasure!
Great video about buzzers !! thankyou !!
Your lessons are absolutely fantastic !!
Love from India 🇮🇳
the most thing i love about your classes is your assignment , I have finished my assignment
Thank you for the lesson!
My pleasure!
Dear teacher, I improved the project by adding a red LED that flashes at the same time as the buzzer sounds, it looks really cool.
God bless you.
great video !!!
Thank you Sir Paul!
Thank You so much Paul i learnt a lot of things from your channel
My pleasure!
Salute, love your style.
best arduino tutorials ever !
I used the If ... else method for this (If >1000 buzz, else don't buzz). That way you don't have to duplicate the analogRead(potPin) and Serial.print(potVal) statements. That's one way If ... else can be better than a while loop.
This is a great series of tutorials. I've learned so much in the last several days. Thank you from Ireland!
as did I, saves the redundancy.
if (potVal>=1000){
digitalWrite(buzzPin,HIGH);}
if (potVal
Thank you Mr. McWorther! Amazing lesson, I did the homework aswell on my own! Here is my code.
int buzzPin=7;
int potPin=A8;
int potVal;
void setup() {
// put your setup code here, to run once:
Serial.begin(9600);
pinMode(potPin,INPUT);
pinMode(buzzPin,OUTPUT);
}
void loop() {
// put your main code here, to run repeatedly:
potVal=analogRead(potPin);
Serial.println(potVal);
if(potVal>1000){
digitalWrite(buzzPin,HIGH);
}
if(potVal
Thankfully, i finally found some where in Australia to get your elegoo starter kit. By the time i get one from Amazon would be double the price with postage and currency conversion, so been using Arduino starter kit which is a bit different with the items. So was having a few problems but I will be right shortly, and thanks for the videos they are great.
I never held my breath for the first 15 lessons, but for the past few or so I’m holding it and things seems to go much smoother
lol
Thank you so much Paul, you are like the Bob Ross of Arduino, so calming!
Wow, thanks!
This was my cat's favorite lesson so far.
Thanks again, great tutorial :-)
Another great lesson!! For some reason I had a bit more difficulty getting the program to run correctly. Must have been getting tired because my syntax was sloppy. The last one took me forever as I substituted a comma for a period and just couldnt see it. Kept getting the "Audrino failed to compile" error. LOL. All good now. Thank you for the lesson and again, I am looking forward to the next one.
you are the best PAUL
I do stuck in the assignment, I forgot the potentiometer!!
So, I go to my notes and review it a bit and rethink what it is and how it works and Boom!
Thanks you always Paul!
Another excellent tutorial. I started off using the while loop...though initially I forgot to set the buzzer low outside of the loop and my dog was not happy.
Hi Paul!
Hey, great vids. Thank you so much for taking the time in posting these lessons. I started at number 1 and up to this one now.
I want to apologize... at one of the times I was supposed to hold my breath, I coughed and caused your project to not work momentarily.
Oh, repost your address so that I may send you a couple of Kuereg pods. I drink Peet's Major Dickason's; it's a bit better than Starbuck's. :-)
Boom very infornative video Sir
Another great video lesson. 😊
Glad you liked it!
Looking forward to using more output and input devices!!
Thanks Paul.
Thank you Sir for taking the time to put out these awesome tutorials. You remind me of my old professor Jerry Cage (electrical engineer) may he rest in peace. I achieved an advanced manufacturing degree but before I can go back for more PLC training he passed away. I definitely need to keep up on Allen Bradley and Siemens coding/remembering relay and ladder logic. Are you familiar with plc's? If so please comment back if you have time. Thanks again.
hi prof, nice content again, things start to combine. Still prefer the if statement however if I have to be honest!
I made a my buzzer play jingle bells🎄.
The kids loved it. The wife...well...let's just say she made not have enjoyed hearing me get the timing correct for the jingle bells buzzer. 😄 It took me awhile to get the delays correct. The kids enjoyed getting to turn the potentiometer to get the song to play.
So I started the day looking at my remote sensor monitor blinking its lcd backlight as a way to draw my attention to an event that occurred and thought to myself, "what I need is a buzzer in case I'm not paying attention to the display."
I knew I had both an active and a passive buzzer in my 'most excellent' Elegoo super-starter-kit and was speculating (correctly as it turns out) about how they function. Then I get this CZcams notification about a new tutorial on using an active buzzer with Arduino. It's almost like someone was reading my mind. Eerie.
I don't suppose you're next tutorial is going to be on energy-harvesting to power our Arduino project? No? ---read my mind---read my mind---
Thanks Mr. McWhorter. Your timing today was serendipitous.
i have found it very convenient to wire a red LED (with resistor on the LED, of course) on the buzzer pin. the output pin goes to the positive on both, but they each get their individual ground. like this, you have both, a visual and auditory cue, but when you are troubleshooting, you can disconnect the ground from the buzzer leaving only the LED as to not have the annoying sound of the buzzer constantly blaring. in the final build, they could share the ground.
love you paul
Thanks Paul See you in the next tutorial
Have fun
Great explanation of the pros and cons of the "active" vs "passive" buzzers. Was curious what the "Remove Seal After Washing" sticker was all about. Found this explanation, "Many processes use "no-clean" flux today and you can remove the sticker after manufacture. Others use water soluble flux and wash the finished assembled boards in what are basically dish washers."
Thanks for looking it up and letting us know!
I really love the mid video homework.
And another great tutorial. Never knew there was an active and passive buzzer.But, you know the adverts that pop up in the middle of such an absorbing lesson are a real pain.
Someone has to pay him. We're getting it for free...
I wanna to play every vedio in your channel to tell u in the comments how much I love u and love your way in the teaching ♥️🙏
Thank u sir for your amazing vedios
Please do!
Paul thank you
boom! that worked!🤩
Great!
Excellent class, now I know how to build a thermostat where if someone touches it outside of my comfort zone it will buzz.
HI Paul, Thanks for your videos, I guess the easy way to do this is using if else statement
Awesome 👍
Great lesson Mr. Mcwhorter. Thank you so much! I'm learning so much from you. I can do a lot more all by myself now. It makes life easier. Those loops man...
God Bless you Paul! May the Lord strengthen you and encourage your efforts.
I figured since we're doing a warning style controller why not add a red LED so it can be sound/light warning, so I'm playing along and doing stuff after the lecture all thanks to you sir
This Lesson took me 2 days to get it right. I think the reason was , it is Ramadan! LOL Also I was trying to add keyboard input , so I could change the Variable of 1000 to other numbers.
But at the end of the day, I had to just follow what Paul McWhorter was doing ,to make every thing work!!!
he wrote int dt=2000; but never used it. The OCD you trained into me keeps yelling NOOO NOO. lol. Always love your videos Paul.
I even started to drink iced coffe. Amazing tutorials!
No sugar, I hope.
Of course not! 🤣🤣
Got it. Search works for me.
Very nice! You made me trouble shoot my coding, so I did this with two "if" statements, and a "while" statement. I think the "if" variant was simpler, and didn't need another serial.print and analog.read statement in the loop. I was wondering why the serial print stopped when it reached >1000, and I was able to figure out "while" created an endless loop without the analog read. Thank you so much for the instruction, it's really making me think about the logic behind the code!
Finally, coffee or no coffee we are looking at other items of the 15 or so sensors in the package. Now we move on to a BUZZER! Yeah, now perhaps other sensors. I hope we don't get unindated with 10 buzzer lessons.
At this rate I could have bought 6 LEDs and 2 buzzers and have $30.00 in the bank. I don't mean to sound off putting but why buy this kit? At this rate maybe by the new year we could get to a few more sensors in play.
I'll keep watching. I also wish "Drone bot Workshop" would reappear. I like the intense programing issues you explore. But am sure other more advanced sensors can incorporate these programing issues. I follow the Arduino microprocessor and this channel as a supplement to my exploring electronics. I am a retired video producer ( I started shooting in the "VHS" days supplying mpeg-1 video to distant clients in the mid 1990s and possessing 1 if the first digtal editing suites in the southeast. Amigas, toasters flyers and lightwsve ruled my world until I sold it and retired 15 years ago. So I'm tuned to a different drummer. Paul, I appreciate your style. My 7 year old grand daughter and I use your course for more than learning. It is an educational venture for her future. And for me it is the love of new technical adventures. So I'll be watching I like your educational style. I wish the pace were a little faster. But all in all thank you for your dedication.
very good and intelligent instructor, Sir kindly add videos also like pressure switches using electronic pressure transducers for water and air pressure switches on and off switching, thank you very much Sir
Hi Paul. Those stickers are on the buzzers to prevent solder or flux entering the component if they're on a PCB that is soldered using a flux and solder "wave" system.
Hey Paul, love following your lessons! Could you please also make a new and improved series on Raspberry Pi 4?
Thanks a lot sir .Respect🙏 from 🇮🇳India
hail tseries
I like your lessons and your also very funny
Enjoyed the lesson. I do have the BNO055 ready when you are.
That is great. Hope to start releasing the lessons next week. We have a nice group developing that have this chip, and hope you guys will work through the lessons together.
I am going to try that black coffee, so I am going to search that big mug into the market !
Iam from India 🇮🇳 🇮🇳 Iam big fan of your,. Thank you
Great video and tutorial Paul. Just a little observation, hope you don't mind if I say, you mentioned that's it's good programming practice to use variables and to get into the habit to use them (I agree 100% with you). You created the variable dt for the delay time, but you didn't use it if I'm not mistaken. You continued to use the value 2000 in the delay() function !! A slight oversight I think !! Keep up the good work though and sorry to be so pedantic.
Thank you i am learning troubleshooting when something don't work, I could not get it to print on the serial monitor and found out i did not put in the serial println command thanks for the classes
Love these tutorials. Option to avoid that clicking would be if > 1000 then HIGH else LOW
12:30 LOL
Love your lessons
About the sticker: Many processes use "no-clean" flux today and you can remove the sticker after manufacture. Others use water- soluble flux and wash the finished assembled boards in what are basically dishwashers. You can leave it on for a quieter buzzer - and a different frequency. Or remove it for a much louder buzzer plus get the tones intended in the software. I copied this answer.