Washer Not Draining? Drain Pump Replacement

Vložit
- čas přidán 16. 10. 2013
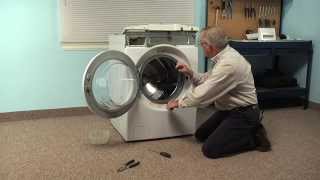
- This video provides step-by-step instructions for replacing the drain pump on Samsung washing machines. The most common reasons for replacing the drain pump is if the washer is not draining and unclogging the pump and hoses does not fix the problem, if the washer is leaking water, and if the washer is making noise when it is draining water.
Click here to purchase Part #DC31-00054D: www.repairclinic.com/PartDetai...
You can find printable step-by-step instructions here: www.repairclinic.com/Repair-L...
Additional washing machine repair, troubleshooting tips, help finding your model number, and part replacement videos: www.repairclinic.com/RepairHel...
All of the information in this drain pump replacement video is applicable to the following brands: Samsung
Tools used: multi-screwdriver, Phillips head bit, needle-nose pliers, flat-head bit, pliers
Connect With Us!
plus.google.com/+repairclinic
/ repairclinic
/ repairclinic
/ repairclinic
Join our free VIP email list for discounts and money-saving tips: tinyurl.com/pnnh3be
Check out our blog: www.DIY.RepairClinic.com
Don't forget to like and comment on this video, and subscribe to our channel! - Jak na to + styl


7 years up and this video was still the best one I found. Helped me swap out my drain pump easily. Thank you!!! FYI my washer is a newer model than the one in the video but you can still use it to guide you.
I'm running my first load after the replacement now.... This is the best video ever. I think this just saved me $300. Only point that was tricky they didn't point out, and I don't know if it matters, is the wire reconnection. Note they put the purple wire on the vertical attachment. Thanks to whoever did this!
This video is amazing. Saved me hundreds of dollars. The clear and step by step instructions make it super easy to follow along. Repair clinic, you’re the best
You're welcome!
We are always happy to help. If you would like to give us a review on Google, we would much appreciate it: g.page/r/CcVUrahZNozMEBM/review
We hope that you have a great day!
Happy to do so. Done!
I realize this video is 9 yrs old…but the information and detailed steps were excellent!! I called 2 repair shops and neither would work on Samsung. 😮 I was prepared to purchase a new washer and came across this video. Bought the $20 drain pump and wahoo….washer is on point again. THANK YOU!
This was one of the best step by step videos I've seen. Thank you for being so detailed and showing each step with meticulous clarity. My husband and I changed out the drain pump yesterday (well, I basically just played and paused the video and handed tools lol) and now our washer works like a charm!! Thanks again!!
Good work guys!
Very clear movie, however for just removing the pump. NO NEED TO DO ALL THIS. Just put the machine on its side, remove the bottom plate (8 screws) and you can remove the pump. I just did this, it was 10 minutes of work including disconnecting it from the water and putting it on its side.... (you could also replace the shocks when the bottom is opened.)
This is my second time replacing the drain pump and I wan to THANK YOU for your video. This is step by step and it makes it so easy to play n stop as needed, follow the step n on to the next one. As a woman having to do these type of repairs is great, makes me feel more empowered n of course saving money is a plus. 🙏🏼
Excellent step by step detailed video to resolve the 5E error. Fortunately, the washer that I am using is Samsung WF45M5500AZ bought 1.5 years ago, and its exactly same like the one in the video. I followed the steps as shown, and found a Canadian 2$ coin stuck in between the black flexible hose and the white connector on the pump visible at 3:36 and 5:15 in the video. It was probably lying there since long as it was all rusted out. It was itself acting like a filter and was blocking all the dirt coming out with the water from the washer tub. Eventually the dirt accumulated so much that the water stopped flowing out. when I removed the coin from the white connector after disconnecting the black flexible hose, lots and lots of black dirt came out of the black hose, and also kept shaking the hose to remove all the dirt out of it. Later I used the old toothbrush and cleaned out everything. Re-assembly was easy, and the washer and money, both were saved. Many thanks to RepairClinic for making and sharing this video. Subscribed 😊
Great job! We are happy to heat that you fixed your washer. Have a great day!
This video was great. Showed me how to take apart step by step. Removed pump and it turned out to be ok. Checked out all hoses for clogs. I found out that when I took off the rubber hose, that kind of looks like a funnel, from the bottom where the water first drains into and than gets smaller and goes into an elbow there was a quarter inside acting like a gate valve. Put everything back together and worked great. Had called a service man at first and was told it would cost at least $250.00 for him to come out. This video helped me find the problem and save me a lot of money and I got a 25 cent refund. Thanks very much!!!!!!
Charles Berchdorf II We're glad you found the quarter culprit.
Thank you for the easy-to-follow, step-by-step instructional video. While a professional washing machine repairman could have done this for somewhere between $200 and $400, the part only cost me about $30 with shipping from Amazon. Due to your instructions, it was so easy that even a B-52 pilot turned novelist could do it. The pump I removed turned easily by hand, in contrast to the new one which offered an expected resistance. During the post-repair ops check, the machine ran like new. I'm subscribing.
This can all be done from underneath the machine. No need to remove the front panel. After he removes the 2 filter housing screws at 1:53 take a screw driver and pry off that rectangular plastic panel that surrounds the filter cap. That will expose the 3rd screw that needs to be removed. Then simply tip the machine back and work from underneath.
Thanks
Thanks for the great tip. Saved me a lot of time.
Great vid and this tip, a big help if you don't mind disconnecting the fill and drain hoses and have space to pull it out and can do it physically because the washer is still a bit hefty. Spun it and put it on its side, There is a big port in the bottom of the frame that allows easy access to all of it. Part was about 36cdn plus tax delivered on 2-day prime! Much appreciated after a Monday fail and washing again Friday evening! Only took that long because I couldn't make up my mind to do it...a congratulatory irish was easily paid for by the savings.
Very helpful and clear instructions. Thank you for saving me $100s. Much appreciate the professional video.
You're welcome!
If you would like to give us a review, here is our link: g.page/r/CcVUrahZNozMEBM/review
Have a great day!
Thanks for the great video. It helped me diagnose and fix my wife's washer for only $31. I spend my days at a computer keyboard, but tonight I got to come home and play "Appliance Repairman" and it was great.
+David Erickson Very cool, thanks!
My whirlpool duet was a piece of crap but way easier to work on. This Samsung has been a great washer until now. Thanks for the comments about tipping the washer on it's side instead of taking off the front panel... huge help!!
Great step by step video! Saved me from buying a new washer!!
Samsung Front load washer was not spinning. It would just make a hum noise. I checked all the usual, drain filter, in the seal, etc. I was dreading getting down to the pump itself, but this video is amazing! even though the model is not the same, same concept. On the newer ones there are not screws on the bottom holding the front plate on, so the step with the box is not necessary. I took the pump out and found a hairball stuck in it. To see if this was the culprit, I hooked back up the face plate, jimmied the door on and set it to spin. The motor span freely so I put it all back together. Seems to being working fine now. Thanks for the AWESOME video!!
This video gave some good information. However, it definitely overcomplicated things. I was having an issue with water not completely draining our of my Samsung front load washer. I opened the little clean out on the front, drained the water from the small black tube, then opened the debris catcher. It was clean. I removed the drain hose from the standpipe to make sure it wasn't clogged, but I was able to drain into a bucket on the floor, so I know that wasn't an issue. I poured water down the standpipe to make sure it wasn't clogged, and all was good. Because of this, I figured my pump was going bad, perhaps not strong enough to push the water up and out. Before ordering a new pump, I decided to check all drain houses underneath. I tilted the washer up, supported it underneath, and removed to screws from inside the clean out compartment on the front. I was able to maneuver the pump around, loosen three clamps, and out came the larger black drain pipe (along with some excess water). I ran some hot water through it, but the flow wasn't great. Upon further inspection, noticed something that looked pink on the inside. With some pliers, i reached in and pulled our a wooden coin shaped toy about the size of the hose diameter. Evidently it had been wedged just the right way to stop the flow of water. Put everything back together and all is good! Don't take all parts off as mentioned in the video. There's an easier way.
Excellent Video. I work at a TV and Appliance Business. I'm more on the Home Networking/Automation/Audio-Video Side, so I usually ask one of our tech guys what to do to fix appliance problems when they arise at my house.
No need to do that after watching this video. Very detailed and the order sequence was spot on.
Even the spring clamp wasn't any trouble. You just have to get it started properly, and carefully work both sides around the seal until you get to the bottom. No problem.
Thanks again for a very helpful video.
Bit McMillan
GREAT video. Ordered replacement pump from "popular" online shop. Pump was definitely bad. I didn't find any clogs, but there was a nice layer of sludge inside the end of the drain tube. I have to echo Scott - the spring took me probably 20 minutes to get back on. The guy in the video makes it look like a walk in the park. Thanks again for the video.
Awesome Tutorial!!! I R2 the pump in my Samsung with ease!!! Thank you!!!
My model is pretty much the same one just the control panel is different. Fantastic video!!
Great Video. Really helped me diagnose problems on my washing machine. Thanks Repair Clinic.
THANKS!!! I followed this video's instructions, disassembling and reassembling the washer twice, first to make sure nothing was clogged (there was a small clog, but apparently a result of the failure of the pump), then replaced the pump in no time flat. Great instructions!
Jimmy Wells Awesome. Congrats on the successful repair!
Great video! some notes: My washer was on a pedestal, which made accessing the clip to release the pump underneath impossible without taking it off the pedestal, which I didn't want to do. I was actually able to unscrew the pump from it's assembly while it was still in the machine ( after unhooking pumps/electrical of course) Also, my original pump, when I took it out, the fan was almost all the way out instead of flush like the replacement pump. When I pushed the fan back in, it seemed exactly like the replacement pump. I wonder if that would have fixed my problem, but I figured since I had the replacement I might as well put it in, so I don't know. but maybe someone else with the same problem can try it and see. to get the front cover off on my model I had to remove the filter encasement and then of the three pegs at the bottom, right and left had screws, none in the middle. So a little different.
thanks again for a great video!
Great points. Pedestals are optional accessories for washers and dryers.
Thanks for the great video guys!! Followed it and replaced our damaged pump. Now we are back in business for about 80 bucks, as opposed to the 400+ for the repair man. You guys saved me a ton!! And on Christmas eve to boot!!!
fnps9057 Congrats on the money savings and successful repair.
One of the best step by step instructional videos ever.
Nice job!
Note... some very minor steps may not be the same on your model wash machine.
Thank you for making this video. It gives folks like me the confidence to attempt jobs I never would have tried!
@@repairclinic You bet!
Thanks the video helped a bunch. Did the repair in under an hour thanks to the video.
Great video; I used its info on a slighter new model, and it worked! Just something stopping up the the impeller, rinsed the inside of the pump and put back together, works like new. One thing to note, the more recent stainless ones, BE CAREFUL REMOVING THE FRONT PANEL! The door latch assembly is floating free without those three screws (requires some prefastening when you put it back together) and the entire door is part of the front panet, which also has incredibly sharp raw steel edges. Other than that, everything else in this video is 1:1 perfect for that model; thank you!
I have a different model Samsung but this tutorial still worked. Hardest part was probably getting the spring wire back on. I tried a couple of bike tire lever tools and they worked great. Thanks for the tutorial
I've used the guidance in this video twice in a little over a year to repair my Samsung washer. While the first replacement drain pump failed me sooner than I had hoped for, this video delivered each time. Thanks for making this available. I've subscribed and will explore all your helpful products.
Are you sure the pump failed? The water level sensor can malfunction keeping the motor from running as well
@@full95one I'm positive the pump failed. The plastic part, I'll call it the propeller, separated from the drive motor, resulting in a lot of noise but no movement of water. I'm rapidly becoming an expert on this particular procedure. Four months after the second replacement, the pump failed again--the part failed in the same exact manner. This time, I replaced it with a new OEM part, with a one-year guarantee. At Amazon, the price for an OEM was less than $10 more than the now proven unreliable discount pumps. Hoping it lasts at least a year this time.
Best complete Detail Video and instruction
I didn't think to look this up on CZcams when our washer quit. So we had an A&E repairman come out and look at it. He diagnosed the problem, and ordered the new pump. It came today. I called them to set up an appointment and they won't be able to come until May 2. We basically told them to shove it, they said now that we had ordered the part through them we HAVE to use them to install it. After watching the video, it definitely looks doable. Thank you for this very "idiot-proof" post. Will show it to my husband.
That doesn't sound fun! We hope it works out ok in the end.
Wonderful instructions - followed step by step and problem resolved. Thanks for this.
Thanks very much. This is just what I needed. New pump is successfully installed.
Kelly Smith Glad we could help.
Thanks a lot. It really helped me with my washing machine that had a draining problem.
Thank you for this tutorial, I just finished the drain pump replacement on my washing machine and this made it a breeze.
THANKS A LOT SIRJI FOR THE WONDERFUL OPERATIONS.
Thanks. This made the job a lot easier. I have a Samsung WF350ANW/XAA 01. The attachments for the drain pump assemble are a bit different. But it is wasn’t a big deal to figure out.
Mine is a little different, but I got it done! Thank you for the detail explanation.
Thanks saved lot of money
Hubby just did this on ours. Works great... so easy! Thank you!
Tip to save time - my Samsung washer wf409anw/xaa (from 2011) did not require accessing the bottom for any screws or pump bracket. There are simply tabs on the bottom that the front panel lifts up out of, and the pump bracket is made to release from the inside. Knowing this would have saved me a lot of trouble of removing my pedestal stand!
Video was very informative! thanks !!!!!
Thanks for the excellent tutorial. I would have ordered the part from you, but it was not available.
Thank You!
Thanks for the video! I replaced my pump. And the machine still didn't drain. I wanted to share - in my case, I had an accordion-like rubber hose connecting off to the rear. One of my kids little socks got sucked into it and was blocking the water from draining. I was able to fish it out. You can reach back and just squeeze along the hose without removing it to see if it feels like there is any object inside. Might save you the money of a new pump.
Have to say this video saved me buying a new washing machine. At first I thought my washer was on the fritz and was about to buy a new one. Started searching for common problems and found the drain pump as one of most common searches. Found this video, ordered the part and just finished replacing the pump. Machine is back and running again so I am a happy camper.
In our case we have our washer on a pedestal (and its a slightly different model than the one in the video) and I am not sure if its specific to our model or if the installers did it when they attached the washer to the pedestal but my washer is missing the screws on the bottom that secure the front panel.
+Wandering Digit Thank you for sharing.
great video thanks! this is the second time I had to replace the pump and I used your video both times!
Cool thanks!
How did you know you had to replace the pump. My washer keeps reading SE/5E
Excellent video.
You're welcome!
If you would like to give us a review, here is our link: g.page/r/CcVUrahZNozMEBM/review
Have a great day!
Thank you for the helpful video
I would have never gotten the front face of the washer off without this helpful video. My model was slightly different but same basic steps. You saved me $200 repair visit. Thanks a lot!
+Dion Monstavicius Thank you for the feedback.
I’ll admit i was slightly intimidated at the task of almost completely taking my washer apart to change a drain motor. Luckily however i found this video and after watching it twice then watching it i was working on my washer, i was able to finish the job start to finish in about 60 mins. Thanks to this video the cost of the fix was a $50 drain motor instead of a repairman charging you hundreds of $ for a repair you can do yourself.
Great job!
Thank you sir
I used a shopvac to remove water from drain hose and drum shining flash light through door!
Amazing video
A couple lessons. Highly recommend you remove all the hoses and clean thoroughly as they all had much more gunk in them than I thought would be. If you replace pump without doing this I think it will definitely shorten life of your new pump. I tested the old pump to see if impeller was turning in machine on spin- you can see impeller through catch drain on lower front. Mine did turn but machine would not complete spin cycle (stuck at 11 mins). I replaced the pump (40$Cdn off Amazon for pump and motor only) and it worked. Housing is plastic so really did not need replacing and it saved me 60$. I used a flat blade (vs needle nose pliers) to access the spring ring holding rubber cover on front panel. Easiest start point is located at the bottom of the opening (6 o’clock position).
While accessing pump is definitely easier if you tip on it’s side... to properly clean the hoses, which I highly recommend, I think front access makes this easier. Trying to reconnect hoses if you removed them while it is on it’s side is definitely trickier. If you have cleaned hoses, reassembled and it still did not work ( my situation). I decided to replace the pump and motor by tipping on its side, a couple of screws are tricky but I used the bit to start the screw then tightened with screwdriver. The wiring harness is easier to reattach to pump if you release the wire from plastic twist tie (simply feel along the wire and you will feel it - release it and then reattach after you attach it to pump.
The rubber flap on plastic housing opens outward toward the main drain, it prevents water from going back into machine. Check for coins inside the two plastic houses. Main one holding pump and one attached to largest black pipe draining drum. Easier to access it from the back where two screws hold an access panel on. Certainly this video really helps. Saved me a lot of money on a service call. Thanks.
Great video. Helped my clear the clogs in my washer. Walked me through every step. Only problem the guy makes taking that spring on and off look easy. He is a liar Lol.
It is definitely pretty difficult.
No kidding!
Nice to see and very useful tips thankyou.
Thanks!
Just an FYI to others searching for a fix.
My sister's Samsumg VRT frontload washer would stop mid rinse cycle, always 11 minutes left, the warranty just ran out. My money was on the pump or the main board being bad until I looked around online more.
I sent her hubby this video site. With help from this video my bro-in-law took the washer apart.
Interestingly he found 3 "drain hoses", 2 needed cleaning and one was almost completely blocked and I quote him "It was like watching a sausage machine the way the gunk came out of that hose. After watching that video I decided to clean everything. The pump itself was only a little dirty."
After doing 4 loads, all is well, so the problem looks to be solved.
Personally, I would rather try to fix things myself and that was the 4th time repairclinic.com helped.
I feel bad though, nothing was purchased from them this time (or 2 other times :) )
Thanks and kudos to repairclinic.com,
Dave
+Dave inCleveland Thank you for the comment! Glad we could help!
Great Video!.. Thanks a lot! Is very easy to understand and very helpful. I Just Saved Hundreds of $$ in Labor thanks to this Video. Keep it doing this type of videos. Great Job!
Will do, thanks!
Great video, but I was able to replace the pump from the bottom by just tilting washer back. Didnt need to remove front panel.
@@repairclinic Done!
Thank you for the video, so is it always left wire blue, right brown? I disconnected the wires and now I can't remember which one on which side was
No need to remove the front panel, you can easy remove the pump from the bottom of the washer saving you so many extra steps.
I have a slightly different model of the machine, and I found it much easier to check my pump from the bottom, without actually taking off the entire front panel,
In my washer, I have a bolt fastening wire, instead of the retaining wire and spring,and it is from the inside of the panel, so removing, and putting it back on is a bit challenging.
The machine is almost entirely open from the bottom, and the pump is easily accessible.
Thanks for the tips! What is your washer's model number? It will be helpful to future viewers.
It's P1453S Samsung 6.0kg washer.
Excellent video. You guys do such a great job, I'm jealous lol I'm gonna copy some of your techniques ;)
Hello. Thank so much for this video. My husband replaced a new drain pump o our samsun washer, another model but similar to this one. I have a question after replacing it leaks a lot of water. What did he do wrong? He says he made sure he got the hose all te way
I have the same washer with the same issue, but it is on the pedestal. Can you unbolt the front cover without removing the pedestal??
Will this method for accessing the drain pump work for WF331 model?
Add marine grease to the two o-ring seals inside the motor assembly to keep it water tight. To access this, pull the impeller (white paddles) out of the housing. I'm on my second pump because the first one filled with water, likely because the factory doesn't put much grease on the seals in the motor assembly.
great video, in my case it turned out to be a clogged recirc line at the drum, thanks so much for your videos
Thank you thank you thank you. You just saved me a big bill. Part cost me $26 bucks on Amazon and a few hours of my time. There was nothing wrong with my pump. Some how rubber band got wrapped around the spinning portion. I was able to remove it but just replaced it with a new one because it is a pain taking that machine apart.
You're welcome. We sell parts at RepairClinic.com.
Video is incredible helps a lot, but I ran into a little issue..........the screws by the drain pump and the screws on the bottom of the front panel have rusted and are locked pretty tight......any pointers?
Thanks a lot. I opened my pump and I solder the thermal fuse on the pump motor. Then everything was good.
Just used the video again, I was having problems with the tub draining. Pulled out the (fairly new) pump, found nothing to indicate the pump was bad. I checked the drain hose leading to the pump and found a small amount of grunge in it, then felt inside a small PVC ell that that was connected to the larger main hose leaving the tub. Something was in it, so I unscrewed the ell from the frame. Jammed perfectly against a small ridge inside the ell was a quarter! It would turn 90 degrees, acting like a check valve, letting water through at a low flow rate, but closing when the water flowed faster.
just read through the thread below and saw I was not the only one to have that problem.
oarman2 Thank you for sharing.
Note: skip the first half and flip it to its side. You have better access from the bottom once flip
Have a Samsung WF218ANW front loading machine, about 4 yrs old, leaking from the bottom. Checked the door seal, replaced the supply hoses, ran a cycle and have small water accumulation underneath. Pulled the top off and checked lines to detergent/softener all good, also checked drain pump filter, wondering if I need to replace the drain pump.
It’s really hard to say where the leak is coming from. You will need to run the unit and remove a panel to try and see where the leak is. It may be a small pin hole in a hose or the front boot seal.
How do you know which wire to plug into which terminal?
3:49 Remove the screws securing the pump assembly to the mounting bracket
hi, I brought what was supposed to be the OEM replacement pump but the electrical connections are different (my old one was a front side connector side by side vertical orientation like IIm the new one is like - I, when I take the motor cover off there are opening to just move the 1 contact over to the vertical orientation, however the connector on the new one is facing the opposite face of the old one, since the motor goes onto the stator reverse of the old one is that ok ?
Well, I replaced the pump, checked the large tube on the bottom ,clear, and still not draining. Is it possible to reverse the two wires plugged into the pump and would that affect it? I’m stumped here as to why it’s not working. Also, what does the pump on the other side do?
+Derek Carlson What is your washer's model number?
Hi, it is WF338AAW/XAA.
Derek Carlson There is not a lot you can do besides trying different wrenches or sockets and see if you can get the clamp off. You can put a towel across the front so your arm is not hitting the metal. Once you do get it off you can reposition the clamp for easier access.
This project is tailing in fast :-( I was able to reach around and disconnect the tub drain hose and cleaned it out. The machine now drains. But apparently I also was not paying attention to the knocking when it was working OK. I can no longer hear the vibration balancing bearings rolling in the tub rings, the washer really knocks and rattles now, and after each cycle, it gets down to 2 minutes trying to spin, and then it goes to the rinse and spin cycle. Ugh.
Derek Carlson
this will work with any model of the same design??? just wondering
I've replaced the washer purge motor twice. btw the purge motor is faulty because if you leave the purge tube at full length and down into the wall drain it will cause it to back flow towards the lowest point which is the base of the washer thus leaving the pump face submerged in water. This leads to the pump leaking into to magnets inside the pump. It corrodes and the magnets crack and the polarity is compromised. The manual says to have the tube cut or at the right length just below the opening of the wall drain opening. They don't say it will f up your poorly made motor seal. Why would they?
My model, Samsung WF 328AAW, had the drain pump assembly in the back. All that was required was to (disconnect power) unscrew the two screws securing the back cover plate then remove the drain pump assembly with the three shock mounted screws,a ten minute job. The clue is that there is no drain tube cover plate on the front of the unit.
Holy cow that sounds easy, I don't have the front drain panel either. Its model WF337AAL/XAA numbers . It has the ND 11 code so its a roll of the dice I see , someone else has the code and the new pump didn't fix it . so I guess a + - $31 pump is good chance , beat $900 for a new model. I need to get the water out
WF50R 8500AV, this model of Samsung washer has an extra opening on top, in drain pump housing, a hose from that opening goes to tub. But is not recirculation hose. Can you tell me why that hose is there for.
WHAT WILL BE RATE FOR THIS SPARE NEW
The instructions got me to the hoses. I think the pump is fine, but the hoses were *all* clogged with goo. I've gotten them all off and cleaned them out except the one that attaches to the bottom of the tub. Most of the hoses use pressure or pinch clamps, but the one on the bottom of the tub uses a screw clamp and the screw faces the back. The washer is on a pedestal and I can't easily get it away from the wall to remove the back panel. Is there a way to handle this from the front?
Derek Carlson and
Can I make my pump less noisier?
What is the pump on the other side for?
You have to do all of this to get to one drain pump screw that is behind the front cover. The 2nd screw is next to the small drain hose. This is terrible design on Samsung's part.
No it isnt, why make it easy when they want you to buy a brand new one lol... i agree with you but hey dirty design
No, go in from the bottom, so much easier.
Where do you order the parts from.
Panasonic good design just open back cover plate and just 3 pcs screw and dismantle power cable and hose that it
Omg guys NO YOU DON'T have to do it like that. That's TOO LONG.
Lay the Washing machine on its side, unscrew the bottom plate and remove. You should beable to clearly see the drainage pump.
FastTrack video to 4:04 and you should beable to see how to remove the drain pump cover and remove the wires. There were 3 screws attaching my pump. Remove the pump and replace with new one, make sure to attach wires in correct positions.
Pop the bottom plate back on and bobs your uncle. 5 minute job...
Do not follow that videos procedure! Way too long. But cudos for a great effort!
Yes your are correct and i am always doing that
Ty it did look long. Now i know how to save some time
Thank you
Well maybe the long way is for those of us who can't lay the washer on its side...? Small kitchen and petite single female.
OMG Correction!! I first tried the procedure in the video. Got way in deep, no way to remove everything like the door boot seal--I am not that strong!! Screws and panels everywhere. I remembered your post...turned the machine on its side...removed the bottom panel, and had the pump replaced in 30 minutes!!!
I replace the drain pump on my Samsung washer but I am still getting error ND when it has 11 min left model wf218anw/xaa any ideas ?:(
Hi, I have a really burning question so I hope yoy react please. I don't want to replace the drain pump but I only want to put that black hose you see on minute 4:05 back on where it belongs. So how can I do that??
The small this hose you see dangling off the pump, connects to the pump and nothing else. Its a drain line. You will see its connected to the lowest point liquid can get in the pump. And as I recall, other than the water level sensor, its the only thin tubing like that in the pump area. When everything is back together, this little tube is the one you use to drain out the liquid from the washer. There should be a plug at the loose end during normal operation. Its possible you lost that plug and now you have a loose end that makes you think it need to connect to something.
I replace the pump with OEM pump...it failed again in 2 weeks?????
This video is absolutely insane, it took me five minutes tops to lay the washer on its right side, unscrew two little screws, unhook the hose clips, done... pump is out. Didn't even have to take out the bottom shield. Popped the filter cover to get to the screws. I believe the video is just in case the repair guys get their pay.
why not show how to diagnose the problem first? for example, if the drain pump is not receiving the 120 volts, what could be the problem? what would be a recommended next step?
I just paid a service Tech $60.00 to check the machine. When he left I put a load of clothes in and I am still getting the NOT DRAINING error message.. The service Tech said he checked the pump, but after watching this video I dont think he did because I didnt see him remove the panel from the machine..