Video není dostupné.
Omlouváme se.
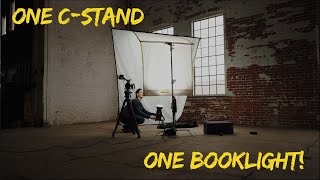
From toy to tool: how to modify the PortKeys LEYE SDI into an AMAZING electronic viewfinder

Vložit
- čas přidán 24. 05. 2023
- // #Affordable EVFs are hard to find.
Cheap models often dissatisfy with having a low resolution, bad image quality or they simply lack of #professional connectors. The #LEYE #SDI from #PortKeys is a competitively priced model that looked incredibly promising on the specs side, but turned out to have serious issues with it‘s eyepiece. A distorted, too small image stood in it‘s way to become a successful #viewfinder you can trust and like to work with when framing your images.
But as there are no real alternatives in the LEYE’s price range and it also showed a lot of #potential I gave it a closer look and found a #solution to #modify it and get the most out of it. Together with my friend Luca we designed an #adapter to swap the #eyepiece (that causes the issues) with the #Z-Finder from #Zacuto.
The result is amazing, providing you an image that‘s twice as large as the #loupe from PortKeys delivers and it is also free of the distortions that made the original LEYE almost unusable under professional conditions. The #modification consists of two 3D models that you can easily #print with a #3D printer.
// Download
You can download the models on my website
www.thorstensc...
or on #Thingiverse for free:
www.thingivers...
// Support us
However we‘d be very happy for any donations to our project via
Ko-Fi: ko-fi.com/thor...
or PayPal www.paypal.me/...
Thank you very much for your support!
Best, Thorsten and Luca
(Design by Thorsten Schönrade and Luca Oltenau)
// Music tracks in this video
Frédéric Chopin
Waltz in B minor, Op. 69 no. 2
Performed by Olga Gurevich
Public Domain Mark 1.0
Frédéric Chopin
Waltz in A flat major 'Farewell', Op. 69 no. 1
Performed by Olga Gurevich
Public Domain Mark 1.0
Frédéric Chopin
Waltz in A minor, B. 150
Performed by Aya Higuchi
Public Domain Mark 1.0
// Legal Disclosure/Impressum
www.thorstensc...


Hello everyone! Since a lot of you are interested in buying the parts ready made, either because you don't have a 3D printing service near you or you want to make sure that the parts fit exactly: Luca and I thought about it and decided to give it a try and make a small first batch to send out. If you are interested in ordering the parts ready made from us, please send me an e-mail with your contact details and how many sets you would like to order. I will get back to you as soon as we can estimate when we are ready to ship the first parts and at what price we can offer them. Some of you had also requested a protective cover for the display in case the LEYE is transported with the Z-Finder removed. We are creating that now and it will be part of the set. Please keep in mind that we are doing all this besides our jobs and families and we are not a professional dealer. Therefore it will not be as fast as ordering on Amazon ;) We are very excited about how it is going and hope to be able to provide you with the parts soon. Best, Thorsten and Luca ❤
I quite liked the movie "The Matrix".
What movie did you shoot?
NO, we are not intrressed, I broke my screen, This is a bad idea.
Ah, I just did it myself :) the first part where the screen fits didn't really sit perfectly, and there is some light leaking but I think it's perfect :)
Should I contact you by email for the prints? I already have a pair that I had done but they have many flaws; I would like to contribute and also get a copy that is not so primitive and unreliable.
@luisa9628 please do so :)
I have no idea why CZcams's algorithm sent me here. I'm an editor, and have zero interest in camera hardware.
However, I wanted to say how fantastic this project looks. What a great idea. I wholeheartedly approve of anything like this that democratises a creative process. Great video. Even I understood what the issue was and would, if I eve needed to, give this a go.
Bravo!
Hi all. I've just modded my EVF and the results are absolutely stunniny. I have modded the very first version of the L-EYE, with HDMI only and no LP-E6 battery buit DC input. For all L-EYE users still wondering, if the mod is worth the risk… it is! As Thorsten explains in the video, the riskiest step is peeling off the stripes from the panel. After I've finished the mod, suddenly there was flickering on the the panel where the stripes have been… dont't b afraid, the issue was gone the next morning. I think the panel needs a bit time to recover from the procedure ;-) Well done, Thorsten!!!
I want to do the mod but can I download the 3d printer plans and send them to an outsource? and have them mailed to me?
I already had a Z-finder EVF that stopped working, and had gotten a LEYE iii (HDMI only version), and had a cousin with a 3D printer. I just made this modification and man am I excited! Thanks very much!
You are a genius! That hardest part was getting the Bambu Labs P1S print settings correct and obvious cleanup. Thank You. 🙏🏼
I just did the mod. Very easy. If you live in a cold climate, I recommend GENTLY using a heat gun to warm the whole unit up and also on the tape. It helps peeling the tape off.
Also I had to put a drill bit through the holes of the 3 D printed locking cover. Very excited to test. Thanks Thorsten. I will drop you a donation, very smart.
I performed the modification today and accidentally removed the ribbon cable connector the first attempt. Took out everything and connected the ribbon cable connector to where it belongs. It is working now. Also stick the extra black tape to cover any light leak. Make sure to attach 2-3 Zacuto Z-Finder Extender Frames. My eyesight requires 3 pieces to adjust correctly. Perfect!
Can you explain how to reconnect the ribbon cable? Mine doesn't power on after the mod but I cant see anything detached.Was yours detached on the screen end of the cable?
Fixed this with help from T - Disconnecting the flat ribbon cable is a very common thing that can happen during the modding process, in fact it happened to a lot of users that wrote me from their experiences. The good thing is, that up to now everyone has been able to connect it again. Just try to carefully connect it again on the board of the evf, where the plug may have got loose in the socket (I guess it’s covered with some tape on top - you don’t have to remove that, just give it some gentle pressure on top; some users wrote that you can even hear a soft click-sound but not everyone mentioned this). After connecting the display again you should be able to turn on the evf again.
Genuis, very impressed! This is the best of what the internet can be, people coming up with smart solutions and sharing them with the rest of the community.
I, like others here, have zero involvement in this hobby; I'm an aerospace engineer who's at most thought about maybe buying a camera to take landscape photos during hikes and trips. As a matter of fact, I hadn't even known what a viewfinder was before this video, I've gotten quite complacent with my "all in one" phone. All that said, this project was excellent! It really covered a lot of topics, and to see your 3D prints work so flawlessly, with a satisfying click no less, was great. Keep it up!
Thank you for making this. I bought the LEYE after watching all the review videos when it came out, with the idea in mind to replace the lens. Really appreciate your thoughtfulness in creating an affordable solution. Also agree that a printable cap would be a nice final touch. I'll hopefully have the upgrade completed next week and will share the results.
Thank you, glad you like it :) I would be very happy to hear of the outcome!
You’ve done an amazing service to the community, thank you! Instantly bought a Z-finder to do this mod asap!
(A word of caution to others) Please take your time with this project especially in regards to the fit and finish of the 3D prints. Unfortunately I was a bit hurried when installing the screen in the 3D print and cracked the LCD - the space for the screen in the 3D print came out a little small which caused the screen to crack when I tried to install it. This is likely due to expansion from my printer and could have been fixed with a new print or some manual post processing. I'm also not sure if the original LEYE and LEYE II & LEYE III all have the same dimensions, mine is the V1 and the holes needed to be shifted a bit to align, probably also just printer problems. The screen will still display an image so I can see how much of an improvement this mod is, just be careful you fellow rat bags.
I will comment here if I have any luck obtaining a replacement 2.4" 1440x900 panel. I think the odds are slim.
UPDATE: I have successfully purchased a replacement screen, to do my own repair, from Portkeys for 79 USD (inc postage) via their service email - I didn't mention how I broke the screen....
Thank you for providing the files! I had a friend print them off and indeed - HUGE difference using a Z-Finder over the stock loupe. Amazing!
Thanks Jamie, so you did it and succeeded! Awesome! That‘s a first success story 🍀 Do you have any comments on the modification process? How did it go? Did you do it alone or did you have help? If you have any additional advice for the modding please share, because I just heard from someone who tried and unfortunately broke the display :( Glad you made it!
@@thorschon Woah, crazy to be one of the guinea pigs! It was a pretty easy process - unscrewed the existing loupe, pulled the tape off to free the screen (my ribbon cable did disconnect from the board, but I was able to plug it back in without issue). Once I got the first 3D printed part on it had a hard time "snapping" into place (Might have just been a resolution issue of the printer my friend used to make the parts?) but once I screwed the second piece down with the first it settled into place. Looks and works great so far!
Hey everyone! Just wanted to share my astonishing results after modding my EVF. I have the LEYE III HDMI/LP-E6 and had quite an adventure finding the right parts. Building my own mod was satisfying, but be cautious when opening the EVF, for my part I ended up with a few dead pixels and I wore out the screws a bit for not initially using the right Torx tool. Despite that, the mod makes shooting such a joy! I am currently using a bongo cable to secure the Zacuto Z Finder Pro firmly to the L-EYE III, because the 3D part was not printed that well by my local 3D printer and the Zacuto is a bit loose on the 3D part. I recommend having a blower bulb and a soft cloth handy to keep the screen clean and dust-free, as dust can be amplified by the loupe. But overall, I'm thrilled with the results. Thanks, Thorsten for sharing with the community! Happy shooting!
I want to do the mod but can I download the 3d printer plans and send them to an outsource? and have them mailed to me?
You should really print a bunch of them yourself and sell them ready-made. People would have no problem paying upwards of $30-$50 for the mod parts.
Hello everyone! Since a lot of you are interested in buying the parts ready made, either because you don't have a 3D printing service near you or you want to make sure that the parts fit exactly: Luca and I thought about it and decided to give it a try and make a small first batch to send out. If you are interested in ordering the parts ready made from us, please send me an e-mail with your contact details and how many sets you would like to order. I will get back to you as soon as we can estimate when we are ready to ship the first parts and at what price we can offer them. Some of you had also requested a protective cover for the display in case the LEYE is transported with the Z-Finder removed. We are creating that now and it will be part of the set. Please keep in mind that we are doing all this besides our jobs and families and we are not a professional dealer. Therefore it will not be as fast as ordering on Amazon ;) We are very excited about how it is going and hope to be able to provide you with the parts soon. Best, Thorsten and Luca
@@thorschon Are there any available?
I ordered a set about 2 weeks ago and received it all good. also got a cheap new zfinder. now im waiting to buy the leye evf.
@@ereceeme Would that be a Z-Finder Pro 2.5x?
I have got this one under my radar but I am worried I might not have all the pieces needed…
What a brilliant piece of work, well done guys.
Thank you for your contribution to the community, this looks incredible!
This has saved my LEYE. It's nearly unusable for me with the small image and distortion. I've often considered swapping it from another kit. What you've done is life changing for this chap!
Thanks! Support coming your way once I'm sorted.
Thank you very much, this is really amazing.
A significant improvement to the viewfinder.
Not all heroes wear capes... THANK YOU!
Guys this is amazing. Let me share a fact very few people know. The SmallHd 502 with Sidefinder attachment turns it into an AMAZING viewfinder.
yes but its no longer available. too bad
What a fabulous mod, thank you so much for this! I used gentle heat from a hairdryer to warm everything up a bit and loosen the tape glue, which helped the tape come off fairly easily.
Also clamped the Leye on the desk, which helped a lot.
Good on your for providing the 3D print files. I really appreciate that, and praise the excellent modelling work!
Just did the mod. Amazing. Day and night. It's probably mentioned somewhere but be careful not to unseat the connector for the flexible ribbon. Mine came out but I was able to reseat and tape down. Fantastic modification! Thanks Thorsten!!!
I want to do the mod but can I download the 3d printer plans and send them to an outsource? and have them mailed to me?
FANTASTIC work Thor! I've been eyeing (ha) that Portkeys for a while so if I ever do make the purchase I'll absolutely do this mod! Thanks for sharing the files :D
Yes!! Love this. Gonna check it out. Be cool to have a cover/cap to protect when the eyepiece gets taken off during travel etc.
Thank you for the great idea and files, I've just finished the mod and it's great looking forward to using this tomorrow
Fantastic! Thank you for the video and the dedication to the community!
Love diy that make products better. Thank you for sharing
I’m still using my Zacuto Z-finder EVF. It was originally used on an FS100, then an FS5, now on an FX6. It’s still a good Evf, considering it’s low weight, Canon battery and is incredibly durable. I’ve had mine for 12 years.
this is AMAZING ! i was not considering it due to the problems that you mentioned, but this mod is awesome, thanks for making it !!!
Thank you Pippin Took for saving the world!
I've done 2 of these mods, and both times the ribbon cable connecting the screen came loose and made it seem like it was broken. It comes off very easily. Luckily it also re-attaches very easily.
Great mod - thanks!
Can you explain how to reconnect the ribbon cable? Mine doesn't power on after the mod but I cant see anything detached.Was yours on the screen end of the cable?
@@oiohig Push the cable down against the board firmly where they meet. If what happened to you is what happened to me, it pulled loose enough that there is no more connection, even though the ribbon looks like it's still attached to the board. Lots of times these ribbon connectors will have a snap lock or levers you hold up to secure the connector in place, but this one doesn't.
@@NadirNovelties Thanks that’s exactly what happened to mine but as easy fix when you know it’s the ribbon. A push down on the tape & it clicked into place. Thanks for the reply!
I love watching mod-videos. Very satisfying. Note: For those of you with $1200, Portkeys has a pro version that's amazing.
Yeah but cumbersome
And noisy
Excellent work- thank you. It’s just a pity (as I’ve said before on one of the reviews on CZcams) that portkeys should make the unit cost $100 more and then we would not have to do this.
Your video might inspire Portkeys.
They almost have a perfect product.
Thanks for this,I got a friend to print the parts and did this last week,well worth the effort.
I end up just replacing the glass without needing to remove the whole thing.
I took off the eyepiece and the glass inside and replaced with a glass from a VERY cheap evf I had laying around and it looks much better then before.
would love to know how you did this
Me too
@@hovendov I guess my response got delete because there was a link in it, so here we go again.
You can remove the eyepiece by unscrewing it all the way out. You have to force a little bit, but it comes out ease.
Now you will see the inside glass attached by 4 screws. Unscrew it and remove this part.
Now there will be another glass inside, but it's not attached to anything, you can remove it using something to pinch it out. I used two screws.
You finally removed all the glass and there will be a hole direct to the screen. Now it's time to use your imagination and find some magnifying glass to replace the ones you took out. I had a cheap Canon 5D viewfinder laying around and removed the eyepiece together with it's glass. I'll try to put the link in the next comment.
Now it's just a matter of attaching it to the PortKeys. You can maybe 3D print something to attach one piece to the other or even use some tape. This is up to you.
The glass from the viewfinder is bigger then the PortKeys one, but you could have it cut and replace the eyepiece glass of the portkeys if you prefer.
Thanks Murilo for sharing! That also sounds like an interesting approach! Still, regarding the eyepiece, I like the build quality of the Z-Finder more than that of the PortKeys. I‘m a little farsighted and have to adjust the diopter… the PortKeys diopter rotates very easily and often during a shooting day, so I have to adjust it a lot. The Z-Finder has a far better diopter, doesn‘t fog up with the anti-fog lenses (which happened a lot with the eyepiece of the PortKeys). I also like that I can still buy diopter lenses and other spare parts for it… That's why I would be more in favor of the Z-finder.
@@Murilo_Resende thanks so much. I don't have access to a 3d printer at the moment, so this a big help 🙏
I did it and I love the result! It's night and day! Thanks so much!!!!!!! PS I used a heat gun, not too close but got the tape heated up and it came off pretty easy straight from the back of the monitor.
Very COoL. Outstanding original idean and post editing :)
Success!! Except we pulled the taped down ribbon off the board disconnecting the LED screen. Very fiddly reconnecting it. Had to take the tape off the ribbon, very carefully to get the ribbon connections reconnected by pressing them down and properly re-aligned. Obviously, did it right as we attained picture with the mod.
Amazing video! Thank you for the information and your clear presentation!
Hi Thorsten. Thank you for your kindest advice.
I’m glad you made this because I was just about to research modifying a Portkeys with one of my Zacuto eyepieces! It’s really too bad that Portkeys created a very useful tool with a poor eyepiece.
Amazing work Thorsten! I've often thought of getting the Portkeys EVF but was always reluctant because of the diopter. Thank you for this great "hack". Cheers from Canada! :)
Obviously people will need to verify for their own country, but in the US companies are completely prohibited from voiding warranties due to a user opening the device, and the same is true in the EU during the two year guaranteed warranty period. So long as you have your receipt from wherever you bought the LEYE if you encounter a manufacturing issue unrelated to the modification you are legally allowed to send it in for replacement or repair (So long as you are able to successfully unmodify it first).
I regret selling my LEye! Great idea.
this is genius! thanks for the all work and the really entertaining video :)
Amazing job! Great video
Thank you so much for making this video, the quality is extremely high!
This is very useful. Was looking for a cheaper alternative for evf
You deserve so many more views. Great idea. I’m shocked nobody else thought of this. Seems so easy and obvious now.
❤ 🎥
You are a genius! A SOOOOOPER GENIUS!
Ok I did notice a couple of problems. One is alarming in that if you are not careful you can easily knock the loupe entirely off the Zacuto frame or frames, causing it to fall to the ground. Possibly breaking it and the loupe lens inside. I wish it was more secure. And if you add more Zacuto frames this adds to the vulnerability. So I solved this and the dangling Z-Finder lens cap that hangs on a string. If you use 3M double interlocking industrial strong velcro, a large enough piece straddling the Z-Finder loupe (applied on top) together with the 3D frame and/or additional Z-Finder frames; then will stop it all coming apart and falling.
Secondly, if you add a piece to the cap itself, the cap will then stick to the velcro strip you glued on to the top of the viewfinder loupe. So now the cap is secure and will not dangle around getting in the way or creating noise the camera shotgun might pick up.😊
Excellent!👏🏾 I for one would definitely pay for the parts as buying a 3D printer is not an economic option just to build it myself! 👍🏾🙏🏾
You may find 3D printing agencies in your local area
@@danielstassen813 Thanks for the suggestion, If we have such a service here in Gothenburg Sweden then I might give it a go! 👍🏾🙏🏾
This did work for me. I would say that without the modification I probably would have returned the viewfinder. You need to set yourself up correctly. I drilled a hole in a small piece of plywood
and put a Tee nut on the back side. Then I could screw in a 1/4 - 20 arri style monitor mount to nato rail ball arm. (Thorsten is using something like this in the video). This allowed me to mount the viewfinder and rotate the set-up as I needed. I put some small shot bags on the plywood and worked on my desk under good light. I also wore a head lamp. It's like painting, preparation is the most important step. Portkeys sets these up just a little differently now, but it is basically the same. I also created two small plastic squares that were slightly smaller than the screen, and I covered one side of each with a microfiber cloth. I could use these to sandwich the screen if need be. I only needed to use one to slightly press down on the screen as I removed the tape. I felt like I was real careful, but surprise, when I went to power up the viewfinder the screen lit up, but the blue Portkeys logo did not appear. I thought I was done for, and was about to put it back together and return it. But after I took it back apart, I pressed down on where the ribbon cable attaches to both the screen and the inside body. Everything felt and looked fine. Anyway, before putting it back together I slapped a battery on it and the blue logo was there. It seems fine now. I shook it around and dropped it on my sofa and it still seems fine. 100% more useable. Eye cup is much better. Used a Zacuto fleece cover on it and it's super comfortable. Need to get a plus +2 diopter so I can remove some of the frames. So glad I did this. Thank you Thorsten.
Did you sandwich the glass or placed it on the table and pressed lightly?
@@ereceeme It was awhile ago, so I don't completely remember, but I believe I was pressing lightly down with one of the padded squares and pulling tape away with a tweezer. Probably pressing / holding it against it's mount.
cool, thanks for sharing.
I was really looking forward to this. I ordered the parts. Waited an eternity to get them. When they came in, I followed your instructions to the T. Set up good lighting, had all the right tools, and was well prepared. I was very careful, following your video step by step. It was really quite simple. I got it all together, hooked up some power and video and… BOOM! nothing. This procedure, while very carefully performed, killed my Portkeyes monitor. It is dead. So buyer beware. You are taking a risk. I’m happy for those who’ve had success with this but it turned out to be an expensive failure for me and definitely not because I did anything wrong.
Are you sure that your monitor is killed?
Perhaps you have pulled too much at the cable with the copper conductors, so that the plug that is connected to the board has lost contact.
One can not see that at the first glance, because some black tape covers the rather broad plug with all its contacts.
Maybe you created a short without noticing.
I'm not gonna lie. EVF limitations have been an obstacle for my Sony FX3 even with an Atomos screen. I'm going to give this some consideration for sure.
Absolutely brilliant.
wow, very good and kind video, thank you!
FYI, I recently purchased a second-hand zFinder. However, I haven't acquired a Portkeys Leye yet. My intention was to secure one at a favorable price before your video gained widespread attention 😂
If you have any other tips like this, please share 😊
PS: I will donate once I try it!
Hmm, do you really think we could experience a high growing demand? 🤔 Damn, maybe I should’ve bought some LEYEs and Z-Finders before releasing the video 😂
Amazing video. Thanks so much for releasing the print files. My local library actually does 3-d printing too! I put in a request and 2 days later it was ready. Just need to acquire a z finder before they rise in price due to your video.
If I ever get back to cameras, I will definitely give this a go.
What a great video which is about to get seen by thousands of Z cam users after a recent post on Facebook. I take it you really love your Chopin ?
Great work, great project!
Gracias luisito!
😂👍🏽
Great idea. I briefly owned the LEYE but returned it because of the tiny view in the viewfinder.
Why didn't Portkeys make it your way!??!
The ways of PortKeys are inscrutable ;)
Wow. Thank you. I'm interested to order!
Woah. If EVFs are just field monitors with eyepieces strapped on, I wonder if a budget DIY solution using similar eyepiece and a small dense monitor would make sense if the price was right!
In my experience it's not that easy to find a suitable monitor for such a project. For me the PortKeys LEYE SDI is the first "monitor" in a long time that has all the necessary features such as being small/compact, energy efficient, battery powered if needed…
Its 2.5 inch screen is perfect in combination with the Z-Finder (which was built for displays around 3.2 inches - but a lot of people find the resulting image of that display size combined with it‘s 2.5x magnification too large). But I‘d be happy to see another approach on this! :) I guess projects like this are a good way to show the companies that there actually IS a demand for an affordable evf.
Great Idea! I LOVE IT!
Word of warning to users: I have three of the old Zacuto versions of this type/resolution of EVF. I have fried the screen of all three by leaving them uncovered in the sun for only a couple of seconds. I have had the screens replaced I think four times, and the three I have all have fry marks, so that's seven times I fried screens by only being careless for a few seconds.
It's very tempting to not bother covering the eyepiece, but I guarantee you, you will pay for it. The rubber Zacuto eyepiece that automatically flips back in place to cover the eyepiece is annoying, but less annoying than ruining an EVF.
Regardless, this is a great upgrade! What were they thinking with that terrible eyepiece? I assume cost was the big reason.
I really wish someone would come up with a sub-$1,000 HD EVF. I find 1440 x 900 to be just a little low res for my eyes for reliable focusing. I've got the Zacuto Gratical HD and even with that, I'd like a bit more resolution and size.
Good hint! I have worked as a camera assistant and there it becomes a routine handle: if the camera is taken off the shoulder or put down, I turn down the viewfinder. Training that routine can also be very effective to avoid damage to the display.
And yes, I also don't understand why manufacturers are almost like intentionally not making something as good as it could be. Or leaving out different features in the different models, so you always have to make compromises where it should be very clear what would be a fitting and good combination for most users. But that story never gets old.
I have a GH4 that bears the scars of working in Cambodia and Hawaii. A bit pock marked, but still functional!
Great mod! Very inventive. Cheaper than the ZCam!!
Thank you this is absolutely amazing. I have no experience with 3D printing. However we have a 3D printer at the office. How do you add the support in the corners of the tray part? Is it already included in the file? If this works, I’ll make sure to donate!
The support is not included. We added it in Cura. Make sure to use a 0.4 mm Nozzle for the print.
Cura is an open source slicing application for 3D printers. ultimaker.com/software/ultimaker-cura/
Cura allows users to prepare and slice 3D models for printing, customise and optimize print settings for a variety of 3D printer and material combinations. Supports in 3D printing are essential to print objects with overhanging parts. In the "advanced" printing settings there is a section called "Support", where you can enable this feature.
Sorry, if it had been discussed before, does this mod work with the 2.5x and the 3x version? 😅
Awesome thank you!
AMAZING
wow you are a professional 👍
Bravo!
I wonder if it is not safer to simply cut off the overhanging tape from the LCD instead peeling it off completely
Wow!
Anyone figure out where to buy replacement LCD screens? Mines all vertical lines after. 😢
So........I cracked my screen attempting this mod. Does anyone know if you can replace the screen?
wow!
Hi! Do you know if this mod would work on the HDMI only version of thie Leye III? I believe the build is the same aside from the missing SDI connection.
If so I'd happy contact you to purchase the mod parts, this looks great!
Hi @thorschon I completed a second upgrade just today. Process went nearly the same but I did have the monitor cable disconnect - but as an encouragement to anyone out there who this might happen to, don't give up! It might take a few tries to get it back in but using the printed frame helps with alignment. My advice, place the LCD into the frame, line up the edges and attempt again. Finally got it to connect, and then tested it with power and signal. Once I could confirm it was connected, I added the next frame, set the screws and tested a second time. Here's a link to my first build: czcams.com/users/postUgkxW7W1EUtz21lpioLyxgpZV3upjE3TaaCp
Thank you so much for sharing! This looks absolutely great :) I can imagine how scary the moment was when the flat ribbon cable slipped out. And it’s great to now have the experience that it can be reconnected, thanks to your feedback :)
@@thorschon no problem for the disconnection of the LCD, the same happened to me and I reconnected with no problem. However, I broke the LCD when the tiny allen key I was using to screw in the printed frame... It just touched the glass surface and f*cked it up. What a sad day!
Have you an Idea on how to get a spare one? I asked to the european seller, but they gave me a contact that didn't reply to my request...
The connection is similar to laptop screen, keyboard etc. Ribbon connections. I directly removed it, it was kind of a challenge to connect it but it's still better then damaging it
@@TheReelport I reached out PortKeys about this mod, my hope is that they'll embrace the audience and come up with a Universal Loupe Edition, with a hard mounted screen, and swappable mounts for the Z-Finder, Hoodman, LCDVF etc. Glad it worked out for you though!
very cool construction. Does this also work with the zacuto z finder 3x
Great job... :-)
This was genius and if I ever go to another EVF (I actually have an older Zacuto EVF so I actually already have the part you used) I will contact you about purchasing the 3D printed parts directly from you.
Du könntest noch einen Deckel, der auf den Adapter Frame passt, für den LEYE basteln wenn der Z-Finder demontiert ist. Dann kann man den Bildschirm schützen wenn man das ganze kompakt transportiert. Sehr schönes Projekt. :)
awesome!
Thanks for this, but the magnified image with the zacuto loupe also seems to distort/bend the image?
The Z-Finder is used on many other displays for quite a while now and I have not heard any complaints about image distortion, neither I have experienced it myself. Unfortunately, the iPhone camera can hardly reproduce what it's like to look through the viewfinder yourself. The video does indeed show minimal shifts (I guess you mean at 6:20), but I haven't noticed anything like that in real life…
@@thorschon Thanks for the reply and yes I was referring to 6:20. But that’s really good to know that with your eye up to the Z finder on the portkeyes it doesn’t shift the image convex which is how it appeared on the video. Thanks for clearing that up:)
Great mod, I will try it as soon as I get the Zacuto. Is it ok to heaten the tape with hot air to loosen it prior to detaching it? How did you clean the mirror side of the display after removing the tape?
Hey Thorsten. Many thanks for this hack. Do you happen to have compared the modified Leye, to a better viewfinder like the o-eye from Portkeys or the one from Z-cam? With all that distortion, I discarded the Leye instantly when I had the opportunity to put my eye on it. Without seeing first through the better Zacuto eyepiece, I can’t tell about resolution, color and general panel quality. That’s why I ask you to elaborate a little more. Thanks again
Great stuff. I have a water housing and worried that the modification would extend the length to much to fit. But i'll do some measurements. Seriously, you would think that Portkeys would have a good look at this and go forward and make new version using your suggestions. Of course not buying up every used Zacuto Loupe.
Thank you so much for this
Glad you like it! What distortion issue are you referring to? The one I talked about in the video was a result of the poor diopter of the original eyepiece. So this will definitely be fixed after the mod :)
lovely video, thank you for the inspiration. I would like to ask if this will also work for LEYE III version? Has anyone tried it please? Thank you
I’d pay you if you could print and mail. If interested what would you charge for these 2 pieces shipped?
Folowing
Luca and I thought about it and decided to give it a try and make a small first batch to send out. If you are interested in ordering the parts ready made from us, please send me an e-mail with your contact details and how many sets you would like to order. I will get back to you as soon as we can estimate when we are ready to ship the first parts and at what price we can offer them. Some of you had also requested a protective cover for the display in case the LEYE is transported with the Z-Finder removed. We are creating that now and it will be part of the set. Please keep in mind that we are doing all this besides our jobs and families and we are not a professional dealer. Therefore it will not be as fast as ordering on Amazon ;)
I have the original Z-finder EVF without the diopter adjuster, I wonder if that would work
Also wonder if they still sell those 3d parts
Brilliant! Found someone locally who can print. but he doesnt do PT material. Is this a deal breaker? PLA or ABS. Whats the 2nd choice?
Thanks! I‘ve no experience with ABS and heard that it‘s not easy to process due to the high melting point… but if he can do it, it should be a great and sturdy material for the parts 👍🏽
Can I ask how this turned out? I don't have access to PT either.
Hi could you also just attach the magnifying glass part on a external hdmi monitor (for cheaper) ?
Thank you for this. I am thinking of ways to have a minimal and very small monitor for my BMMCC, I think this is a good option. Do you think it’s also okay to use it without the viewfinder attached? Just the monitor and maybe put a screen protector or something?
You‘re very welcome! Without the eyepiece I find the screen size too small for the use as an onboard monitor… For that purpose I really like my 5 inch monitor.