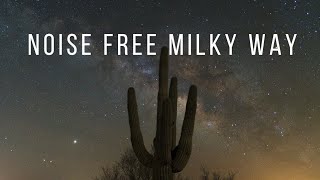
How to STACK ASTRO PHOTOS for less noise

Vložit
- čas přidán 29. 07. 2024
- This week I show you how to stack your milkyway photographs in Starry Landscape Stacker for cleaner night skies. I've seen it as a challenge to get my astrophotography in one shot, but now.......
Astrophotography stacking tutorial. When photographing at night you can take single photographs, you can stack your photos or you can track your photos. Today I show you stacking and soon I'll show you tracking!!
Here are the links:
Downloadable Images: bit.ly/astrostack
Free trial with adobe: helpx.adobe.com/download-inst...
Starry Landscape Stacker: sites.google.com/site/starryl...
Sequator: sites.google.com/site/sequato...
Select and Mask tool tutorial: • Select and Mask Tasksp...
Editing in Lightroom: • How I edit my photos i...
My Equipment list:
Sony A7iii amzn.to/2IIq4fm
Samyang 14mm amzn.to/31yjBw7
Batis 25mm amzn.to/2WDQKb0
Tamron 28-75mm amzn.to/2MLLwWe
Sony 85mm amzn.to/2WK8phd
Manfrotto 055 Tripod amzn.to/2WEkZyC
Manfrotto ball head amzn.to/2IHrNl3
If you would like to see more, subscribe and turn on notifications for weekly videos, hints and tips and more. If you know anyone who would benefit from this video, share and like the video.
Thanks
Mike
mike@boxheadmike.com
www.boxheadmike.com
/ boxheadmike
/ boxheadmike
Music by: www.epidemicsound.com
So many good songs and sound effects on the epidemic sound website, go check them out!! (I'm not sponsored by them, just love the selection!)
#boxheadmike Affiliate links
Some of the links above are affiliate links, which means at no extra cost to you I will make a small commission, if you click them and make a qualifying purchase. - Jak na to + styl


Thank you very much for this tutorial! I'm a photographer from Kenya. I begun venturing into Astrophotography a while back, but due to some unforeseen circumstances I had to stop. I'm back now... Full steam ahead!
Any Kenyan, East African, or African Photographer who's into Astrophotography here?
Brilliant tutorial. Thanks for the attachments too. It helps enormously to practice and see the results in our own monitors, which is a ton better than watching everything on CZcams alone. A trillion thanks.
Mike you are an unsung hero!
Thanks so much for your kind words Stephen! 😁👍
SLS now supports raw files for anyone who isn’t aware! I haven’t used it in a while, and needed a refresh. Thanks, Mike!
Thanks for the update Sam! Great to hear they now support raw files! 😁👍
Your best tutorial to date Mike, I'm on my break at work but I can't wait to get home and give this a try,
Thank
William
Thanks so much William! Much appreciated! 😁👍
Thanks for all the information regarding astrophotography. You are wonderful at clearly explaining information needed for accomplishing exactly what is in the title of the video. I appreciate this greatly because there is a LOT of garbage on CZcams that is either not clear or muddied up with other info I don't need. Thanks again and keep up the good work!
Thanks so much Mike!
One of the many reasons I started this channel was because of this...I used to get so frustrated with hearing about people’s lives or going for coffee with them before getting to the point...I’ll have none of that on my channel thank you very much...get in and teach, nothing more, nothing less. 👍
Vlogs work as entertainment but to fill out a tutorial with 5-10 minutes of vlogging content at the start...that’s insulting to the viewers...👍
Thanks for watching! 😁
Super sir...🌌🌌🌌🎞️🎞️📸📸
Thank you very much!! 😁👍
Best stacking tutorial I've seen so far. Thanks!
Thanks so much! 😁👍
Thank you so much Mike !
No worries, thanks for watching Mohamed! 😁👍
Thanks for this great tutorial. I learned a lot.
Great to hear Diego!
This guy surely knows his stuff ... fantastic!
Thanks so much!! 😁👍
Legit! Takes a lot more work but the results speak for themselves. Thanks! Looking forward to the next one!
Thank you!! You’re right, takes more work but definitely worth doing.
Thanks for watching 😁👍
So good to follow your tutorials !
Thanks so much Patrick! 😁👍
Wow, this is really excellent way to reduce the inevitable noice in long exposure shots. Thanks a lot for the new tutorial 👍👍👍👍
Thanks so much Sherif!!
I hope you had a good Eid with your family!! 😁👍
thx so much, I appreciate this.
No worries...stacking is a great way to clean up your images! 😁👍
Man. This channel is pure gold!!!!!
Thanks so much James, much appreciated! Lots more to come as well so keep checking back. 😁👍
SLS really makes a difference. I see many Instagram photos where the creator mentions using it. Thanks for the tutorial.
Thanks Tony, it’s definitely worth the investment. 😁👍
Great new innovative way for stacking photos. Thanks a lot Mike well done.
Thanks Waleed! It works really well and I was really surprised by the results.
Thanks for watching my friend! 😁👍
Finally a great and logical tutorial! Cheers mate
Great to hear! Thanks for watching. 😁👍
As I am just getting into Milky Way photography and looking for tutorials/advice I found your videos really helpful and well presented. I like that you don't waffle and take any longer than necessary, and you will be someone I will be looking more at now. I am waiting for delivery of a Move Shoot Move Star Tracker, and also my first dark night. But I am super keen now to get started, so perhaps I will download your sample files and get to work on those - so thanks. Big thumbs up from me.
Thanks so much Gordon! Great to hear my tutorials have helped.
Ihear the move shoot move tracker is really good.
Thanks for watching 😁👍
Bonjour Mike 🙂 What a great tuto ! 👍 Thank you very much. 🙂
Merci beaucoup Michel! And thank you for watching!! 😁👍
Great video as always and well explained. SLS is great program. I continue to admire your lack of wandering about and staying on point (#nofaff). Having used SLS for awhile, I agree with your choice to create your own masks as I find them much cleaner and work much better. I'm also in agreement with keeping all your PS panels and tools on one side of photoshop. Easier to keep organized imo, though opinions may vary. Keep it up and thanks again.
Great video Mike. Thanks heaps for sharing the info. Cheers!
Thanks so much Adrian, much appreciated! 😁👍
Such an underrated channel. Keep the good work bro!
Thanks so much Amir, much appreciated! Lots more to come as well dude!! 😁👍
thank you for sharing that! Seems like a lot of extra steps for a small difference in quality, but I suppose for poster prints etc, the difference would show.
Great videos! Keep em coming :D
Most definitely. At the top end it's all about those subtle differences to make the photo really stand out...and when combined with a tracker, it gets even better!
Thanks for watching 😁👍
never really thought about stacking starry landscapes - very interesting
Thanks Noealz!! It’s an interesting concept and I’ve been pleased with the results. 👍
Thanks 🙌🏾
And thank you for watching Burak!
Great content, thank you.
I'm glad it was helpful, thanks for watching. 😁👍
Thanks very much for the tutorial. I have tried the SLS program and my Milky way shots are not coming out great after stacking so I have to practice with your tips and hopefully things will work out better. My lessons I have learned for next shots of the stars is that I did not do dark frames, I only took around 4 shots at one exposure time and then I tried a different setting and I should have tried higher ISO now that I have seen videos like yours that show how well the program works. Incrementally I will get better, thanks for your help! Cheers!
Hi Mike,
When I first started using SLS I didn't see much difference, but what I found was that in using between 10-20 light frames and then about 10 dark frames, this seemed to work the best for me.
Hopefully you get better results the next time you go out. 😁👍
Awesome video .. Subscribed 👍🏻
Thanks so much Shahab! Great to have you aboard!! 😁👍
Great video. Looks a bit easier and cleaner than stacking solely using Photoshop. Will probably try it when my 20 mm f1.8 arrives!
Most definitely Devon...it does seem to give better results than photoshop. I was so close to getting the 20mm to try out under the stars...and then the lockdown happened...It looks like a fantastic lens and I'm sure you'll get some amazing shots with it...and even better when they're stacked!!
Thanks for watching! 😁👍
Great video. Remember to promote your socials at the end of your videos too. It took me a while to realise you showed at the beginning. Thanks for your work
Well done and interesting information which I’ll try. My only feedback is slow down your delivery, as that would make it easier for viewers having little PS experience to follow.
Thanks for watching and for the feedback Glyn. 😁👍
Oi thats pretty awesome. Definitely saved for when my Cannon M50 gets here.
Thanks so much. Let me know how you get on with it. 👍
One lens I'd really recommend with the m50 is the 16mm f1.4 from sigma. I recently got one for my Sony a6600 and it is fantastic for astrophotography.
👍
@@mikesphotography It came in today and you would NOT believe my luck. A storm rolled through and I was able to get some killer long exposure shots of some lightning. I will be going camping in a few weeks to try out some of this sweet stacking business!
Very good tutorial! Looking forward on shooting Astro. Do you have any tips on shooting when the moon is out? Thanks :)
Great video as always. I'll have to try out Sequator sometime soon. At the moment my best lens for astrophotography is a 12-60mm F3.5 lens with a micro four thirds camera. Obviously not an ideal setup, so hopefully it'll help out.
Thank you! Now that would be an interesting test...to see how your kit would work with starry landscape stacker or sequator!
I’ll be doing a video on sequator really soon so I might have to take my gh4 out and test that as well. 👍
@@mikesphotography Is there any benefit to owning a gh4 when you have an a7iii and an a7rii? I have a weird fascination with micro four thirds and want to buy a gh5, even though I don't have any lenses for it and my current camera outperforms any mft sensor. 😁
I rarely use my gh4 anymore. Maybe a gh5 would be ok if you wanted to do some Vlogging, with the flippy screen and the stabilisation...what are you thinking you’d do with it?
@@mikesphotography Landscapes, real estate, product photography and onboard videos for my (car) racing sessions.
Follower from India
Thanks for watching and thanks for following! 😁👍
Great video, thanks for the tutorial.
For a timelapse, if each image was stacked one by one before editing and compiling them, do you think it would improve the quality of the timelapse ?
Thanks Jules...and that’s a good question! I think it could work, you’d just have to change the reference image every time you output the stacked image, until you covered every frame.
Even though it would take ages to output, it would be interesting to try it! 👍
Im glad this workflow works for any manual interchangable lens as I'm switching away from mirrorless and going back to my Ricoh DSLR. That is the future you know. FUTURE! :)
Haha!! You’re a Ricoh fan boy, with your fans fanning you...I hear they also make great photocopiers...
@@mikesphotography I require at least 2 people fanning me at all times or i wont do a photoshoot. :)
Haha!! You’re a fanning fanboy...with fans as arms and chicken feet...😁😁😁😆😘👍👌🤙
@@mikesphotography haha thanks... I think. I might be in France early July for another race coverage. If my layover is Dubai ill borrow that sigma mc11 again. Not
Lol! That’ll be cool to get another event to shoot!! 👌
Excellent tutorial, Mike. I am definitely going to try this. I sent you an e-mail to your photography website email as I think the boxheadmike site is down. Let me know if you received it. It had a photo from my recent Milky Way shoot. I also ordered the Sony 24mm F1.4. Should get it in early July. I am really looking forward to doing some astro shots with it. Take care.
Hey Stephen,
Thanks for that, I’ll check it out. Been super busy with my day job and when I get busy...I end up being rubbish with emails and newsletters! 🤦🏻♂️ must do better!! 😆
Ooh! The 24mm 1.4 is a great little lens...I’ve used it once and it’s fantastic...and it’ll be perfect for Astro as well...I’m a little envious.
Stacking is definitely worth trying. I was surprised at how much cleaner it looked.
As always, thanks for watching, I really appreciate your support. 👍
Thank you Mike for this video , very informative indeed. Quick question there , can we use lightroom to stack the photos instead of sequator ?
No worries, thanks for watching. 👍
At the moment you need sequator or starry landscape stacker to stack them successfully as these programs take into account the movement of the stars between shots.
Have you tried using the technique of taking multiple shots and using Photoshop > File > Scripts > Statistics and then one of the average modes like median to reduce noise? Serge Ramelli used this in a tutorial a while ago and it seemed to work well on sky noise in higher ISO shots. I haven't tried this yet on astrophotography and it may interpret the stars as noise and average them out of the final image. This may be how Starry Landscape Stacker actually works anyway.
I haven’t yet but I’ll be sure to try it out. It would be interesting to see how it deals with the movement of the stars. 👍 thanks for watching 👍
It looks like mask creation in SLS has improved greatly since mid-2019.
They definitely have developed the software through the years. 👍
To take dark shots without a lens cap would it be enough to put your palm over the lens? My camer (RX100) has no lens cap.
Also do you have a tutorial for Sequator if that's free? This process in your vid seems great with great results but very long winded. Best regards
Thanks Mark. With your hand, you might still let in some light, so it would be better to use a dark cloth or something that cuts out all of the light.
I haven't done a video on sequator yet, but I do have one planned in the near future, when I can get to a dark location.
Thanks for watching 😁👍
Hi Mike! Thanks so much for the tutorial! Just one question, since you are exporting files back and forth, will it lose any raw data in the process?
No worries Mattias, You do lose the raw capabilities, but the gains in noise reduction far outway the losses...and with the initial changes, you can just bump up the saturation and contrast to finish it off...😁👍
@@mikesphotography Thanks for explaining, will try this technique soon!
For a normal beginner shoot how many images should I be taking for the stacking process .. this may seem like silly question but could I not stack the one same image multiple times? love your work and so far ive been able to capture some magical pictures.
Hi Glen, you need to take about 20 shots to get some good results. The more the better really. The reason stacking works is because the noise pattern changes from image to image and therefore if the computer looks at lots of images, it can see a trend in what is moving consistently (The stars with the earth's rotation) and what is randomly appearing (noise). Then it can get rid of the noise and keep what should be visible in the photo. If you stacked one image, there would be no difference between the two.
Thanks for watching 😁👍
Hi, :) can I stack photos of milkyway in lightroom? does it has the same effect when using sequator?
Unfortunately you can't stack them in lightroom yet. I'd definitely use sequator for pc or starry landscape stacker on mac as it gives much better results.
What iso shutter speed and aparture were you using for these photos?
Good question, I think it would have been 25 seconds, ISO 5000 f2.8.👍
Mike Smith the photos looks very dark. Is that good enough?
Mike, as usual your video's are so well presented. Thanks again.
Please note that using SLS those star trails should be removed. SLS uses the time stamp in the metadata to re-align the stars.
The next best tool we could use a star tracker.
Yes SLS does a fantastic job reducing noise, however, there is noise filter in PS called 'dust and scratches' that will reduce the fixed pattern noise in the dark foreground part of the image.
Ian Norman also presented a tutorial for SLS and covers this topics. See his tutorial at:
czcams.com/video/AQOfTTGWEDo/video.html
Thanks Steve,
I've done a video on noise removal using dust and scratches and I thought that this did a better job.
I've been using a star tracker recently and will be doing a video on that, comparing it to stacking astro shots soon. I really like the tracker and there are definite benefits to it, but also some disadvantages as well.
Thanks for watching. 👍
@@mikesphotography I have experimented with a tracker also. It's the 1st gen of Move-Shoot-Move. Easy to setup and very portable. However, including anything ground based is troublesome. Foreground features get moved/blurred. Forcing you to do a composite.
I have heard of people getting 4min exposures with the inexpensive trackers, just not with telephoto FL. Using stacking software means no worry about using longer FL or leaving the foreground in frame.
Looking forward to you video on trackers. Thanks for sharing all this knowledge with us.
It definitely comes down to the polar alignment on tracking...and you’re right...the cheap trackers struggle with longer focal lengths.
Thanks 😁👍
Why do you export in sRGB? This is so poor Quality!
sRGB is fine for most applications. Most websites only use sRGB as well as computer monitors most people will view it on.
Also you can run into issues if you have the wrong colour profile for the medium you're creating it for.
Printing, however is a different story.
@@mikesphotographyWhat do you mean by "you can run into ussues if you are having the wrong profile"? I personally don't see any reason why to invest in Gmaster Lenses and high quality cameras and then editing in sRGB. I edit in Pro Photo because AdobeRGB is not enough for me. I work with calibrated monitors and AdobeRGB is much worse then ProPhoto. But sRGB is really poor quality. Of course the web is going with sRGB. But you can do this step at the end of post processing and keep it at least with Adobe or Pro Photo Color Space. In case a customer wants to buy your work and print it then you lost all the information already at the beginning of post processing and there is no way to get it back. It is like recording audio in mp3 and not in wav format, because you lose the valuable information already at the beginning, which makes no sense to me when you are able to do this compression also at the end. I think if it suits your purpose that's fine. But many people out there don't know about it and they will copy your settings without knowing that they lose a lot of information. Because they might wanna print their work as I do. That's why I was asking you what's the reason to sacrifice the information already at the beginning. It seems somehow wierd for me to invest thousands of euro in the high quality equipment, a star tracker, spending hours planing good photos, investing money to travel there and try to get the maximum out of an image by using a stacking method but on the other hand to chose a worse quality without any pressure, because this step could be done also at the very end of the whole process just for the web version material.
NOT FOR BEGINNERS. I'M A BEGINNER
It looks like magic when you do it because you rush so fast over how and what you do learning is not enhanced. Slow down!
Thanks for your feedback George.
CZcams does have a feature where you can control the speed of the video called playback speed, if you click on the settings wheel when watching the video, you can slow it down if it is too fast for you.
Thanks 👍