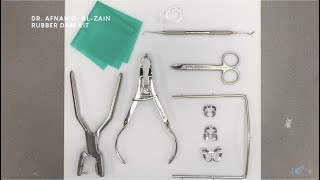
Rubber Dam (6) application (clamp in dam/simultaneously) and removal - Mandibular- Arabic عربي

Vložit
- čas přidán 6. 08. 2024
- Rubber dam application using clamp in dam (simultaneously) and removal on a Mandibular molar
- To learn about the rubber dam (1) instruments/kit, watch the video: • Rubber Dam (1) instrum...
- To learn about the rubber dam (2) preparation and clamp ligation, watch the video: • Rubber Dam (2) prepara...
- To learn about the rubber dam (3) and clamp application techniques (dam over clamp, clamp over dam, simultaneously / clamp in dam), watch the video: • Rubber Dam (3) &clamp ...
- To learn about the rubber dam (4) application and removal using dam over clamp technique, watch the video: • Rubber Dam (4) applica...
- To learn about the summary of rubber dam (5) instruments/kit, preparation & clamp ligation, watch the video: • Rubber Dam (5) Summary...
Subscribe for more Preclinical Operative Dentistry videos: / @drafnanoalzain
Music: www.bensound.com
--- Contents of this video ---
00:00 - Introduction
00:14 - Title: Rubber dam application and removal (clamp in dam technique) - Mandibular
00:23 - Rubber dam application (clamp in dam/simultaneously) and removal
00:47 - Application: 1. Mouth preparation
00:55 - Application: 1. Mouth preparation: a. Identify field extension
01:03 - Application: 1. Mouth preparation: b. Prepare the operative field
01:19 - Application: 2. Ligate the clamp
01:23 - Application: 3. Test the clamp
02:34 - Application: 4. Remove the clamp
03:07 - Application: 5. Clamp in dam placement technique (simultaneously)
03:18 - Application: 5. Clamp in dam placement technique: a. Wingless “W” clamp
03:24 - Application: 5. Clamp in dam placement technique: a. Wingless clamp: 1. Place the clamp jaws or bow in the clamped tooth hole
03:46 - Application: 5. Clamp in dam placement technique: a. Wingless clamp: 2. Expose the jaws
04:06 - Application: 5. Clamp in dam placement technique: a. Wingless clamp: 3. Floss is placed outward
04:12 - Application: 5. Clamp in dam placement technique: b. Winged clamp
05:29 - Application: 5. Clamp in dam placement technique: a. Wingless “W” clamp
06:04 - Application: 6. Place the posterior anchorage
06:14 - Application: 7. Check clamp stability
06:19 - Application: 6. Place the posterior anchorage (Close up)
06:29 - Application: 7. Check clamp stability (Close up)
06:34 - Application: 8. Spread the rubber dam in the proper orientation
06:58 - Application: 9. Expose the whole clamp by stretching the rubber dam with care
07:53 - Application: 10. Cover the tooth posterior to the clamped tooth
08:04 - Application: 11. Floss is placed outward
08:09 - Application: 5. Clamp in dam placement technique (simultaneously): b. Winged clamp (with frame attached)
08:28 - Application: 6. Place the posterior anchorage (clamped tooth)
08:44 - Application: 7. Check clamp stability
08:53 - Application: 8. Make sure the rubber dam is in the proper orientation
09:01 - Application: 9. Expose the wings
09:59 - Application: 10. Cover the tooth posterior to the clamped tooth
10:05 - Application: 11. Floss is placed outward
10:09 - Application: 12. For anterior anchorage stability use
10:46 - Application: 13. Place the most anterior tooth in the operative field in its hole
11:00 - Application: 14. Place the anterior anchorage
11:42 - Application: 15. Stretch the rubber dam and place the frame
12:46 - Application: 16. Insert each tooth in its hole
12:55 - Application: 16. Insert each tooth in its hole: a. with fingers, b. with dental floss
13:00 - Application: 16. Insert each tooth in its hole: a. with fingers
13:35 - Application: 16. Insert each tooth in its hole: b. with dental floss to insert & invert the rubber dam proximally
14:42 - Application: 17. Invert the rubber dam facially and lingually
16:13 - Application: 18. Place the dental floss thread on the other side of the frame
16:33 - Application: 19. Make sure the rubber dam & frame are centered, rubber dam is stretched, and wrinkles free
17:24 - Removal
17:28 - Removal: 1. Place one finger inside and one finger below & one above the rubber dam
17:39 - Removal: 2. Pull / Stretch the rubber dam & place
17:42 - Removal: 3. Use the scissors to cut the rubber dam interdentally
18:00 - Removal: 4. Insert the scissors between the holes
18:16 - Removal: 5. Cutting the septa
18:20 - Removal: 6. Repeat the steps to continue cutting all the septa
19:11 - Removal: 7. Remove the anterior anchorage
19:23 - Removal: 8. Remove the posterior anchorage with the frame & rubber dam sheet all together simultaneously
19:49 - Removal: 9. Examine the rubber dam sheet
20:05 - Removal: 10. Examine the patient mouth for rubber dam remnants: a. with a dental mirror
20:23 - Removal: 10. Examine the patient mouth for rubber dam remnants: b. with a dental floss
20:41 - Removal: 11. Clean the patient’s mouth & lips
Instagram: @afnanalzain
Twitter: @afnanalzain
Telegram Channel: Dr. Afnan O. Al-Zain / t.me/afnanalzain
Email: info@afnanalzain.com
• Video


بارك الله بيج دكتوره ❤اتابع واطبق
ماشاء الله ، شرح متميز واضح و فيديو 👏
ممتنة لك بروف هشام
The best doctor ever the explanation ❤.
I appreciate it thank you ☺️
كورس هايل جدا احنا محظوظين اننا بنتابعك
That was so helpful thanx doc
You are most welcome
the best explanation
Thank you
ماشاء الله عليك دكتوره شرح ممتاز جدا
ياريت لو اضيفى اندو لمحاضراتك😀
ممتنة شكرا. تخصصي إصحاح وتجميل الأسنان فالإندو خارج مجال تخصصي الدقيق. حأشوف كيف أقدر أساعدكم
💕💕💕💕💕💕💕💕💕💕