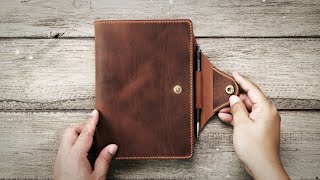
Making your own Midori-style Leather Traveler's Notebook

Vložit
- čas přidán 29. 06. 2024
- If you're interested in having me make one of these for you go here:
www.mylifeallinoneplace.com/20...
---
I've been meaning to get around to this for a long time. Here is a video that shows every stage of making your own Traveler's Notebook. It includes some optional steps, like rounding off the corners and adding a bookmark. Visit mylifeallinoneplace.blogspot.c... to find more Traveler's Notebook resources, downloads and ideas.
You can also make your own inserts: • Making your own insert... - Jak na to + styl


You don't find many DETAILED instructional videos, which is absolutely necessary for newbies. Thank You 7 years later!!!
I was almost sure I would order an original one but while watching your tutorial I realised that I already have everything at home to make on myself. THANK YOU FOR THE TUTORIAL
Exactly ,,,same here, this is the best video yet on this beautiful journal. Thanks so much for the great detail. I cant wait to get started on minel Bulk making as vending season is soon upon us here. Happy crafting everyone
Thank you so much, I when to Micheals and had a 50% coupon. I bought the leather and string. Travelers note in under $9 dollars.
I just made my own version with slightly different dimensions for larger notebooks, but I could NOT have done it without your video. Thank you so much!
Thanks very much, Ray. A $2 off cut from a leather factory, some elastic from the $2 shop, a bit of ribbon and your directions and I have my first standard Field Notes size faux-dori. Brilliant! Ta!
This is utterly fantastic and most helpful to those of us who have taken a particular interest in handmade travelers notebooks. Thank you very much!
Oh god sake thank you for using mm mesurings and not other hard to find measurement scales like inches and so. I love you for that. Excellent work.
@mrcynthiag it's typically not taught to do conversions between metric and empirical. Unless you're in the US and such
Weird my rulers have both, not hard at all to find LOL.
Some of my rulers have both. My nice, gridded one is only in inches.
I have watched many tutorials for making your own traveler notebook. This one is the best. Straight up. The way you bind it, the way you explain it, and give the seizes. Plus, you give some additional ideas (such as stamping) Thank you so much!
Thank you so much for this! I made one of these several weeks ago, and your version is definitely nicer. I especially love your tip with the needle, and the tip for the rounded corners for the washer. Thank you for all you do for the stationery community!
Wonderful video Ray. I enjoy watching you create these items.
Thank you for all the entertaining and educative tutorial. You truly inspire me to improve and share what I know. You have a gift in your hands.
I made my first notebook today and I am so excited. Thank you for such an easy to follow tutorial!
I found this video recently and I want to thank you for posting this. I learned so much from this. It was awesome.
Thanks for this tutorial! I didn't feel as if I could manage the leather craft in order to make my own leather cover until I saw you do it. Now I feel like it's possible to not only make myself one, but also one or two as a gift.
Received my Raydori FN Traveler's Notebook at the beginning of the week & I love it. Thanks Ray!
I think your approach to threading notebook elastic is brilliant - it gives the spine of the notebook a very handsome looking finish.
Watched this video and was hooked. Just ordered leather, punch and elastic thread !! I'm so looking forward to making this! Thank you for this great tuorial, I really love it!
Thanks, Ray, for posting this. I don't know that I'll make my own covers, but I really enjoy watching people who know what they're doing work and you explain the process very well.
This instruction was absolutely brilliant. I was able to build a field notes sized one right along with you! Well done.
Huge fan of your blog. Thank you for this great tutorial.
Excellent tutorial! Thank you for taking the time to make and upload this. It’s really appreciated!
Hi Ray - Just re-watched this video after seeing your latest blog post, and there are a few ideas I would like to share with you (or anyone reading the comments):
(This was from what I learn in a leathercraft class)
1. Since you have made a template anyway - you could make the template on slightly thinner card, with the round corners and punch holes marked.
2. When you cut the leather, you cellotape the template onto the leather, using 4 pieces of cellotape on the 4 edges of the template.
3. In contrast to what you advised - (measure twice and) cut ONCE - oh you still use a steel ruler to guide the cutting part anyway - is to do long cuts but getting deeper at each cut, to avoid accidentally moving the knife/ruler about when you aim to cut the whole depth of the leather at one cut and apply too much force on the ruler and knife. i.e. no need to aim for cutting through the leather using just one cut.
4. for the corner, again, several cuts - deeper each time - around the round corner on the tempate
5. for the holes, you punch them through while having the template placed on top (by this time you probably have cut passed the edges so you could just place the template on - pencil mark slightly, or retape the template on the leather you've cut out).
**The benefit of doing this this way is that 1) it save you staining any of your leather scrap with any markers or pens - maximising the area of leather you can use. 2) save you time measuring the centre / places for the holes
6. When you stamp the letters/names - gently moist the area with water - this will help the letters to stay permanently. (However I am not very good with this; when I used a metal ruler to guide the stamping like how you use a plastic ruler to guide, I somehow hit the ruler too, so underneath the name I had a horrible and rather permanent horizontal line... :'( I need to ask for more tips on being able to stamp accurately....
My preferences:
1) I would finish off with using the special glue/finish and the wooden tool (forgot the name - oh, "wood slicker") to smooth out the cut edges :D
2) bookmark - I would pull the cord till it's equal length on both ends, and tie a knot to stabilise it, pull the knot upwards - and have 2 bookmarks :D
I had so much fun doing a leathercraft course in Hong Kong 2 years ago and I made a card holder and a coin purse. I have always toyed around making Midori notebook covers but this never happened :P as I didn't know where to find the right tools & buying leather in London.
Recently I have stopped using my Midori (now using a Flex cover with a Large Moleskine + hand made A5 notebook as monthly calendar).
QUESTION - Ray, have you experimented with making Midori style notebook cover in A5 and or Large Moleskine size?
Some interesting ideas - thanks. Yes, I've made bookmarks in the way you suggest and I have indeed worked with the larger sizes.
This is one of the most excellent tutorials I've ever seen on CZcams! Thank you!! I am a papercrafter so I have all the tools I need for this except the leather itself. I can't wait to try and make one and I've recommended your video to my FB group I own with several hundred people. :)
That's great. Thanks for the comment.
Hi Ray, thank-you for a very clear and precise instructional video. I appreciate you sharing your ideas and skill. Amanda
You uploaded this video on my birthday - what a great gift :) (Even though I won't be able to make my own, it was a pleasure to watch this great video!) Thank you, Ray!
This is wonderful Ray! Thanks for sharing with us!
i just made a home made traveler's notebook (fauxdori). It is a three string book. It currently holds the five inserts. I made all of them. Your videos were my inspiration!!
Definitely the best video I've watched in learning how to make my own tn. Thank you so much for the clear and precise instruction.
Great tutorial. I can also use this guide for making Journals for friends. Brilliant. Thank you!
Thanks, Ray! I love the one you made for my husband!
One of the easiest videos I've seen. Thanks for sharing this. I've made some with paper but I've been wanting to try leather but the tutorials just called for way too many tools. Your video is fabulous. Cant wait to make a leather one now!
That is fantastic, thank you for all that info and the fact you used very little tools means I really just need the leather and a hole punch. I'm heading to a tannery soon to see what I can find as I'm only very new at these midori travel notebooks but they look great and if I had both in front of me I would always pick your hand made over a factory made :)
Excellent idea and tutorial. I like your precision and style!
Just made mine today.. took about 45 minutes but I think I can do them in about 20 moving forward now... Thx for the video... it was pretty easy once I got down to it!
Fantastic tutorial! I have just gotten my leather and am anxious to start. Thanks for sharing!
I enjoyed your video very much. I went right out to the shop and made two notebooks. Here is something you might find helpful: soak the last 3mm of the elastic in super glue, stretching it slightly, so the glue will penetrate. After the glue hardens, cut the end at an angle with a very sharp knife. This will make a hardened elastic "needle", and simplify threading the cover.
My favorite cover is made from sea ray hide. It is very thin and indestructible.
Thank you for your videos and wonderful book.
You are awesome - thank you for this tutorial. My son is about to turn 10 and he's really getting into both drawing and writing and asked for a notebook that's not standard sized. I realized I could make him a travelers notebook (in his favorite color) and it would let him have drawing and writing notebooks in hand. Thank you!
Such professionalism! Thank You!
Thank you for the great tutorial!!! I started on my channel with card-making tutorials, but I'll definitely give traveler's notebooks a try!!
Great video. I've been searching around for one and might just give it a shot making one. Thanks for the inspiration, Ray.
Excellent! I couldn't swallow the cost of the original shop bought one so I will have a go at this. I am going to use a paper corner cutter to put a 5mm rad on the corner. They are not designed for leather but four corners is a small job in the scheme of things. Thanks for making the video.
Thank you so much, I was thinking of buying one but after I saw how simple the design of the midori I knew I could do this at home. I also like your little touch with closing elastic being in the spine rather than the back so that you aren’t writing over that.
I’ll most certainly be ordering some leather and elastic once I have the money(broke highschool student).
Absolutely fabulous! Great work!
Thank you so much for this great tutorial. I made my own one and because of your tutorial it was so easy. This notebook will be a great sketchbook. I can't wait to take it with me. Every day :))
Great tutorial, Ray. Thanks a lot for sharing your skills.
Thanks for sharing this Ray. I decided to make my own after watching this and am really pleased with the result! (And how little it cost!)
Thank you! This was immensely helpful in making my first fauxdori :)
instead of using a washer for the corners use a pair of nail clippers, child's for a tight curve.......
Thanks for the video Ray! I bought a passport size with the intent of using it as a template template and then using it as a notebook as well. Now I have the measurements for the larger and a midsize one too!
I will also check out your site for the PDF files. I appreciate you taking the time to share all this info with the interwebz!!
Thank you !!! Now I finally understand how to insert the binding! Good job! :)
This is awesome! I just loved it! Thanks so much for sharing!
Yay! Three books, thank you very much.
Ray, this is a nice intro to making a Midori-style notebook. I especially like that you put the measurements on your templates, and include those numbers right at the beginning. Thanks for a great "intro" video!
As for rounding your corners, there are, in fact, many tools for rounding corners. They range everywhere from manual punches for traditional leatherworkers, to large, table-top rounders made for rounding bound books or stacks of printed material (made for print shops), and even little punches from Fiskars and Martha Stewart, and range in price from under $10 to over $200, depending on how sturdy, and how much capacity they have.
Just Google "corner round punch".
If you are not making a lot of these notebooks, cutting the corners by hand is probably more cost-effective, but if you are doing a lot of them, you might consider a commercial-grade rounder like a Lassco...
Thanks for taking thetime to put this together
What a fantastically useful, well done video. Thank you so very much.
Really great video, thank you so much! I have a nice piece of leather I've been wondering what to do with and I've been looking at Traveler's notebooks getting ready for 2021 so, shazam!, homemade traveler's notebook here I come. And I'm going to check out your homemade inserts. Much Mahalos!!
Nice video and workmanship. Thank you!
this is amazing definitely will have to make one loved it thanks ray
Thank you for this wonderful tutorial! I need to try making one of these beauties😄
Thank you for sharing Ray it is fantastic. I will try your method for my next piece of work ☺
Hi Ray,
thank you so much for your great and detailed tutorial!
I'm thinking about making one for my Dad (as well as one for myself, hehe) for Christmas.
Cheers
Fran
Your instructions were awesome! Thank you!
Well done Ray!
I just made my own last week in exactly the same way. Never thought to make templates though, that's genius!
So, so helpful. Thank you for making this
I was thinking about buying one, but now I'm excited to save that money and make my own instead! Thank you!
This. is. awesome!!!
Thank you so much, Ray :)
Dentel bridge threaders work great for threading stuff that is kinda thick through small, pre-made holes.
+Lexi Hanson This is genius!
My leather arrives saturday I Cnt wait to make mine. I have Travelers, many. But curious to start learning leather hides types, differences, qualities. Beautiful video great artist u are!
That was an excellent tutorial--many thanks.
Such a great video. Thanks for the tutorial. I might even try it.
Awesome! I plan to make one for sure
A decent pair of nail clippers will give you a nice clean corner and nice nails too :)
What an awesome tutorial... thankyou for taking the time to make this... I'm gonna give it a go!! I have an old leather jacket I never wear anymore ... wondering if I could make it work...might be too soft leather... I think it's lamb leather. If not... you've inspired me to go buy some to make one. Thanks again!
thanks for posting measurements and this tutorial. Love it.. thanks!!
FANTASTIC ty Ray you are GREAT!
You are an amazing tutor!!
great work! I love this!
Great tutorial. Thank you!!!
I also have that lettering set! But I didn't know how to use it so thank you
Fantastic tutorial! Thanks!
eexcellent tutorial thanks, I'm going to make an a5 version. one bit made me laugh. "the exact centre is about 12.8 cm, roughly"
The address book is from a download available on my blog. There's a link in the video description. An old leather jacket would probably yield quite floppy leather, but it's worth a try.
Excellent tutorial, I might attemptto make one.
Just got a big bundle of scrap leather at local flea market. Planning on making some of these with it. This will be a first try
Muito lindo e perfeito. Parabéns!
You can use a curved wood chisel (gouge) to cut a circular corner.
Skills🙌 thanks for sharing!
Wonderful tutorial!!!! I am definetly giving this a try!!!!...tfs..Annie
For my bookmark I put a very small metal flat bead where the Midori 'clasp' would be, threaded the bookmark through and then tied a knot on the inside. This gives you two book marks but still the design element of the bead.
I made one and it seem too flimsy so I cut some foam sheets to size and glued them inside the cover in the front and back. That helped and made mine look a lot better. I cut the foam sheet about 1 cm narrower than each side to give more room at the spine (middle).
wow this is soooo informative and useful; thank you so much! can't wait to make mine :')
Thank you! Great video!
Great and generous!!! Thanks
loved this! thank you!
I love this! Thanks for sharing:)
Thank you! This is awesome. Now I don't need to spend a $100 to buy a traveller's notebook from Midori or Chic Sparrow. You are most kind! And I don't really care about stitching the edges. This looks fabulous.
Hello Ray! New subscriber to your channel. You do amazing work!!! These are beautiful!!! I make journals and would love to eventually purchase one of these from you if I can't find the right kind of leather here or feel confident enough lol. I have bookmarked your mylifeallinoneplace sight. Will be purchasing soon. Thanks for this tutorial...you do excellent work! Melissa
thanks for sharing this tutorial.
Like the dry, straightforwardness of this tutorial. Thank you.