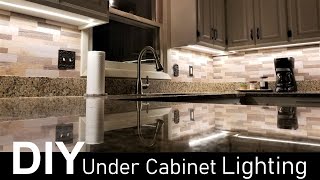
How to Install LED Under Cabinet Lighting

Vložit
- čas přidán 5. 09. 2024
- There are many ways to do things and this was my approach. You can take ideas, leave ideas and I will link below the materials I used below.
mounting brackets:
www.amazon.com...
LED Lights I used:
www.amazon.com...
18 gauge low vault wire:
www.amazon.com...
Aluminum Profile Track for LED lights:
www.amazon.com...
Transformer dimmer switch:
www.amazon.com...


My three wives are very happy with my new under cabinet lights, thanks.
Huh?
I had to replay that 4 times to make sure I heard that correctly 😂
@@hendricks135 😂
@@buildingwithjosh I was genuinely saying thanks for the video, as well as taking the Mick that it made my all wives happy 😄👍
@@lukehanna7440ha ha, your welcome! I was just confused at first and didn’t know how to interpret that! Glad you got it and made your “three wives happy”.
This is the exact same installation that I'm about to do and couldn't find any other videos going through it. Thank you
Your welcome. Good luck with your project!
It’s not as easy as you make it look Josh? Like you I am a contractor ; sub contractor to be exact (finish carpenter). In fact I tell ppl quickest way to burn down your house is to save 3 or 4 hundred bucks on an electrician ? Where DIY’s get in trouble is that box!
Pulling off of a single to a double run it loose, not the right cap or size wire and bingo !
Customer used to ask can you ? And I say yes?
Then one yr while re-upping my bond & license my insurance provider reminded me “you work outside your license; your not covered”?
Now if I got a GC then I am ? Maybe?
Anyway these little things like lighting, crown, hardware , is so easy to say “I can do that and save this”!
My Dad who build customs and specs for a living used to say “Yes u can do that & remember it will look like you did it, if you can live with that then do it”!
I would & hv told ppl just make a sketch and list “and” put a chk mark next to the area you really need to be careful!
And keep your insurance up to date; homeowners that is!
@@zephyr1408 I appreciate your comment. And you are correct to a certain degree! But some Homeowners and DIYers do have some knowledge and some, ummm, not so much. So, only ones who are comfortable or are willing to take on the liability should try doing there own electrical. In the video, I’m just trying to show others how it’s possible to do and give good results! I’m not telling everyone that they should do it just like me, but show how I have achieved the finished outcome on my project! If one is willing to take a risk, that’s their freedom to do so and if not they should definitely hire a professional! I would always recommend hiring a professional where needed!
damn nice job man..excellent!..really clean..
Thanks so much!
Very nice work!
Thank you 🙏
well done. very neat job & looks great 👏💯% perfect...
Thank you
Super helpful! Thanks for posting this! Looks amazing 💡
Thank you!
Nice job & helpful for my new build.
Thank you! Good luck with your new build!
Love the lights. Good job!
Thank you!!!
I did it the other way. Install the wires for led strips before sheetrock, than install power wire from switch box to the outlet for transformer for into sink cabinet. Transformer plugs to the outlet in sink cabinet and switch turns on the outlet pretty simple.
Sorry for my English 😁
That’s a great way, and easier! As long as it’s planned ahead, that can be done. Mine was after the fact the kitchen was in.
@@buildingwithjosh anyway, u did a great job. Clean and smooth result.
@@dmitrytomashuk259 thank you!
Wait, but how did he fix thedry wall hole He made when he installed the gangbox, particularly above that metal strip on the stud.. howd he patch that??
I would have recommended a side screw slider box instead of the 2 gang box you installed that way you wouldn't have any sheet rock repair where the stud is
This is a good option as well! If one doesn’t want to repair Sheetrock. I was doing the tile anyway so didn’t mind due to liking the box better!
Thanks for the tip!
This is a far better solution. Thanks!!!
Nice job. Im looking to do this to our kitchen. Are you happy with everything? There are SO many choices, its hard to decide and its not something you would want to skimp on. Thank you
Love it! I’m very happy with the outcome! Only thing I would have done differently if possible is run the low volt wire ahead of time behind Sheetrock.
@buildingwithjosh1145 I'm sold brother! I watched your video twice and it looks like the cleanest installation I've seen. Thank you for listing the products. I'm using your links. Thanks again and real nice job👌
@@BrandonLund thank you! I tried to keep it as clean as possible…I’m o.c.d. like that😂.
Good-luck brother! Quality LEDs definitely make a difference!
This is probably a dumb question, but does it matter for the transformer switch if the switch is being installed on a 20 amp circuit vs a 15 amp circuit? I'd like to put it on a 20 amp circuit.
Not a dumb question at all! The transformer switch is intended for 120v, which can be 15 or 20 amp circuits. Just like a standard switch I believe. Hope this helps!
Do you need the aluminum profile track / diffuser if you purchase COB LED lights?
The use case is for the kitchen under cabinet lights.
I don’t believe the COB lights need an additional protection like the aluminum track. They should be able to be ran by themselves
Hey Josh, we can provide you full led strip/cob/neon/profile light for testing. how to work with you ? 🤗
Is there a restriction on how many LEDs can go on a single switch?
Really good information here. One question though. I'm having trouble getting the clean cuts in the channel that you get. Could you specify the brand and model of both the miter saw and blade that you use? Thanks.
I used a Diablo steel cutting blade on a basic Skill miter saw. Not a fancy saw but a good steel cutting blade.
@@buildingwithjosh Cutting extrusion is not fun, without a brand new blade it wants to grab all the small details of the extrusion. I've had much better luck using a band saw. They make some pretty affordable "chop saw" looking ones that we've found to be much easier to work with or in a pinch an oscillating multi tool.
@@InnovativeEvan a band saw works great, however keeping a perfect angle is the difficult part. Thanks for the feedback!
Nice job Josh, I have an almost identical kitchen setup as yours.
My 2 switch gang box has ac power to 3 locations as well as overhead sink light switch.
Just wondering if I need 3 drivers for all locations. I am looking at tunable COB lights from 2700k to 6000k for working to ambiet light.
I would like 3 locations to sync for colour brightness and dimming. Any suggestions would be great.
Thank you, appreciate the comment.
Drivers probably depend on how much laid you are putting on them. Curious, are you wanting to use the existing 12 or 14 gauge wire to get power from the transformer to lights?
I was hoping to use the 3 locations controlled through one switch. I have read that cob or fcob strip leds need a constant 12v or 24v therefore cannot use a house line dimmer switch. I have seen this in other applications so I'm not sure how that works. I know it's going to be an extra cost to have seperate drivers but the control part I am unsure about for dimming and brightness ie: colour change.
Were all 4 low voltage leads wire nutted together to the switch?
From the transformer switch out there are two wires out feeding, a positive and neutral. All the positive feeds to the lights were nutted together. Also all the neutral feeds were nutted together. Hope this helps!
Hey Josh, you may have already answered this question, but did you tie in all of the under cabinet lighting and upper cabinet lighting into that one switch?
I did simply wire nut all the leads together and then tied them to the switch lead all in that box.
While the idea of the dimmer that includes voltage conversion is nice and clean, it hardly seems to code since presumably you’re mixing high and low voltages in the same box. Anyone have any input on these products?
The instructions tell you to put a divider and provide it to separate the top low voltage feeds from the bottom high voltage feeds. There are also vertical dividers you can buy for 2/3 gang installations. Or just buy a divided 2/3 gang box. Yes you are correct though. This guy didn't follow the instructions. Don't be this guy.
Very Nice work! Is using stranded 18 gauge wire better than a single core wire? Thanks
I think the stranded wire is more flexible than solid wire. However I don’t think it really matters! I only found 18 gauge in stranded.
Thank you for the video friend! I’m about to do this myself :) have you checked the cob led strips?? You don’t even need a diffuser now 😊
Thank you and you’re welcome!
I have seen the cob led strips, funny how technology changes even in just a short time period! Honestly I would still use the channels and diffusers not because it has to have it, but I feel it looks more clean having the lights fully encased. I think it looks cleaner.
Good luck with your project!
Couldn’t you just have used the same bracket and just taken out the box and replaced it with a 2 gang adjustable? Or was that not an adjustable single gang. If it was it would’ve saved you cutting sheetrock
Very nice looking!
Thank you very much!!
So did you have to solder your 22.5 angle or bend them.? Thanks for sharing
I folded the led Strip on the 22.5 angles, I didn’t want a gap in lighting. Hope this helps!
If you use a transformer that doesn’t come with the dimmer switch, what kind of dimmer switch do you need? I have a transformer going from 120v input to 24v output. Thanks in advanced!
I would just use a dimmer switch that can be states that it can work with leds.
@@buildingwithjosh the dimmer switch I am using is Lutron led+ diva single pole dvcl-153P-wh-2 and it doesn’t work to dim. I checked my connections and it’s all good too.
@buildingwithjosh you never showed adding dividers to separate the 110V light switch from the dimmer/transformer. You need a vertical and horizontal.
People who buy the products you linked and follow your video and don't read the instructions that come with the dimmer/transformer combo are violating NEC code.
no sheetrock up, thinking i should just run the low voltage wire in the wall and avoid the channel cut, just entering each cabinet.
Running the wire before sheetrock is a great idea if you can! Many do run wires to each cabinet and run separate lights. The only thing I don’t like about not running a continuous light channel is that it doesn’t have a continuous light shine on the countertop.
I can’t find that switch on Amazon
I put the link of the switch used in the video description. Hope this helps!
Switch ,60 watts or 40 watts in 120volts ????
There should be a link the to transformer switch and all the materials in the video description.
Josh-do they have a multi colored LED light option that can be soldered? My wife wants one that's changeable and we're in the middle of a kitchen renovation.
You should be able too! I believe most led strips should be able to be soldered together. I simply just cut the plug off of the led strip off that would have went into a 110 wall outlet. Then exposed the two wires and soldered them. Hope this helps!
along with that question about color led on a switch, after soldering, will the remote yo change the colors still work? do you have any recommendations for colored led strips?
also can I direct wire a led strip that that only had a plug option, just by cutting and soldering? could I connect the 18 Gauge wire directly to a 12 or 14 gauge standard 15 or 20 amp 120v outlet? if a transformer needed to be used (not at the outlet) would you have a recommendation?
Looking at the profile+lens cove and LED strip light you chose I don't see how you achieved a dotless result. The profile channel is too shallow, the lens cover doesn't appear to be a "fancy" diffuser type. The strip light does have three LEDs per inch but what's your secret?
Ha ha, no secret. Everything in the video shows what I did. There might be minimal dotting looking directly up, but not much. I tried to get as accurate video as possible for transparency. Yes, three leds per inch, matched with a shallow 5/16 channel, and a frosted diffuser. Everything should be listed in description. Thanks for the feedback!
They're also selling a new product that's spotless. @@buildingwithjosh
Can i do the same i allready have the switch from previous cabinet light the ugly big ones.
The older lights most likely are running 110 wire , so you could use the switch. However you would have to install a transformer somewhere between the switch and LED lights strips.
Hey Josh-my husband is installing a similar LED set up using the transformer dimmer switch and 18/2 thermostat wire. Is there a length restriction using these transformer switches and 18g wire? We're doing a L shaped kitchen/dining room renovation 10'x20' roughly with two transformer switches.
As far as I know, I don’t know the limit on the transformation switch, I think you would be fine. I put all my lights above and below cabinets on one switch. If you are running two switches I think you would have more than enough supply. Now I did notice in the light box, these lights get warm to the touch if they are turned all the way up. From reviews I saw this is common and hasn’t been a problem. I’ve had these for a year now, without a problem.
I don’t know how far you can run one continuous wire run though. I would run multiple 18/2 power supply if it was a 30’ run, or something like that. If makes sense?
It depends on what LED strip you're using and how much power it draws. What will be affected is the brightness towards the end of your wire run due to voltage drop. With a 30 foot run, you should be fine using 18 ga. You can test it first by setting it all up and checking everything. If you notice the ends are noticeably dimmer, up your wire to 16 ga.
I was looking at some reviews on amazon for the transformer/dimmer switch and it seems that there are some complaints about heat at the gang box and that the dimmer shouldn't be run at 100%. Have you noticed any excessive heat at your gangbox? Do you try to run the dimmer at a reduced brightness to lower any heat that the transformer may generate? Have you left it high at 100% for an extended time and noticed excessive heat?
Sorry if I'm asking too many questions, but im planning to install something similar and came across these concerns. Thank you.
These are very good questions! Yes, after a time of use I noticed that the light switch does get hot at full capacity. I try and keep it not at the brightest setting to just avoid the heat, somewhere in the middle. However my wife has ran it on high for extended periods of time and everything operates fine. I tell her to not do that though 😂
@@buildingwithjosh thanks for answeringy questions. I just want to say, you did a great job. It's the cleanest installation I've found on CZcams.
@@robloxgamer9335 thank you! I appreciate your comment!
@@buildingwithjoshI successfully installed the lighting with the instructions you provided. Thanks! But I did have one question. How did you snap the diffuser covers into place? I could not get them to snap in
@@robloxgamer9335 that’s great, glad to to hear that this video could help!
Interesting, are your diffusers covers not snapping in? To think of it, I remember they were a little difficult. In order to snap them in they had to go in evenly, flexing the center in order to accomplish this. Kind of in partially and then a full snap once both sides are partially in. I think if one side is fully in, the opposite side wouldn’t fit in.
Great video. Do you have a link for the switch/transformer you used?
Sorry about the delay. I will attach it here in this comment and then I will add to the description. Good luck!
www.amazon.com/dp/B07GX5FK4C?ref_=cm_sw_r_apin_dp_PBBEHN04J4CYH9P06144&fbclid=IwAR06sSWPBbcNRj-2Vx2itcpbk9HhpNq7OtE2pNWlAGjKyFFGE1h_RHdqrzY&th=1
Hey Josh, where did you get all your materials from ?? Amozon????
Yes, everything except the wire came from Amazon. I have links in the description!
Can you link the products you used please?
Yes, the links are in the more info/video details on the video!
Do these leds come in daylight
Yes!
Thanks!
Well, which is it Josh?
?
Wife or wives, buddy
@@jaret217 lol, did I say wives??? 😆 I definitely meant to say wife if I said wives… I don’t think I could handle wives 😂😂😂
0:13 @@buildingwithjosh
Would have been better if you set it up motion-activated.
That is a good idea.
I disagree. I think there would be too many times you want to walk in there without the light being on
@@sk8infreek Same. I’m doing mine now and thought about doing motion activated for exactly 3 seconds before I came to the same conclusion.
problem with that lighting is its yellow
I don’t see how these are yellow, just warmer lighting than the 5k.
Keep your wives happy???
How many do you have Josh??
Ha ha, depends on if we are talking about personality or not. 😆 Just one wife! That’s all I can handle.
I guess I should have phrased that differently. I meant “wives” to all the husbands out there.