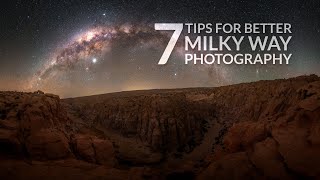
Editing Single Exposure Milky Way Image

Vložit
- čas přidán 29. 02. 2024
- As promised I want to present to you a video on how I edit single exposure milky way images. This old silo was one of the images I shot a few weeks ago and in this video I go through the whole editing process from start to finish.
I hope you enjoy the video.
Direct Paypal Payment Link: paypal.me/nightscapeimages?lo...
RC Astro StarXterminator - www.rc-astro.com/software/sxt/
Website: www.nightscapeimages.com.au/
Facebook: / nightscapeimages
Instagram: / nightscapeimages
Equipment I use:
Photography
Nikon Z6ii amzn.to/2UXHY7y
Nikon Z6 amzn.to/2LWpSvH
Nikon 20mm f1.8S amzn.to/3rk5aJj
Nikon 14-24 f2.8S amzn.to/3Phg0dN
Nikon 24-70 f4S amzn.to/2EkWZF0
Nikon 35mm f1.8S amzn.to/36GTVkX
Nikon 50mm f1.8S amzn.to/36J7twe
Laowa 15mm f2 amzn.to/3SFpoKZ
Sirui W2204 Tripod amzn.to/2YTg2Qf
Timelapse+View Intervalometer timelapseplus.com/richard-tatti Discount Code: NIGHTSCAPEIMAGES
Yongnuo RF603nii remote triggers amzn.to/35ppbCD
DJI Mavic 2 Pro Drone amzn.to/35ocjNc
DJI Air 2 S Drone amzn.to/3xRiGqk
Yongnuo Flash amzn.to/2qUaYyH
Yongnuo Flash 2 amzn.to/35pqNMF
LED Lenser P7.2 torch amzn.to/34l2rlV
Z96 continuous light amzn.to/2LYYey6
Ulanzi VL49 Led RGB Panel amzn.to/3QCBbIk
Syrp Genie Mini amzn.to/35y0MuV
Sky Watcher Star Adventurer amzn.to/35qf68G
Lens Heater amzn.to/3C1GoVQ
Zeapon PONS Pan/Tilt amzn.to/3QDuu8y
Zeapon Micro3 Timelapse Slider: amzn.to/3g5pUTZ
Nitecore Sony USB Battery Charger amzn.to/3Qh2FU5
Video Equipment:
Sony A7siii amzn.to/3z7LZ8q
Sony 20mm f1.8 G amzn.to/3Bc9sam
Sony 24mm f1.4 GM amzn.to/3xMTMYY
Tamron 28-75 f2.8 Sony amzn.to/3es44Gw
Tamron 28-200 Sony amzn.to/3zeqtz1
DJI Pocket 2 Gimbal amzn.to/3z9y8yl
Z96 video lights amzn.to/2LYYey6
Yongnuo YN300 video lights amzn.to/2qTfU6V
Rode Wireless Go ii Radio Microphones amzn.to/3wROry9
Magmod Flash Modifiers amzn.to/2ElgBZD
As an Amazon Associate I earn from qualifying purchases. I earn a very small commission on the above links if you decide to purchase the item. This commission slowly adds up and greatly helps me to continue creating content for this channel. I very much appreciate your support!


I can't afford trackers and all the fancy gear, so these single frame edits are a valuable rescore thank you for putting in the time and effort in this type of video Richard.
You're very welcome indeed. Thanks for watching.
Stacking is free!
Move Shoot Move star Trackers are Cheap and great to start out
@@CMikeGo74Might you know of a good product? I had not heard of these, so I will research. Thank you!
Richard. I can‘t emphazise enough how helpful you videos are! Thnx.
Yo
I'm really pleased to hear that. Thanks for watching.
Very informative, a big thankyou 👍👍
Thanks as always for watching John
Very helpful!
I'm really pleased you found it helpful Ashley. Thanks for watching.
Great video! Loved the complete A to Z editing, explaining each step including your reasoning and how too’s.
I'm really pleased you liked it Norm, thank you.
Great editing tutorial Richard. Lots of tips and tricks shared and much appreciated. 👌👍😊
Thanks Geoff. I'm sure you'd be using a similar workflow. Hope Tasmania's going well.
Your enthusiasm is infectious and a delight to follow. I had the great pleasure to visit your wonderful country last year and the highlight was a visit to the GinGin observatory near Perth.
Thanks for tuning in Martin. Glad you liked Australia.
As a fellow astrophotographer in USA, I do greatly appreciate this tutorial. I was using the filters in Photoshop and it was such a pain. You opened a new chapter in my astrophotography adventures. Thank you, mate!
You're very welcome indeed my friend. I appreciate your support.
Richard, A really useful tutorial on your technique. thanks for the effort you put into this video.
Cheers Peter.
Many thanks indeed Peter
Thank you for another fantastic video Richard, your tips and tricks are great . I always learn something from your videos. Thank you again.
You're very welcome indeed Dennis. Always appreciate your comments.
Thanks Richard, great video. I've learnt heaps from this one, especially StarXTerminator.
Thanks again for tuning in Steve. Appreciate your comments.
Brilliant explanation, I’ve learnt so much from your videos, you’re an absolute legend! Cheers.
Thanks again for watching Michael.
Thanks Richard for taking us through that editing process. I love how Star Xterminator works - a definite purchase when I get a new computer. Fantastic result from a single image.
Thanks again for watching Julie
This was a fantastic. Thank you for sharing your expertise and experience. I have looked at other MW shots and wondered how they achieved the luminosity - you have opened a whole new chapter for me. I have just completed my first edit based on your technique and really happy with the result.
Once again I appreciate you watching Graeham.
fantastic work Richard, really looks as good as a multi stacked image, very clean 👍
Many thanks indeed. Appreciate you watching.
Hi Richard, Love this workflow. It might look simple, but it's one of the best (yet) single frame editing workflow I've ever seen. I like the precision and effective of every movement you do there. Since it's also single frame is amazing! Can't wait to see more 🙌🏼🌌
Thanks so much for your kind words my friend.
Another great video Richard, nicely done clear skies 🖖
Thanks as always for watching Gavin.
Great video Richard. Liked that did the single image edit.😊
I really appreciate you watching William
An excellent video - many thanks Richard!
Really appreciate that Darrel
Thank you Richard for showing your workflow in detail. The information is very useful including your introductio to that topic.
As always I very much appreciate your comments Gunter.
So Good!! I'm going to have a great time re editing some old shots and my new ones... Thanks so much for all you do for this community Richard.. Very much appreciated
You're very welcome Alyn, really appreciated.
Looks fantastic! I noticed you did the edit on my birthday. It is definitely a wall hanger! You have a wonderful week my friend. 📷☕️🍪
Happy birthday John, hope you enjoyed the day.
Hi Richard...excellent video, I learned so much in 35 minutes very easy to follow and understand...keep up the great work..Only discovered your channel recently, you've inspired me so much...thank you.
Very kind of you David. I'm pleased the videos are helpful.
Thank you for another great video Richard. Love the way you edited the single image🙂
Thanks as always for your great support Julie.
Another great video Richard. Clear Skies!
Thanks so much for tuning in.
I'm so glad you talked about the White balance. I just got an Astro modified Z7ii and tried a custom balance with a grey card and incandescent lights, since I would image with a regular camera on incandescent. Shot last night on my light polluted deck and got temps of 2000 and Tint of -38. It looked way off. I will try your 3000 Kelvin and Tint adjustments next time out in Death valley next week as well as my custom white balance. Great tips!!! And Russell Crowman's tools are also excellent. I use them for my Deep Sky Astro!
Thanks for watching. White balance on these cameras is so fiddly and it will change depending on what we're shooting. But I do like to have that consistent starting point.
Fantastic....thoroughly enjoyed that. Thanks for posting these!
I'm really pleased you found it helpful.
Absolutely marvellous Richard, thanks for the video! Pete
I very much appreciate you watching Pete.
How advanced photoshop has gotten yeah using a plug-in to announce it is the usability from where it started the first Photoshop to what is that now it's complications but it can be simplified to anybody's use and ability but that is extreme exposure of use artist integrity signature absolutely worth it
There are certainly many great tools to do our editing these days for sure.
@@nightscapeimages.richard my first camera was Nikon fm5 film using more in the Ilford paper in the early days of Photoshop elements I'm proud of the schooling I've done and who was an Aussie that can never leave the behind without the ones that count
Another great tutorial Richard. The results that you have obtained from a single exposure are remarkable. Thank you for sharing.
You're welcome Tony, really appreciated.
Richard, I was out practicing last night, and found a humorous foreground you might like. A farmer has placed a mannequin in high vis clothing in an old tractor. At 80kph, I couldn't check if the sky is visible for a suitable shot. I'll keep the location cryptic, but I think you'll figure it out if my guess on your location is correct. If you travel from the city of B, along the C highway towards M, turn off at K and head east towards the towns of R and H. The farm is about a minute from the K turnoff.
I know the area I think .. but haven't come across this one yet ..!!!!
@@nightscapeimages.richardA correction, I mistakenly said east - the road actually goes north, but it felt like I was turning east as I was heading north on the freeway. You should turn left off the highway away from the town. The tractor is on the right hand side of the road as you head north. And I just checked, the tractor with the mannequin is NOT visible on street view. Assuming I have the correct house, there's a small windmill on the property and a huge white truck passing the google car. I'm hoping that's enough information without giving away too many details. I don't want to accidentally make the owners (who I don't know and never met) into celebrities.
Commending your excellent video, Richard. I must confess, I've embraced a remarkably similar workflow, and the results are truly impressive. As you rightly pointed out, there are numerous variations, yet the simplicity combined with a few third-party tools can indeed enhance our images, rendering them clean, sharp, and vibrant with outstanding contrast, whether they're single, stacked, or tracked. Grateful as always for your generous sharing.
Thanks as always for your kind words Al. It's very refreshing to have such wonderful tools at our disposal.
Really clear and informative video Richard. Thanks so much.
Thanks as always for watching Eric.
A great tutorial, thank you Richard 🙂
You're very welcome Les.
Wow! I never had used Topaz for noise reduction before but I’m definitely going to give it a go now! Those results are a huge difference! That’s awesome
It's working well for me ..!!!
Wonderful video. Thank you. Topaz tends to over sharpen stars but your technique eliminates that issue. RC Astro makes a noise reduction plug in trained on stars which avoids that issue but may not add much the way you manage noise.
Yes I reckon the same about Topaz and stars. I haven't tried NoiseXterminator but a few friends have it and love it. Thanks for watching.
Great edit Richard. I have plenty of images on my hard drive I that I can practice these techniques.
In my area west of Chicago it was too cloudy during the new moon period, I am hoping for some clear nigjts in April.
Thanks for tuning in Jim. I hope you get some clear nights soon.
Thanks! Great tip on doubling up on the stars layer. This was the first video of yours I’ve watched from Australia. I’m here in the Central West of NSW near Coonabarabran for a couple of weeks of stargazing and shooting. Been great so far! Perfect nights under the glorious southern sky. Time for a Tim Tam!
That's fantastic Alan. You will love Coonabarabran and those pristine and warm Aussie skies ..!!!
Fantastic and easy to follow along and to understand. If you were Nicole Kidman and knew all this, you'd be just my type. 😋
Ah, well ok mate . .!!!! Thanks for the encouragement mate . .I think ...!!!!
Richard. Thank you so much: this is brilliant & the incorporation of LR & PS is a game-changer!! Making notes & working/testing on some single images I took last year & results are so much better. Can not thank you enough! Cheers
You're very welcome Manjul. Glad the videos are helpful.
Awesome shot and tutorial Richard. Thanks for taking the time for another awesome video.
You're very welcome Brian, thank you.
Richard, Thank you so much for sharing your knowledge and expertise. So helpful and very much appreciated.
You're very welcome Emilio
Thanks Richard for my weekly inspiration.
Another thing that has helped my single shots is low level lighting. I have 2 small lights that can some extra detail in a single shot.
I've still got a lot to learn about where to place them and what on percentage to set them.
Really appreciate your comments Mike. Yes indeed, low level lighting is wonderful.
Excellent Richard.
Really appreciate you tuning in Tony.
Brilliant - thank you!
Thanks so much for watching.
I'm SOOO happy you mentioned the WB on your Modified Z6ii. Last weekend was my first time out with my modified Z6ii and I lowered the WB to around 3000K. 👍
Yes I think it helps a lot.
Amazing video.. So many excellent ways of post procesing night scape images..thank you!!
Thanks again Luis. Yes you are so right my friend.
Thank you very much for sharing your knowledge with us.
Thanks so much for watching.
Awesome Richard..Thank You
Thanks again for watching Chris
Fabulous tutorial Richard. We are moving to Mansfield in a few weeks, and I can't wait to explore the area for astro!! I have previously been to Craigs Hut and shot a sunset (which is my most popular image!) and an astro there. The astro shot was a bit of a fizzer as I didn't know so much then as I do now!! I'm sure there are old silos and buildings etc which are just waiting for me!!
Thanks Carmel. I hope your shift goes well. That area is very scenic indeed .. and quite dark skies as well. The milky way rises beautifully over Craigs Hut in the east .. and early in the year it's not so cold up there.
Hi Richard. I love this approach! The detail you've extracted from a single image is stunning and you've remained faithful to the original capture. Thank you so much for sharing.
I really appreciate you watching Tim, thank you.
Great tutorial. Although I don't do too many single exposures (we really need the signal from bortle 4 ;-)) I learned a trick or 2 here. Also shows that you don't necessarily need tracking/stacking if the scene and sky quality is there. Thanks Richard!
Thanks as always for your kind comments Jeroen. Hope you're going well my friend.
Hi Richard. Very educational and helpful video, perfect for those of us who are taking their first steps in astrophotography with only a camera, suitable lens and tripod. I very much appreciate your sharing of knowledge and experience! Thanks again!
You're very welcome indeed Oliver. I'm pleased you find the videos helpful.
@@nightscapeimages.richardVery much so! Can´t wait for your next video! Have a great week
You have a huge advantage over me in that you can already clearly see the Milky Way in the frame straight out of the camera. You must have nice dark skies. Where I live in UK you really cant even see the Milky Way with the naked eye. It is SUCH hard work trying to get ANY image of the Milky Way. Hope you appreciate that - what a gift it would be to have proper dark night skies.
Yes I certainly do appreciate that Gordon .. every time I go out I thank my lucky stars .!!! The Southern Hemisphere night sky is simply amazing, and the milky way core gets very high into the sky as it travels it's course .. which helps make it brighter as well.
Yes I've come to realize if it isn't at least a bortle 3, I won't expect to push the edit, and will mostly just focus in constellation shots. I'm a bit picky though haha
This is an extremely helpful video, Richard! I will definitely checking out the trial version of StarXTerminator. I tend to do mostly either single shot or some with stacked foreground, so I'm sure it will be a great help. Thanks!
Thanks for tuning in Drake. Yes it's a wonderful piece of software . .worth every penny.
Brilliant picture and Brilliant edit Richard.... Looks Great... WOW... 😊
I very much appreciate you watching Keith, thank you.
great edit and video. thanks Richard
You are very kind as always.
Thanks Richard, this is a big help to me. Excellent tutorial.
Thanks so much for watching.
Thanks for this useful tutorial.
I need to have astro mod cam soon 😆
Thanks again for watching. In next weeks video I'll be comparing standard and astro mod camera.
Thanks again for a wonderful tutorial Richard!
Think it is an awesome image!
Many thanks indeed Calvin
Hi Richard! Great workflow and thanks for the wb info. I also enjoy using star exterminator. Take care, Jerry
Good on you Jerry. Always appreciate your comments.
@nightscapeimages.richard I sent you a contribution on PP a couple of days ago Richard... Your passion for astrophotography is wonderful and I really appreciate your work!
Thanks so much for your generous support Jerry .. . it means a lot.@@user-re5vf3wl1s
Great skills Rich, talking about the teaching skills and photoshop, light room
I'm pleased you enjoyed it Alan.
Hi Richard. It is good to see you again. My wife and I were on a religious mission for one year, so I had to postpone my photography for that period. However, we are back. For the next year I hope to improve my photography skills. I find what you do is remarkable. I sincerely appreciate your enthusiasm and your willingness to teach us your technique. Richard, the biggest challenge I have is finding foreground subjects for my Milky Way shots. We don't seem to have a lot of abandoned buildings here in Utah, USA like you do where you live. So, my challenge is to use natural landscape items. However, these can be tricky to do light painting. Fortunately, Southern Utah has a lot of natural landscape items to photograph. Again, thank you so much for what you do.
Thanks so much Nyall. You have a lot more grand landscape where you are than me so I go looking for old buildings. Both make great subjects to shoot.
Cool vid mate, I think I would need to straighten the buildings if I was being picky but it’s amazing what can be done with single images these days especially when you are feeling lazy in the field!
Thanks so much for watching my friend.
Fantastic Richard!!! I love your passion for astro photography! You also love to share your knowledge too!!! That's amazing! I'm still new at this, but I have learned so much from you! My attempts at shooting the milkyway always have failed in a noisy mess!! Im hoping for a big success this year! The single shot is what I tried in the past!!! But this time I'm going for a 10 to 15 stack! With light painting thanks to you!!! This video was awesome, but I want to go for the gold my friend!!! I will let you know it goes!!!!!!!!👍👍👍🇺🇲
Thanks again for watching Marvin. You will certainly get better results by stacking multiple images.
Fantastic Richard Thanks 😊
Many thanks indeed Michelle
Thanks for showing this! Really well done, I'd would like to increase the brightness on the linear stars layer, it almost looks like they're disappeared,more stars will break up the noise pattern and give you a sharper cleaner look over all, try it out to see if it match your taste.Also you might find star glow plugin useful.See you soon!
Thanks for your comments. I'll give it a try.
That is magic!
Thanks so much for watching.
Awesome MW processing tutorial 👌👌👌
Thanks so much for watching Gus
Great video on a somewhat overlooked topic. I picked up a few new useful tips. Thanks.
You're very welcome indeed David.
Thankyou Richard! Awesome video
You're very welcome my friend.
Great in-depth review
Thanks as always for watching Tony
Amazing edit Richard, if not told I'd have guessed stacked at the very least. Tools these days are just crazy good at what they do. They are expensive, but still not crazy fast prime lens expensive. Absolutely worth investing in.
Thanks as always Dominic. Yes it's a lot easier now than it was years ago that's for sure. But nothing beats good old experience.
Very helpful! Thank you so much! Your image is very clean after using the starxterminator, my image has some coma which can't be removed. But l learned that I need to control the coma.
Yes that comes down to lens quality. Some are very good and others not so much.
Thanks so much for the tutorial, Richard, I just started using the Star Xterminator and I love it.
It's a fantastic tool Brian, well worth the investment I reckon.
With regard to white balance settings on a modified camera, because I've had two that had different kinds of modifications, even with my colorblind eyes, I can tell there's a big difference between the images created by each. My first modified camera was a full spectrum mod, more suitable for DSO, so the visibility of red was really extreme. My current modified camera uses an Optolong dual bandpass filter (basically, like the L-Enhance), so it isn't nearly as extreme with reds, and other colors come through more readily, which makes it more suitable for landscape astro.
Anyway, to anyone who might read this, look up white balance recommendations for the specific type of modification you have, so that you can zero in on the results you want with less effort in post.
Yes very good info Derek. My modification is H-Alpha plus Visible. Which is recommended for astro landscape photography.
Yes, very similar workflow Richard. Heading to Mersey Bluff tonight. Hoping for clear skies later on 😅
The lighthouse has a great alignment, although a bit of light pollution from the town perhaps. And of course the light itself ..!!!
Great job, Richard, you seem to be a master with Photoshop.
Thanks Jeff. Photoshop is important to my workflow . but it's all self taught.
Great tips Richard.. :)
Thanks for looking Mark
Great video, I'll save th8s one for when I get my new computer.
Good stuff Phil, appreciate you watching.
Great Richard. Regarding the noise I like the new lightroom denoise. Also, usually I duplicate the layer on PS and leave different levels of denoise at the terrain and sky.
I think that's a great idea Raphael. Editing the sky and foreground differently will give best results.
Just starting to learn all this astro mod processing malarkey...... Sharp learning curve that's for sure, my images currently have a purple tinge
And also a lot of light pollution will confuse the issue as well. Dark skies make everything easier Suzie.
Really helpful video thanks Richard. The stars trick with different screen modes is one I'll try. I have been trying to use star spikes 4 but it's tricky to use. For denoise I use ai denoise usually but will have to try Topaz with severe noise setting as I have usually used low light setting and found it is often too aggressive with details.
Thanks so much Brendan. It's amazing how many great tools we have at our disposal these days isn't it. I do prefer the Severe over the Low Light setting.
Hello Richard. Another superb video. Congratulations again and again. I had a question:
You use Topaz to remove noise. Is there a reason why you don't use Lightroom's denoiser?
Finally, do you remove noise in the same way for stacked photos? Thanking you in advance for your answers.
Thanks for watching. Yes I do exactly the same editing for stacked and also tracked images. I like using Topaz as it's a direct plug-in to Photoshop. When I use the in built De-Noise in Lightroom it creates a new large file. To be honest Topaz does the same thing if used in Lightroom as well.
Nice tutorial, but I actually don't like to get rid of stars to make the Milky Way pop, that's now how my eyes saw the night sky.
That's quite ok Danny. You don't have to remove any of the stars at all using this process. It all depends on the Blend Mode you choose to use. I mean . .you do initially separate them, but they go back exactly as they were before. The big key to this workflow is that you can do edits to the milky way nebulosity without blowing out the stars . .which is exactly what will happen when editing images. The result is a very clean and clear image as shown here.
Awesome Milky Way tutorial. I have watched you and others use the Star Exterminator plug-in with wonderful results. I have to get it and start using it in my own post processing. One question, did you or did you not have some hot pixels in the foreground? If you did, using 'dust & scratches' (filter>noise>dust & scratches) in PS does an amazing job with those pesky pixels. Love your channel, always recommending it to my astro-landscape photographer friends.
Thanks heaps for watching Michael. I often use the Dust & Scratches filter to remove fine pixel noise in my images. I didn't see to much in this one to worry about it.
Richard, great presentation as usual and another valuable benchmark for comparison between the other options of stacking and tracking. Pretty amazing detail in the core, but then again you see a much higher elevation than us to the north. What bortle was this shot in
Thanks again for watching Robb. I'd say this is a Bortle 3 sky in that direction.
Hi again Richard…addicted to your tutorials…really fantastic and very detailed. Like I mentioned before, I’m curious to see the following tutorials: stacked and tracked approaches.
And finally would like to see difference between the 3 final images regarding dynamic range of the milky way. A 100% detail would be nice, from for example the Rho Ophiuchi region of the 3 finished final images.
If possible next to each other, I’m very curious if the stacked are much different from the tracked results.
Thanks again for watching Edward. I do have many videos featuring both the stacked and tracked approaches as well as editing. No doubt the best images will be tracked, and if we want even better we will track and stack.
Yes indeed...but curious if the difference is enormous ?
Not sure if carefully done the difference will be that great between stacked and tracked. I mean for a general picture with the milky way in a landscape.
Would normal people (mean non-photographers 😉) see the difference ?
For deep space photography it's another story of course. Don't do that part...let it be done by more driven people or by the Hubble or Web telescope. But can't say that I was already tempted a few times but think I my wife will kill me...
And yes the starless filters does wonders.
I think you're right . .the average person won't see any difference at all. They look at images as a whole .. they don't pixel peep.@@edwarddebruyn8717
Hi Richard. Are you going to show us how to edit stacked shoot of this scenery? :)
I have a lot of editing videos. See here: czcams.com/video/3uXHTmwcaFM/video.html
Hi Richard, I do like a single exposure, one as well executed as you have. It is a very nice result. Just a question: after using Topaz Denoise, do you use a little bit of Topaz Sharpen?
Thanks so much for watching Ivan. As a general rule I don't apply extra sharpening to my images. I figure that after adding things like dehaze and clarity they are plenty sharp.
use in PS the "select->sky" to make a sky mask makes it easier....and in LR...select sky then in selection options select invert to get the ground....
All good info Steve, and I do that as well. I used the select sky option in Camera Raw so I could add some Dehaze. The invert selection for foreground is very good isn't it.
The original image is so bright >> was it taken just before sunrise . In South Africa = same as Australia my Barn would be a distinct dark shadow
No it was taken at about 3.30am well before sunrise. I shot the lens wide open at f1.8 There was some ambient light on the building from a distant quarry. See: 6.20 in this video. czcams.com/video/iI09f6v33nQ/video.html
A superb instructional video Richard! The rate of change in LR PS is huge these days and you’ve given me some great tips on how to make better use of the masking. Have you done a side by side comparison with the built in Denoise tool compared to Topaz? I like the denoise but it takes an eternity.
Thanks for a great video.
Thanks as always for your encouraging comments Carl. I haven't done any scientific testing of the two noise reduction programs .. they are both very good. I find Topaz as a plug-in to photoshop to be quicker and I don't get the huge resulting file size.
@@nightscapeimages.richard ah yes you’re right about that Richard I think they’re double the size of the photo.👍
Such a great video! I actually tried your editing technique and the final image came out so much better than my previous Milky Way photos. Is there a way to do a timelapse while still applying these kinds of edits to the entire sequence?
Thanks so much for your kind comments. That's a lot more difficult as the editing on each image in a timelapse sequence would be immense. That's because you need to remove the stars and create the starless version etc in Photoshop for every image separately, that's tedious for hundreds of images. Technically yes it's possible but realistically I wouldn't do that. I'd be content with doing a more traditional edit for timelapse. You can certainly do some extra masking on the sky for example in lightroom and sync that to all the images and you'll get a great timelapse result.
Richard, these videos are so informative for us semi-newbies. Can I ask if you have used RC-Astro noiseXterminator? It is supposedly trained on astro images so I am wondering if it does better than the general purpose options such as Topaz and the Lightroom/CMF denoise AI.
Thanks for watching. I've not used noiseXterminator but as few of my friends love it for their nightscapes. We have many great tools available to us at present.
Great video, Richard! Just one thing. Did I miss the camera settings or you didn't mention them? I'd really love to know what you settings were. Thanks.
Thanks for watching. I show the settings in the Lightroom view at 5.05 in the video.
@@nightscapeimages.richard Thanks!
Hi, you will get directly a starless and a stars only image (Layer) if you use the Photoshop StarXTerminator Unscreen action. So no need to use the subtract blending mode.
And why didnt you add contrast to the sky instead applying the S curve to the whole picture? And then remove again from the foreground. Is contrast and S curve not the same?
And when you add exposure to the foreground (in LR) and increase the shadows it will also add again noise to the foreground. Thats why I would use the NoiseXTerminator at the very end in Photoshop..
Thanks so much for watching my friend. There are many ways to edit these images with great results. I appreciate you adding more editing options.
Richard, another great video that shares with us your knowledge and skills. Thank you! One question in following you are doing in this video at about the 10:20 point....on the right side you had a button you called "mask tool" and used to select the sky. I can't find that button on my copy of Ps (subscription). I can do a Select>Sky and add a layer mask from the bottom button in the layers panel but it does not give me all the adjustments you show.
Thanks for watching Bradley. Yes I used the Camera Raw Filter .. that's where you'll find that Mask Tool. It's the same as using Lightroom .. same tools.
Oh my, Richard. I missed that you were in Camera Raw. Thanks so much for your prompt and very helpful response. I really enjoy your videos and learning from them. Best regards! @@nightscapeimages.richard
Hey Bradley. I noticed you sent through some money via Paypal. Did you order anything ..???@@bradleychewning9094
I'd love to do the old mine nearby, do you know if it's accessible Richard? I went and had a look on Monday after my cousin who has stage 4 bowel and liver cancer and lives just out of Newstead told me about it, he told me about the silo too and after going to it I'll leave that to your expertise because it's too big and out of my league lol 😂
There are 2 separate mines in the area . .both on private property. The one I've been to is quite tricky to shoot as it's surrounded by rubbish and has trees and a big hill right behind it. I don't know how to access the other one.
I only shoot 1 image as at 73yes old my P Shop skills are minimal >> I shoot with Z8 and Nikon Z 20 mm f1.8 s >> I can never get Light painting right (My Torch maybe too strong so I use a Godox V1 Flash on another Tripod off camera starting at 1/128 Power and eventually get it right = lovely lighting
Thanks as always for watching Peter. There are many ways to achieve a great image.