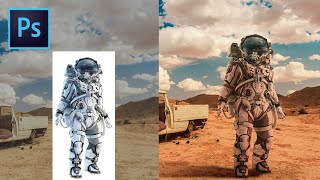
How to Change a Background Color in Photoshop

Vložit
- čas přidán 8. 02. 2023
- Check out Create Your Career: thebiteshot.com/create-your-c...
Getting Started in Capture One: • Capture One Getting St...
Previous video about cutting out subjects in Photoshop: • Editing Food in Photos...
Want to get started with Artificial Lighting? Check out our FREE mini course, to help you Pick Your Perfect Light at thebiteshot.com/pick-your-per...
Find more food photography resources at thebiteshot.com
Sign up for Joanie’s weekly food photography tips at thebiteshot.com/subscribe/
For a full listing of all my gear see thebiteshot.com/food-photogra...
Love a free workshop? We've got one coming up! Sign up here: thebiteshot.com/food-photogra...
Rather be reading? My latest book, Picture Perfect Food is at thebiteshot.com/picture-perfe...


For the background colour you can also create a colour fill layer instead of using the paint bucket tool. This way to change the colour you can double click the coulour icon and set it to whatever you want!
That's awesome! I think my hands auto-programmed to the paint bucket key, but for sure will give your method a whirl sometime.
Great tutorial Joanie!! Love that you are always ready to share your progress and technical skills with us ❤
You are so welcome!
Wild! Can't wait to try this, Joanie. Thank you! And congrats on the new course!
thank you so much Jackelin!!
Thank you! The method with shadow is very interesting
OMG that is just genius!!! If only I saw this before I entered my photo into the Pink Lady photographer competition!! Thanks so much Joanie!
How did you know I needed this tutorial? I was just going to explore how to do this and here you are Joanie with this video. Thank you so very much!!!
I love it when timing works like that!
Interesting approach! I personally sandwich my color layer in between the masked subject and the original photo, and apply a linear burn to the color layer. Looking forward to trying your technique and compare the results 😄
ah, very cool! love to know all the many ways to do things!
Amazing! I love the tutorial. Thank you very much Joanie :)
You are so welcome!
Um, this is epic. Thank you, thank you for doing such a detailed video on this Joanie!
Woot woot!! So glad to share!
This has to be my most repeated video on your channel haha. I refer back to it again and again! :)
Ha ha! Yes!!! So glad you find it helpful!
Love this lighting. Was this with a scrim?
Super Good!!!!
What’s the advantage of doing it this way vs just selecting the surface (including the cast shadow) and applying a solid color with blend mode like multiply? It would save a couple steps of creating a separate shadow layer and levels. Plus there’s no risk of having a seam of the shadow layer showing up.
Per Photoshop, lots of ways to get a thing done, right? But this does give an added level of control in the shadows, to isolate them, so if I want to desaturate a color cast in them, or lighten them up separately from affecting the whole scene.
i've tried this before, it's way easier if the cutout shape is "clean", and the object has strong contrast color with the inital background. I've took a picture of ginseng once and tried to change the background color, after a whole day of manipulating the selection with all the "smart selection tool" i gave up.....
can this be done in lightroom ?
There are some great color tools in Lightroom, for sure. Here's a tutorial that might help: czcams.com/video/0lCPsiCxShU/video.html
@@TheBiteShot thank you!