Do THIS to get SHARP photos EVERY time

Vložit
- čas přidán 30. 05. 2024
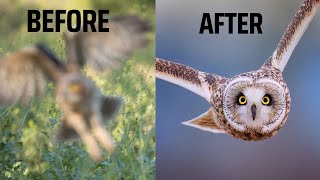
- Getting sharp photos is easier to achieve than you think, but it's important to use the right techniques which I discuss here.
Squarespace: www.squarespace.com/Nigel
CZcams viewers get $100 off Mastering the Art of Landscape Photography - www.nigeldanson.com/masterclass
New book Seascapes - geni.us/seascapes
A big thanks to Rick for the help with filming this video - / rickbebbington
Sign up for my newsletter - geni.us/nigelnewsletter
Where I get my AWESOME MUSIC - geni.us/amazing_music
Kase Filters (my fav filters) - geni.us/Kase | And use code NIGEL for 5% off
Instagram (follow my daily stories) - / nigel.danson
NIKON GEAR (Main STILLS camera)
Current landscape camera - Nikon Z7 - geni.us/nikonz7
Awesome telephoto lens - Nikon 70-200m f/2.8 - geni.us/nikon70200
Great ultra-wide angle lens - Nikon 14-30mm f/4 - geni.us/1430mm
Hiking mid lens - Nikon 24-70mm Z f4 - geni.us/nikon2470
Sharpest mid lens - Nikon 24-70mm Z f2.8 geni.us/2470mm28
Very long lens - Nikon 500mm F5.6 - geni.us/nikon500mm
FILM GEAR
AWESOME DRONE - geni.us/dji_mavic3
Nikon Z6 - geni.us/z6nikon
Nikon 20mm Z F1.8 - geni.us/nikon20mmz
Nikon 24mm Z F1.8 - geni.us/nikon24mm
Nikon 50mm Z F1.8 - geni.us/nikon50mmz
Nikon 85mm Z F1.8 - geni.us/nikon85mmz
OTHER PHOTO GEAR
Clever camera strap (peak design) - geni.us/PDstrap
Microfibre Cloths - geni.us/microfibre
Rab Downpour Pants - geni.us/rainpants
Awesome sensor brush - geni.us/brush4sensor
GorillaPod - geni.us/Kb9mV
The great printer I use Canon P1000 - geni.us/cIIc
Great bag for hiking - Tenba 24L - geni.us/orPwh
Great bag for travel (carry on) - Tenba 32L - geni.us/tenba32l
Super light Benro Travel Tripod UK - geni.us/Benrotravel
A must have for tripod (L bracket) - geni.us/myLbracket
Lightweight tripod - Benro Mach3 Carbon Fiber Tripod - geni.us/benromach3
Paper I use for all my prints - Fotospeed - geni.us/fotospeed Use DANSON10 to get 10% off your paper.


Nigel, really loved your simple, lucid & easy-to-understand steps to shoot sharp photos. No expensive equipment required, thank God! Thanks.
Another great video Nigel. I have dabbled in photography for years but only in the last year really got into it. Bought all the gear and not sure what to do with it. I am doing an online diploma but your videos are really informative and a great addition to my online course.
Great advice Nigel, as always! Thank you.
Thank you so much for posting this! I love your videos! You’re an amazing teacher!
Can’t wait to try out your pointers!
Thanks ever so much, Nigel. Clear and handy explanation.
Thank you so much for sharing your invaluable info on focusing, as always it’s an excellent watch!
So helpful, too, revisiting other videos you’ve done on this subject.
Many thanks Nigel.
Great video. Nigel packs a great deal of information into a short video. His explanations are accurate and concise - which I value.
Good advice. Thanks Nigel. Especially getting it right in camera - not using post processing sharpening.
I always learn something or reminded of something from you Nigel. Thanks🙂
THis is another great video, Nigel. You are an excellent teacher. I appreciate all you do. Thanks for your great content.
Thanks Nigel. Great information!! Thanks for sharing!
Great video as always Nigel, simply explained. Thank you
The images you've used as examples are stunning!!!
I've been following your career for several years now and you just keep getting better and better. Keep up the fantastic photography, mate. You are a wonderful shooter.
Fantastic explanation! Thank you for sharing!
Thanks for the great info Nigel.
I'm so glad I stumbled across your videos! Been telling everyone I know about them, very clear speaking and the information is valuable as well.
Great video, very easy to understand Nigel, thanks
This is a really good video for me, Nigel. Thanks for all you covered here. Cheers.
Thank you for sharing this information for us.
Great video, thanks Nigel.
Good advice, thanks Nigel.
Thanks very much...great info.
Love the colour and composition in his photographs! Thanks for bringing another great photographer to my attention😊
Thanks for leading us through sharpening as if it was as easy and sweet as cake! You are a natural teacher Nigel! Enjoy your shells on the Harris shore 🙂!
yes, he is an excellent teacher, and a wonderful content creator, his effort in production is unbeatable.
Really good points Nigel, thanks
Great update and something we were discussing whilst walking around taking photos yesterday. Thanks to you, I have also just taken the plunge on the Kase magnetic system and look forward to that. More of the same please. 👍👏
Brilliant video as always Nigel.
Great teaching session thanks very much
GR8 stuff- now to go and apply it !
Nicely done Nigel. Useful information presented clearly without any bias. You are a natural teacher.
Thanks Dennis
Nice Nigel. Sound information presented in a clear & easy to digest manner..👍 Looking forward to seeing the results of your month long project - beautiful location.
Wonderful tips as always!
Great tips, THANKS!
Amazing images on the intro to this Nigel, hope you have a great time on the Island this month.
Good video with excellent info for obtaining sharp photos!
Fab video. Thanks for the top tips
Another liked video. I think I've liked every one of your videos I've watched Nigel. Another really informative video with a lot of helpful tips. Thanks so much!!
Thank you so much. It was 👌
Very useful review, Nigel. One small additional point. Your discussion of movement centered on camera movement. In some compositions, there may also be an element of subject movement, such as reeds, wildflowers, leaves etc moving in the wind. Particularly if you are using a longer exposure to (intentionally) blur movement in water or the sky, but want the foreground to be sharp, you may need to take a second exposure at a faster shutter speed to freeze the motion of the foreground elements, and then blend the images in PS or similar. This strategy may incorporated when focus stacking.
Wow, this is great. Honestly learned so much, I was so focused on swapping from crop sensor to full for more “sharpness” but actually I just need to concentrate on using the camera /lenses are their best
Very nice, educational and balanced video.
excellent...small points we should know...but need to think more about during our shooting...thanks!
Thanks for the useful info. Fills in a few gaps in my knowledge.
Thank you for sharing
Love your advice. Simple, straight forward, easy to understand. I’m looking at purchasing a new Nikon z7II, but I’m going to try your advice first with my current Nikon D5000 and see how it goes. I’m a bit out of practice and I used to take really good photos with it, but lately it seems like the images have just been crap. Let’s see if I can take your advice and make it work with my current camera system. Then when I do upgrade, it will only make my images that much better.
nice how you explain things ,helped me
Thanks. Very very useful.
Lovely, concise video, Nigel, thanks. I love how you treat your images in LR and you are definitely right that images don't always have to be insanely sharp. I don't think you are correct, however, in saying that a lens is sharper wide open, I was brought up to believe that the mid range of the available apertures is usually best for the sharpest images, a rule of thumb is 3 stops ABOVE the widest aperture. Typically f/8 or f/11 on a full frame camera.
super tut and great photographs😊
Thank you!
Thanks. Good tip on the lens hood. I've never considered that before and tend to leave it on permanently normally.
Hmmm got some new information. Thanks buddy🤜
On PhotoPills after you put in the information in the DoF screen, you can hit the AR (augmented reality) and will actually show your scene from your viewpoint, and where each of the focusing distances is. It’s really cool and very helpful
Yes - great tip!
I just learned another thing…thank you!
Obviously shutter speed is the most miss-used setting, especially nowadays with very high MP sensors/cameras with 45-100mp...shutter speed is more important than ever, and too many people are shooting too slow of shutter speed's for their cameras. If you have a 36mp or higher sensor, I'd recommend doubling your normal or what you think you need, and then get a sharp shot, and then if you can, slowly work way down and see if you can Go lower. I see so many people shooting birds in flight at 1000th of a second or somewhere around there, when really you should be more at 3200th of a second or higher, unless it's a big slow moving bird...you could away with 1250th, but anyway great video. Aperture is probably the 2nd biggest issue that I see, but motion blur is a close 3rd. Anyways I would only add, take a few shots. Most cameras nowadays do 10fps or better and you don't need to spray and pray, but I recommend bursts if you are pushing the limits of the exposure triangle. Taking 2-5 shots in a row helps insure you'll get one or two sharp, even at lower than normal shutter speeds for your given situation. Obviously IBIS or in-body VR or lens based IS/VR really helps, I actually prefer fast glass and the Nikon D6 and D850, D500. I shoot so much in low light that I mostly use two D6's or a D6 and D5, but sometimes I prefer to have a D6 and D850 or D810. I just got a like new in box D810 with only 2,094 total shutter count, and it's a 2014-2015 era camera? For only $850 USD with 6-month warranty and it's a USA copy so can always get NPS service if I need or before they announce they have stopped servicing them?
Anyhow, great video, I didn't learn much, (but I'm a 20 year veteran photojournalist), so I didn't expect to learn much this time, but I definitely have learned from you in the past. I'm not a landscape photographer, but I obviously still shoot landscapes and I enjoy it, but I hate tripods and therefor I need really steady hands, fast glass and or great VR. Although I had a $1,800 USD tripod setup, I ended up selling it for half of what I paid for it. Just can't stand tripods these days, they just slow me down and make it more difficult for me. Thankfully I do own use my $900 Pro Media Gear monopod and RRS MH-01 monopod setup for instances where I'll be standing in one spot or shooting for a few hours! Like say at a sporting event...I'll use my 500mm f/4E VR FL or 180-400mm FL on my monopod. Those are both barely hand-holdable lenses at 3.2 kilos and 3.8 kilo?... and the 500mm FL is actually quite a bit lighter than the zoom! Plus it is sharper and brighter and it's easier to hold for longer. However, I obviously don't want to handhold these beasts always, but I did shoot an Airshow for 5 hours with my D6 and 500mm f/4...handheld the entire time. Big mistake, lol. It was much easier to track the fast fighter jets while hand-held, especially if they were high or right above us, it got tiring fast. However my back was out for days and it still gets reinsured at times, so I do regret all of the heavy weight I have to light constantly. My main bag with two bodies and three lenses is nearly 50 pounds. Many of my colleagues have switched to mirrorless, but very few of them have saved any weight or at least not enough for me to care or switch. I'm jealous of you landscape photographers who get to hike and see such beauty and only carry half or less of the weight, I need to carry, lol. All of the big brands, Nikon/Canon/Sony now make much lighter weight super-tele's, but few of them are any lighter than my 500FL and the Z9 is not much lighter than the D6 or D5/1Dx series. Image quality hasn't really improved any with mirrorless and although some features are game-changers, like 30fps RAW or 120fps JPEG in 11mp mode? So why don't I switch to mirrorless? Too expensive for the very little if any gains I'd see, and I've used the Z9 and although it was early on, it had much worse noise than my D6's. Nikon has obviously abandoned the flagship DSLR world behind, but thankfully the D6 is by far the best camera I've ever used, period. The D850 or Z8 would probably be my vote for second best cameras ever made, but that's just because I don't count Sony. I know people love their A1's and A7RIV's, and they do have amazing IQ and specs, but they are just so different from I am used to and or enjoy using. The Sony A9 II made my hand hurt and it was really uncomfortable to use for long periods of time. No offense, but it felt like a toy camera compared to the D5/D6. Anyways, long tangents there, but I do appreciate the channel and I think a lot of people will learn some important knowledge from this video, well done!
Awesome 👍
Good one Nigel, incidentally the photos you've shared from Harris are outstanding, what a superb location and boy did you do it justice! 😊
Good information about (not) sharpening photos in post processing, thanks!
One thing i missed is setting the camera or lens stabilisation to "off" when shooting from a tripod. It can strange enough create unsharpness and shifting your composition
Thanks Nigel for the video. Even with many years experience, it is still good to go over the basics every so often. A question: have you ever played with the "Diffraction Compensation" in the shooting menu on your Z camera?
Nicely told
Just had to Google where you are, I'm blown away!! With your location and your pictures, wow!
Very good video well done i learn a lot
Good information. Thanks, Nigel. “Image Stackingl! This is the answer to one of my questions I asked from a previous video 😊
bonjour nigel thank you for all vidéos,and for quality of each,i hope to go lewis and harris
Thanks!
Excellent video with tips for beginners and more experienced. I’ve been taking photos for 66 years but I have learned something from this video. Thanks Nigel!
Move along, folks, nothing to see here. I was a pro for something over 50years. Sure, when I was young and inexperienced I was onsessing
Great video as always mate
One tip on the tripod thing... if you have, say, a 4-section tripod (there are 4 leg segments), only extent the first three (from the top down) leave the last segment retracted, as that's usually the weakest section as it's the smallest in diameter). Also don't use your center column if you have one (if you must choose between the center column and the last leg segment for height reasons, use the last leg segment because the weight of the camera and the top part of the tripod will help stabilize it better than extending the center column (I would say don't use the center column at all if you can avoid it, and ideally, buy one without a center column, because even with some tripods with center columns, they can still wobble even when they are tightened down all the way). If you get a tripod with beefier legs, then it's less of a concern regarding extending all of the leg segments, but for travel tripods that are 4 and 5 segments and don't weight that much, then it's usually not a good idea to extend the last segment (but on something like a heavy-duty FLM tripod like the FLM 34 or 38, then it's not as much of an issue because it has beefy leg segments that are also carbon fiber).
Have to say that Photopills is well worth the $10 or $20 it costs. Very useful features, and even if you only one one or two features (like the DOF calculator), it's well worth it.
One thing about sharpness that some people also sort of forget is that in some cases, to show depth, you may NOT want a scene with a foreground, mid-ground, and background all completely tack sharp (i believe this was mentioned briefly with the woodland shot), so sometimes it's OK if the mountain isn't tack sharp, as long as it's acceptably sharp or slightly burred, because this gives the sense of depth. When you look at a grand scene like a mountain in the background with flowers in the foreground, your eyes cannot focus on both parts anyway, and if you COULD see both at the same time, it's unlikely that both are pin sharp (although your mind does constantly feed you information and "Trick" you into thinking they are, but they likely are NOT both pin sharp from your perception, in reality).
I know you didn't want to go into ISO, and that's understandable, but so people understand it doesn't impact sharpness in terms of detail, but if you have too much noise, you may need to apply noise reduction in post processing and that can (and usually does) reduce sharpness in many cases because the software has to blur the image slightly to cover the noise. But you're better off getting a sharp photo with noise, than a clean image that's not sharp to begin with.
... and don't hang bags from the tripod, they also move in the wind!
@@a.keithclarke7975 Or DO hang weights from the tripod because it keeps it steady, which is why a lot of them have hooks on the bottom of the centre column.
Well said!
Nice video. One thing I've found that makes a huge difference is choosing an appropriate shutter speed!
Thanks again for excellent advise. Enjoy Harris wish I was with you 🤔
Thank you for another excellent video. You did not mention something I have been using to determine depth of field - focus peaking. I’ve found if set my camera to auto and manual focus this seems to work pretty well and I don’t have to use an app on my phone and estimate distances. The convenience of his method makes me wonder if I am missing something.
I appreciate your clearly described advice. And your appropriately paced video session. I'm always trying for the very most detailed shots I can capture/produce. I can get creative with blur in post, but can't really do much in the reverse. 🙂 Applying too much sharpening later isn't satisfying.
great tips!
Great video
Thanks for the tips Nigel! One thing I sometimes hear is to use the electronic shutter to avoid vibration from the movement of the mechanical shutter. Would you recommend that or doesn't that really matter? What is your experience?
Thank you Nigel, great tips and thorough explanation. One other area I struggle with is getting my lens calibrated for the focus point (versus front/back focus). I have used the calibration tools but it is hard to ‘see’ the accuracy differences even when you purposely try to make it out of focus just to verify your calibration. Any tips on that for your viewers? Thank you, sir.
Great video again 😊
Thanks for another concise and informative vlog Nigel. Whilst this covers quite a bit of stuff that many people (should) know if they’ve been doing photography for any amount if time, I firmly believe there’s benefit in being reminded of stuff every now and then because we can all slip into bad habits without realising it. (Cue the disagreement from all the perfect photographers out there 😊). What’s your opinion on print output sharpening please? So far I’ve been applying some via Nik before sending my files to the print lab, and they do look great when they come back. Just wonder if it’s something you feel is necessary or not?
Some very good hints
Good Teacher
🇦🇺🇦🇺🇦🇺
Great video Nigel! I had a feeling that the focal length of the lens can affect the aperture range of focus! Looking at the barrels of old vintage Nikkor lenses, when they still indicated zone focus ranges, I do notice how different they are between my 24mm and 135mm. This makes sense now. Also, loved that ending - "I am going to shoot some shells on the shore". I will have a few pints and try repeating that phrase 10 times fast 😂🍻 cheers
You've forgot to mention to shut down lens stabelizers when using long exposures on a tripod. Leaving it on can result in doubles in the picture from the movement of the stabelizer.
Its amazing how many photographers today rely on iso and swear by using higher than 100 or even 64. Im from old school and we had to set ASA/ iso based on the film we were using. Pushing film was the technique. Too much luxury can make you lazy. Shoot like you are using film...it gets you thinking.
Over the pass year or so more and more I hear professional photographers mention not to worry about the sharpness but more of what you’re trying to tell as a story. Thanks for the tips, much appreciated
That's nonsense. They are probably losing their eyesight. You make a sharp image a little less sharp in software. Much better than trying to make a blurry image sharp. You didn't see the old greats using their huge view cameras going outdoors to take blurry photos, did you?
One important thing you forgot to mention for DSLR shooters is learning to use “Mirror Lockup” along with the shutter timer. Those two combined will help greatly with loss of sharpness from body movement esp mirror slap.
What is mirror lockup, never heard of that before
@@DenisMcCaul Read the manual!
@@DenisMcCaul The camera lifts the mirror up, like when you normally take a shot, but waits a while before taking the shot (or you have to trigger the shot yourself, preferably using a remote). This allows the vibrations from the mirror's movement to die down so that the shot is sharper. Of course, if you're using a mirrorless camera, this doesn't apply.
also shooting in Live View helps ......
Great video, even though I knew most of it, there were a couple of new things for me, and a good refresher anyway.
A certain photographer made me realise it's OK to despise tripods, haha. Just a small technical note though - ISO does reduce sharpness and detail on some cameras (Sonys especially) even in RAWs.
Love the way you pronounce aperture though. So posh, haha
For the megapixel discussion, the word you were looking for is sampling.
Of course more megapixels will allow more sharpness but only under a lot of circumstances we rarely met:
- The lens has to render a quality of image relative to the sampling. Else it'll be oversampled and will look blurry so less sharp.
- The way the image is presented has to allow to zoom into the details (crop, big print with short distance viewing)
So, if the image is undersampled, so that the lzns has produced a sharper image the sensor can render, the image will look pixelated so quite bad looking when zoomed or cropped.
If a quite static landscape is made, multiple images with slight camera displacements will allow the rendering of an higher sampled image. This is called dithering+drizzle.
Dithering is the technique of doing multiple image with slight displacements.
Drizzle is the algorithm allowing the production of an image with an higher resolution.
This has been added to recent cameras.
Astrophotographers does this since a decade :)
Mirror lock up is my key to success, combined with a remote. Settles down the vibrations a charm…when it’s not blowing a gale 😂
I know you are all about landscape and my hobby is 90% wildlife but never the less when someone says Do THIS to get SHARP photos EVERY time.", I'm watching! I've gone from D850 to Z9 in the last year. On the D850 with TC1.4 and 200-500 lens for 700mm, handheld I never went below 1/500th. Now, with the Z9 in body IS, I'm regularly shooting below 1/100th hand-held at 800mm! In body IS is a massive game changer. For landscape, I have a separate kit. Z5, 14-24 and 24-70. Your tips on getting full-field sharpness are much appreciated. I do use focus stacking too but great to learn how to minimize the need. Thanks for the PhotoPills tip. I purchased it. :)
Do agree on that. From what I can tell, the biggest difference was when stepping up from my old cam and lens (5D MkII - from 2008) to new gear (R6). New cameras with their AF and stabilisation certainly make a change. However, my old lenses on my new body also look way less sharp. Looks like lens tech has gone further! New glass really is worth it.
@@dabozzcrg Yes, I agree. The 800 I mentioned is the nikon Z mount 800 F6.3 PF. Definitely sharper than the older F mount 200-500.
I'd love to spend time in Scotland photographing. I'd imagine the possibilities are endless. Maybe this winter...
Nigel thank you for sharing. Would you please touch on camera style setting. On my Canon R5 I set mine to neutral after doing some research. I’m not sure I agree ! Love to hear your opinion on that. I think being able to shoot tack sharp is up to each photographer and it’s nice to know it can be achieved if that individual wants that. It’s easy to shoot pics slightly out of focus. With the high dollar cameras you kinda of gauge your skill and equipment shooting for which effect you are looking for. Thank again
VERY GOOD EXPLANATION VIDEO :)
THANK YOU FOR SHARING :)
THANK YOU FROM ISRAEL :)
Hi Nigel thnx foar this clear 'how to do' video. I was wondering what type / brand of (geared) head you're using on your tripod. Thnx
What ive found to be useful. If you're shooting on the beach, then bring a few blank CD's and place them at the feet of the tripod.
It drastically stops your tripod from sinking into the sand!
What are CDs? 🤔😂
I can recommend the C-grip style (when handling rifles) when shooting handheld with telephoto or longer lenses. That's what I teach some shaky photographers. And of course a stable stance and having 3 points of contact and all that. Pretty much like handling a firearm :P
Very good information in this video, however I find it interesting that the approach to sharpness depends on the type of photography you specialize in. Yes, everything you mentioned works well in landscape simply because you don't expect anything to move in your frame (Except on a windy day shooting in a wheat field... 😀). However one thing you didn't mention which is shutter speed. When you are a wild life photographer, a sport photographer, or even a wedding photographer, you find very quick that a low shutter speed can easily ruin your shot... 😉
Hello!
Notwithstanding my total appreciation for your precious suggestions, I'd like to stress a thing about ISO: higher ISO does not bring in more noise; that's not correct. In fact, the opposite is true.
If you shoot with all the same camera setting and increase the ISO, unless your highlights are out of range, the noise is going to be lower.
This question often brings confusion, because typically one also changes other parameters (shutter speed, above all) and that reduces the amount of collected light, and that's why the final signal-to-noise ratio decreases.
Don't you agree?
There are two things that increase noise: Under exposed shadows will show increased noise. The higher the ISO the more noise. I'm confused how you can keep shutter/aperture the same, increase ISO and still have a correctly exposed image.
@@brianjones5535
OK. Maybe I see your point, but I’d say so (trying to be brief): underexposed shadows show “relatively” increased noise; actually, their noise is lower, because they bring less photon noise and the readout noise of the camera is the same (at fixed ISO). BUT also the “good” signal photons are less (and they decrease with a steeper trend), thus the signal-to-noise ratio (SNR) is lower and that’s why those regions look noisier.
Being less brief…
For the aspect of correct exposition, let me depict a scenario. Imagine you have a certain range of light levels you want to be acquired as well as possible, let’s say 3 stops from the darkest to the lightest thing you’re interested in. Then it’ll depend on your priorities for the shot, but let’s put you want a fixed aperture and let’s say that without any adjustments your highlights are slightly below the middle of your available dynamic range. Then, I think that you can do either of two things to seize the entire range, you double either the exposure time or your ISO.
In the first case the “ISO” noise will stay the same, your photon signal will be almost twice as much, your photon noise will be at least square root of 2 times as much (I say “at least” because in reality, especially in dark scenes, there could be significant contributions by light pollution and by the dark current of each pixel, which is proportional to exposure time). So, yes, if you’re not in extreme conditions, your SNR will be slightly higher (i.e. better), probably by a factor slight lower than square root of 2.
BUT if for instance you can’t increase the shutter time (typically because of the relative speed of your subject), I argue that you’d better increase the ISO. That not only won’t increase noise, but it will reduce it, instead. And that’s particularly true if you have a less ISO-invariant sensor (like most of Canon cameras have). With higher ISO, readout noise will be lower, while all other noise sources will be the same, thus also in this case your SNR will be higher.
Anyway, the decreasing trend of noise vs ISO is a scientifically known fact; if you don’t believe me you can take a look at photnstophots.net.
And what do you think of the above, is it so wrong?
(sorry for my bad English)
You can also invest some money in MC - 50 cable release trigger.
Depth Of Field is also impacted by sensor resolution. More specifically the pixel size on your sensor ( which translates to the minimum viewing distance for an image of a specific size ). Photopills also allows you to enter the print size and viewing distance, as well as visual acuity under the Advanced tab. I find the Photopills assumption for the Circle of Confusion for my camera to be about 6 times larger than what the camera will support. This translates to a much larger DOF than what I can get in practice, resulting in images far less sharp than what the camera can deliver at 300 dpi. I do agree, not all images need to be sharp front to back, or corner to corner, and having the most convenient lens is often better than the sharpest lens. Thanks for the video.
Actually, it's a characteristic of digital cameras but dof as a function of aperture, focal length and distance to the object are independent of camera type. The remaining points derives from the fact "being in focus" is not mathematically described without uncertain since it depends upon the human judgment
@@raphaelcoelho1557 it’s a bit more scientific than that, but you do need to make a determination about human visual acuity, viewing distance, and image size. You can also choose to put constraints on viewing distance based on human peripheral range. The limitation for all of this, however, is the resolution and sensor size. I use a high resolution camera because I typically (and a lot of viewers) inspect large images hanging on the wall at close distances.
The sensor has absolutely no determination of depth of field. As Raphael states, aperture, focal length and camera to object distance. Nothing whatsoever effects DoF.
@@brianjones5535 you are correct only if you assume images from a 6 MP sensor and a 60 MP sensor will be viewed at the same distance (and that distance will be far enough that human visual acuity won’t make a difference in the sharpness between images). I submit that a 2 meter, 60 MP image will support a closer viewing distance than a 2 meter 6 MP image, therefore it will support a smaller CoC. A smaller CoC, by definition, results in a shallower Depth of Field. Without trying to explain the calculations here, you can just go into the Advanced section of the PhotoPills DOF tool and adjust parameters to prove this to yourself. I use a high resolution sensor and premium glass so that my large images can be viewed at close distances. This, sometimes, requires focus stacking to take full advantage of the higher sensor resolution and compensate for the shallower DOF - more often than would be necessary to take full advantage of a lower resolution sensor.
@@davidligon6088 I'm not sure what you are saying. Are you saying that if you make prints 2 metres in size the print from the 6MP will have a different DoF from the 60MP print? That is incorrect. Because the 6MP sensor has recorded less data the print might appear overall softer/less defined than the 60MP print but the actual DoF is identical. The interaction of Aperture/focal length/distance to object are the ONLY criteria that effect DoF. No Matter what focal length lens you use, if the subject is the same size on the sensor, ie you change camera to object distance to acheive this, the DoF will remain the same.
Good video 👌👌
I shoot with a Canon 5DSR and shooting landscapes in good dailight and ISO 500 to ISO 800 Improves the Dynamic Range dramatically without adding any noise.