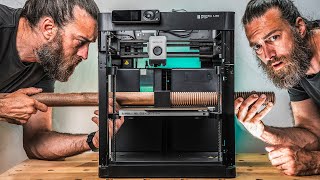
Inserting Magnets has never been easier with this 3D Printed Tool

Vložit
- čas přidán 11. 09. 2024
- Inserting magnets can be a Challange. This 3D Printed Tool was designed to fix this.
pick up and place magnets easily with one hand.
If you want to support my work become a Patreon:
/ emgi3d
Download the STL files for free here
Printables:
www.printables...
Makerworld:
makerworld.com...


Hey all. Im currently working on a improved Version with magazine and automated reloading. If you are interested consider leaving a sub to also support my channel!
Nifty! FWIW, if you dig into how a 'MagSwitch' works, you could probably make it work even better.
Liked and subbed! I'm printing two of these for myself right now. Just finished the second plate of black parts, now to do the red.
You bet I've subbed!
Good job. But that's a little too complicated. I use a capped thick plastic straw with a wooden stick inside to which I glued a small magnet. It works great for magnets that are wider than the straw. That gives me a lot of visibility and maneuverability when placing magnets in tight spaces.
The new Milwaukee magnet inserter is pretty cool.
I looked this up and still dont quite know what you are talking about. Are these magnetic bits or like the little guides to align them or something else?
@@calebkierum6871 I was referencing how the design looks kind of like a power tool 😁
I actually checked out some powertools to get some Inspiration for the Design 😄
@@EmGi_ well it definitely shows 😁 nice work.
Nice idea, I make tolerances tight then use a long hex screwdriver bit upside down in my drill press. Stick a stack of magnets to it then use the drill press to force them in. No glue, no mess magnets all oriented correctly.
Saying "you have no idea how much I waited for such tool" woud me missleading as you clearly know.... thank you so much for that project! That is a great help.
Im glad you like it!
i usually just hold the stack of magnets and slide them off into the holes they need to go in. i also usually just make the tolerances tight so they stick in by friction, and print over them to secure them in the print. no glue needed
This is the way
Great idea. If it had a "magazine" and a smaller tip it'd be a total game changer for me. Perhaps a solenoid could simplify the design.
I Tried to somehow include a magazine but i couldnt figure out a simple solution. I have a concept for a standalone magazine that separates the magnets so i can Pick them up from there easily but its still a early concept and im not Sure if it will work that way
Perhaps making it more complex could simplify the design? How would that work?
Pez dispenser for inspiration....
@BrandonWhipp Tried that lmao. But the problem with that is the magnetic force between the magnets. The Magnet that gets dispended from the magazine gets attracted more to the magazine as they have a huge magnetic force compared to the Single pickup magnet
Maybe something more like a stapler than a pez. Rather than pushing down to activate it, you squeeze and a protrusion pushes the last magnet off the stack and kicks it out. Then you can quickly dispense multiple magnets and line them up to use with your current tool. Or if you want it all in 1, it would kick 1 magnet into a chamber while pushing the magnet that was just in the chamber out and into the spot it belongs.
Nice tool, Looks like you could taper the aplication end since the mechanism inside is rotational and could make it more narrow as well. You could also line the inside with copper in the areas you dont want the magnets to affect each other. Now you just need a pezz dispensor like tool for the magnets. I'll definately be printing some of these for our maker space.
Thanks.
As there is only one magnet now - couldn't the mechanism be simplified even more, so you just lift the magnet away instead of rotating it away?
That way you could design the tip of the tool much smaller to reach better into corners.
Good point. I had that on my mind as well and did some tests. But just lifting the Magnet with that setup did Not Interrupt the magnetic force enough to let the loose Magnet go. I think because of the Rotating motion like it currently is it Kinda destroys the Force between the 2 magnets better compared to just Lifting it up. Lifting the Magnet up enough would Require more motion but that felt unnatural to move the thumb that much. Using internal gears could be the solution to increase the Distance. That might be someting for a v2.
@@EmGi_well your design presses the magnet down into the glue and that’s a plus you can’t be sure to get with the lifting mechanism
Was thinking the same thing - the magnetic depth gauge holders for CNC work like this
Yeah, this needs a magazine system, that would allow you to use different sizes as well as lay down magnets in quick succession.
Make the magnet slot the correct size, so that they are tight. Use a flat piece of metal and press the magnet into the slot.
I love magnets and 3D Printing so this was a good video for me 👍🏻 Looking forward to the V2 autoloader 😉
Bau die Technik von einem Kugelschreiber nach. Du kannst ja die Abstände der Magneten zueinander bestimmen und somit kannst du eine Feder wählen die ausreichend Kraft hat die Magnete zu trennen.😊
Nice. I've just been using two magnets with opposite polarity glued to the bottoms of chopsticks with the right color marks on them to tell me which is up and which is down. No way to let them go, but the magnets doing to picking up are the tiniest ones I could get, so they barely stick at all.
Excellent piece of work.
Looking forward to future iterations.
You might be able to use the two magnet approach for the mechanism if you add a third lobe (without a magnet) to the structure so that the repelling magnet is the mid point of the mechanism travel, rather than an end. Once you seat the magnet, pressing the actuator would rotate to the repelling magnet, pushing the payload down into the work piece, before rotating away just like the carrier magnet, up into the body of the device. That said, it certainly looks like the one magnet approach is working well.
Interesting idea. But i think that would Require the rotating piece to be able to rotate 180 degrees. With the current Design of the actuator of just pushing/pulling i can achieve about 90 degrees so that would need a redesign of that mechanism as well. But great take. I didnt even had that concept in my mind
You need a PEZ-like dispenser to pass the magnets from the stack to the insertion tool. Also thumb activated. :)
Very cool invention! I have just recently started 3D printing, but have already experienced the superglue-on-fingers-magnet-not-in-place-syndrome. I will print this one of these days for sure. Thank you for sharing!
Thank you for the tool!
Looks really good. Maybe another iteration would be to make the tip cover only just large enough to fit the clearances required by the moving internal mechanism.
Loved it, I do use magnets in a lot of project I will probably this one for myself thank you very much, nice solution.
Nice, I will probably need this eventually.
I use “Gridfinity Pressure Fit Magnet Jig” by Software2 on Printables for this purpose. Its benefit is that it holds a magnet in place and I can whack it with a hammer to friction-fit the magnet into place. I have two of them in opposite polarities. I use them frequently for Gridfinity trays and bins so I’ve labeled my two tools accordingly. Also I determined the ideal diameter and depth for the 6x2 magnets I use so that I get a tight friction fit and don’t need any glue. Before that it was utter chaos, exactly as you describe in the beginning of your video!
The problem I have using magnets is getting the hole size just right. I have been pausing the print, adding the magnets, then printing over them. If the hole is too big, the magnet rattles around a little after encased. They don't pop out because the parts are thin so they are attracted to the build plate more than the print head. I could use glue, but I didn't want to try messing w/ that on the build plate. If the holes are too small, I can't get the magnets in! I hate trying to push down real hard on the bed. Worst part is, the holes don't print consistently. If there are 4 on a part, 3 are really nice and the 4th is too tight, even though they are all the 'same'. Even between prints they vary. 1 print they can all work well, the next...some may be tight or loose.
I love the pause method! I'm not sure why people use glue so much for magnets on flat designs that could easily be printed over.
If you haven't already, you may need to measure the magnets with a caliper and make sure they're consistent. That helped me get the holes just right, adding a 0.2mm margin. They pop right in with no resistance and no rattle. Of course, YMMV with your setup. The inconsistency you're seeing could be caused by many things. What printer and nozzle? I have Prusa MK4 and I've only used 0.4mm for prints with magnets.
@@PilotA51 I haven't measured each and every magnet, but it could be the difference rather than the print....though if I have 4 holes on a piece, it seems like it's usually the same one that's always tight, so the chances of me putting a bigger magnet in that one every time is unlikely. I'd say it has something to do w/ how the print head moves in that particular orientation giving a slight error. I'm using a Bambu P1S, .4mm nozzle. I'd rather have them a touch loose than too tight because I hate pushing down hard on the bed, even if I support under it w/ my other hand.
@@Dave_D. Yeah, I think you need to adjust the hole size slightly in 0.1 or 0.2 increments until it stops being a problem. It took me a few prints to get a size I was happy with.
@@PilotA51 I've done that. I got to where I was happy with it but sometimes it just makes it a hair big or small. I settled on a slightly larger hole than I want because I'd rather it be a touch loose than too tight.
I also like to use magnets in my designs, but most of the times i make the holes to be press-fit and push magnets there without glue.
But that works good only for magnets that have some height, flat ones have not enough wall surface to hold properly. Another approach is to conceal magnets behind the single layer and put them from the bottom or through the slot on the side.
Also in my current project i designed magnetic connectors where magnets serve as self-locking contacts that connect two wires and conduct electricity. Also the polarities are arranged in such way that connector (it's round) will lock only in correct position, otherwise most magnets repel each other.
About your design, what if you make a place that holds the magnet the exact diameter as the magnet you are incerting? That way in can push the magnet into a hole and hold it in place. The magnet inside then goes in the cylinder up and down in a linear motion in order to have enough distance to disengage. It's obviously should be a magnet with smaller diameter to fit inside a column, so to compensate on magnetic force it cold be a tall cylinder magnet. Also i think it's possible to rotate this magnet 180 degrees in order to have two polarities in one device. A magazine with other magnets can go paralel to the cylinder, on a distance where their field don't affect the work area. And with a separate push lever you can slide the magnets to the side from the column and push them to the holding place by a long narrow channel.
Hope i described it clear enough with the words, sadly I can't add a sketch to the comment
I can see how you could improve this design and make it as skinny as the magnet inside. It would be the size of a pen. Just make the mekanism be a single shaft that you lift instead of pushing down.
Also, if you dont want to pull the trigger up, you could have a spring and just let it go.
Also, on the matter of separating the magnet from the stack, you could make a small lip on the tip that you run the magnet stack into, and it separates them while also sticking hte separated one to the tip.
Love it.
Some suggestions for design improvements:
Use a slightly larger magnet in the tool so you can avoid the magnet-on-magnet contact but still guarantee the polarity when grabbing a new magnet. Then design a more narrow tool face to act as a press to insert the magnet, just big enough to hold the desired size of magnet. (Heads even be swappable, and tuned for various magnet sizes /strengths) Your lever would then be used to pull the larger magnet a little further away in a linear path, breaking the magnetic connection and not rotating the magnetic field and risking a magnet flip.
Also, a small rubber band inside to hold the tool in the 'open' position and help it return automatically.
Thank you for These suggestions. I started Working on a v2 already an will consider some of These
IMPRESSIVE!!
Nice 😎 Congratulations on your exciting idea 👍
Hi EmGi, this is really great, I love great design ideas, but even more I like the way you show us how your idea evolved. This is fantastic and way more useful, because it shows that many issues only become clear by getting involved in the process, but of course you will also inspire others to do the same. I look forward to your future videos, especially if this is a forebode of the kind of stuff you intend to show to us. Thanks a stack! Jan
Thank you :)
Magnets are awesome!
Awesome idea and execution. I also like the added details for aesthetics...it looks really cool. Really nice...subscribed!
Finally someone appreciating the aesthetics 😄 thank you!
Awesome idea. Thanks!
Awesome idea!
Looking forward to the next iterations with a magazine! 🦾🤩
Keep it up!
Just design your magent pockets hexagon shaped. Provides much better clamp forces, just push them in, no glue needed.
Thank you. I didn't know I needed this until I saw the video
I think the 'two magnet' variant would be a good option to have.
Because then you can have both polarities in one device, you just need to label that 'Up' is plus and "Down' is negative. Because you can still 'pick and place' with the other magnet with the plunger down, and just pull 'up' to remove the magnet.
could have the rotator as a T, or just a bar with magnets on either end, then have two buttons, one to turn it with the P polarity down, and one to turn it to the N polarity down, and spring loaded it so it always pops back up to neutral position with no magnet down..
Interesting. I always just made the 8x2 magnet friction fit into the print and made a cylinder that holds a magnet in each end, that then drives another magnet, or stack of magnets into the recess.
Interesting invention and great design.
I created my own much simpler solution while working on magnetic letter blocks for my nephew a few weeks ago and it seems to work just as well. It's just a 25x25x5mm block with a 10x3mm magnet embedded in the middle (inserted during pause, so no glue needed) and red N and blue S text modifiers on the top and bottom. It's super compact and easy to use, just slide horizontally to release the magnet once it's in place, much like you found you had to do to prevent the magnet from flipping and jumping back to the tool. Is the reverse magnet even necessary if you have to do the slide release anyway or is that mostly to press it into the glue? So far I've only done fully embedded magnets without glue.
I haven't published it yet. One of these days I will. I think I explained it well enough that you could easily create it yourself.
I like this. I have superglued too many magnets to my fingers! The need for two tools for different polarities seems a bit excessive. If there was a way to do that in one tool instead - swappable heads, for example (which fix on with magnets!). Keep going with this. It’s developing really nicely.
Really cool, cant wait to watch more videos of yours
Are you using stock blender or any specific workflow for creating functional parts? Great video!
Thank you. Yes im using Stock Blender which it not the Best Tool for those kind of mechanical parts to be honest but im somehow still faster with Blender compared to traditional CAD Software. Especially when Prototypying. The workflow simplified is that i try to avoid the Scaling function as much as i can because i cant get good measures using the scale function. There is a function in Blender that can Show the length of a edge in milimeters (or other units) which is really important for Checking and adjusting measurements. The Rest is moving faces and alot of boolean Operations
THX a lot for making and sharing mate, much appresiated! 👍😀
This is so so good!!
New sub here, that looks cool!!!!
I've never had an issue with magnet polarity since you can just stick a magnet to an adjacent magnet and then slide it over (saw Martin from Wintergatan do that, even if it ended up not being what he really needed SuperVinlin) only real issue I've had is the magnets staying in (without glue) with my new printer that prints the edges of the holes so fast they become circular..
if you ever seen pez dispenser it would be perfect to speed up getting those magmets one by one
Really cool idea. Thanks for sharing!
Great work!
Well done! Such a recognisable problem :))
@06:05 Why make the bottom so large to begin with instead of just barely larger than the size of the Magnet? Would increase the visibility during the placement.
I'd perhaps also consider changing the Activation Mechanism from a Thumb to a Trigger Finger activated one thus allowing the Thumb to be used for when you want to press-fit Magnets into Place.
Thanks for your input. it needed to be that big for the first concept with the 2 magnets inside as they need room to rotate. but you are right. now that im only using 1 magnet on the inside i could make one side of the tip way smaller. Thats probably something for a v2 of this tool.
it can be activated with the trigger finger as well. i noticed that im actually using the trigger finger most of the time. But you probably mean the case to look something like a pistol so the thumb is free?
This is exactly what I've been looking for. I need one for 6x2mm
there were many requests for 6x2. i ordered some and will test if it will work with them as well and then upload those files to the printables page
@@EmGi_ also, any idea if this model would work for 5x3?
Depends on the strength of the Magnet. If its too strong it might not let go of it
i kinda wonder if can somehow be upgrade to accommodate different sizes without the need to building multiples for varying magnet sizes. i would also imagine having a stack of magnets being fed into the device like a magazine of sorts
i tested it afterwards and if you build the device with a 5x1, 6x2 or 8x2 magnet on the inside it works with the other sizes as well. so you just need one device for each side of the magnet. but i wanted to offer diffrent sizes so people who own 6x2 magnets for example dont have to order 5x1 magnets if they never use them.
im currently working on a v2 with magazine. im facing some problems with the reliability of the magazine feeder but i hope i can get it to work soon.
This would be a big hit on makerworld, you'd get points to use to buy filament, printers, etc. too :D
does it make sense to use makerworld without owning a bambulab? i had the impression that print profiles are very popular there and without a bambulab printer i cant upload any useful print profiles
Larger internal magnet(s) might allow a longer tip that gets in corners better?
cool idea either way. Subscribed!
"design", in Fachkreisen auch Future-Knick genannt^^
How about seating the magnets with a friction fit and use a magnet on a stick for orientation 😁
Still an interesting idea
I never had good experiences with friction fits. Might be my fault or the fault of my previous Printers that traumatized me for life 😶
Brilliant 👍
very cool but only for flat surfaces
would a longer tube that the working magnet travels thru help? It would also pull up straight.
Did anybody else notice one magnet flip over at 4:30? 😳
When doing the stress test, how was your finger? Just looking at the tool, it might be a good idea to instead design it so that you would squeeze it to activate the switch mechanism instead of the finger plunger.
No sign of exhaustion in my Fingers even After multiple Tests. But squeezing to activate sounds like an interesting concept as well
Really Awesome
cool video, could please you make a video how you have configured Blender and what addons do you use for you creations , or if you know a good site for it , thanks! :)
That's really cool. Nice design.
Perhaps look at a pezz dispenser as inspiration for loading magnets onto the tool
Adding the Pez dispenser design so no one by one handling?
Most people doing this use a small press. They put a stack of magnets on the end (since it's made of metal) and go to town. They're cheap too.
Link?
impressive
Overengineering at it best
It's 🤓
Looks like you use more tolerance around the edges of the magnets than most. How much tolerance do you like to use?
For 5mm magnets i use 5.5 or 6mm holes. But not for any specific reason to be honest. I Noticed that my printer prints small holes smaller than they should be so i make them slightly bigger
brilliant
Maybe I missed it in the video, but... How do you do the magnets of the opposite side? You'll need the other polarity. Do you just use a second device?
Yes. At 5:00 im mentioning that i need another device for the other Polarity (Blue device)
lol, when I saw the first design I thought it was a pez dispenser
Good Idea, great design, but the blue one is unnecessary because you could just use the red one in reverse order. Anyways, nice vid.
That wouldn't work - there is only one magnet inside the tool (see at 3:25), so when the lever is pressed, no magnets will stuck at all.
That was the Intention in the beginning but as @Apokalyptika91 mentioned i had to change the Design to one magnet
Make it so you can load it with a stack of magnets?
This is awesome; where are you getting your magnets from?
5x1 omicube neodym magnets from amazon
Brilliant‼️👍😃👏👏
Wunderbar!
10 Magnete pro Ziffer verschendet, was man auch mit einer gedruckten Feder und Nocken hätte lösen können :)
*20
Neat design... But where can we get that dial counter???
Thanks. The counter is a part of a Project thats not released yet
@@EmGi_ I look forward to seeing it, so I'll subscribe and come back to see what other cool stuff you're cooking up too 🖖
How do you manage dimensional accuracy in Blender ?
Blender has a built in function to measure edge lengths. I built my workflow mainly around that.
Do you have a link for the first counter model you showed as an example?
Currently not. Its part of a unfinished project
@@EmGi_ thanks for the reply I'll sub and hope for an update. Was looking to make a mechanical version of the same thing but this seems like a very simple solution
Do you have an email for the CZcams channel? I have an idea I wanted to share that you could do... It may be out of your price range. I'm too broke to do it myself.
Yes you can find my mail on my channel page under the channel infos
Excellent work
So slow.
Should work a bit lile a PEZ dispenser.
Is there a link for the magnet life counter?
What Life counter?
@@EmGi_ The one you start the video with, at 0:04.
My Bad. Its part of a Project thats not Finished yet
coool!
This would have been better if it also dispensed the magnets.
Your voice sounds strangely compressed up to compromised.
i recorded with my phone mic. i dont have a better one at the moment
epic
Nonsens.
This could've been done with a far simpler design. A simple tube with a simple spring-loaded plunger with a magnet at the end. Think of a simple click/retract pen. It would've been two parts plus a spring and the tip would be far narrower. The design in this video is massive overkill.
I didn't realize this was an issue. I make the magnet holes slightly undersized, so they press in snug with a drop of CA. This device is over kill and over complicates the insertion and use of magnets.
For every small inconvenience that someone may or may not experience in their life there will most certainly be an over engineered mechanism to solve that nonissue.
Bros get off the high horse, what if you print someone else's design and the tolerances are off, what if your printer sucks, what if your magnets aren't precisely manufactured, what if a device like this helps a lot of people save a lot of time, you're not alone in the world and this comment is toughtless
@@karmapolice9477or handicapped! This would be great for this with manual dexterity issues.
@@karmapolice9477 I will say I agree with the original comment that I also had no idea that this was a problem for some people. I do the same thing but I also use a stack of magnets the press it in then just slide the other magnets off to the side. It’s always worked for me and for me there is no use for this. That being said this falls into the category of a mechanism that, for most people takes up more space than it’s worth. That’s not to say that it’s not valuable to some but it’s most likely not useful to most. I could see a person with one hand or some other birth defect effecting their extremity finding this very useful. That means that yes you are correct that people will find this useful, but the original point is still valid for the majority of people.
@@atillathehung2000 I agree with your comment, but the proverb about nonissues felt gratuitous to me here
could you sound like you care about your video?
could you shut up for once
my next print for sure
Brilliant!