IoT Smart Home project using ESP32 Blynk control relay with WiFi + Manual Switch - 2021

Vložit
- čas přidán 5. 11. 2021
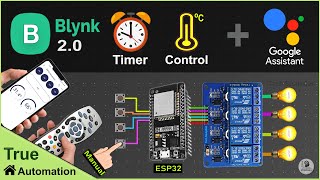
- In this ESP32 project, I have explained how to make an IoT Smart Home project using ESP32 Blynk to control relays with Wi-Fi and manual switch. with this internet of things home automation system, you can also monitor the real-time feedback and control the appliances manually without internet.
PCBA from $0 (Free Setup, Free Stencil) jlcpcb.com/RHS
Download PCB Gerber file for the ESP32 IoT based home automation project
drive.google.com/uc?export=do...
For this ESP32 project, I have used the FREE plan of the Blynk IoT platform.
During the Blynk IoT tutorial video, I have covered the following topics:
00:35 Required Components for this Blynk ESP32 IoT project.
01:09 Circuit of the ESP32 Home Automation system.
03:00 Program the ESP32 with Arduino IDE
04:21 Set up Blynk cloud account, Web Dashboard.
07:02 Connect ESP32 with Blynk cloud account.
07:59 Setup Blynk IoT application Mobile Dashboard.
09:10 Control relays from Blynk App and switches.
Required Components for this ESP32 home automation system
1. ESP32 DEV KIT V1
2. 8-channel 5V SPDT Relay Module
3. Latched switches or Push Button
Amazon India Affiliate links:
ESP32 DEV KIT V1 : amzn.to/331pohb
8-channel 5V Relay Module : amzn.to/3mTWyVZ
Amazon United States Affiliate links:
ESP32 DEV KIT V1 : amzn.to/3mBjCch
8-channel 5V Relay Module : amzn.to/3p50UeH
Required Components for the Smart Relay Module PCB:
1. Relays 5v (SPDT) (8 no)
2. BC547 Transistors (8 no)
3. PC817 Optocuplors (8 no)
4. 510-ohm 0.25-watt Resistor (8 no)
5. 1k 0.25-watt Resistors (10 no)
6. LED 5-mm (10 no)
7. 1N4007 Diodes (8 no)
8. Push Buttons (8 no)
9. Terminal Connectors
10. Jumper (2 no)
11. 5V DC supply
------Important points for this ESP32 project:------
1. After compiling the code, you have to press and hold the BOOT button of ESP32 until the code starts uploading.
2. Install the correct version of the ESP32 board and Blynk library as mentioned in the code.
3. Please take proper safety precautions while working with high voltage.
-----------Related Previous Video Links:------------
Create New Template, DataStreams in Blynk Cloud account
• Home Automation using ...
Steps to program ESP32 with Arduino IDE
• Programming NodeMCU ES...
----------Codes----------
Download Code for this Blynk ESP32 control relays from the following article
iotcircuithub.com/iot-smart-h...
#smarthome #esp32 #blynk
-------------------------------------------------------
Thanks For Watching...
✅ SUBSCRIBE ✅LIKE ✅SHARE ✅ COMMENTS
Find out more such projects: iotcircuithub.com/
Facebook: / techstudycell
Instagram: / techstudycell
Telegram: t.me/techstudycell/
Twitter: / techstudycell
-------------------------------------------------------
Other useful ESP32 home automation projects:
Latest ESP32 projects playlist:
• ESP32 Projects
Latest NodeMCU projects playlist:
• NodeMCU Projects
Smart Home using Arduino IoT Cloud ESP32 Alexa control relay with IR remote
• Arduino IoT Cloud ESP3...


bro, but how can you control the through mobile without internet ? is there way to build a offline mobile app?
can i connect this with amazon alexa for free??
How can I delete my previous wifi?
Same project nodeMCU(esp8266)
How to change WiFi and password in esp 32
Sir blynk iot app par agr account banate h first time to 8 relay switch ka free plan kitne days ke lea valied hota h
Woahhh👏👏 Bro, Can u please make a base board of this that is ready to be installed behind the switch board because the esp32 or node MCU also need their own power supply I am sort of confused on how to do this without the need to use a charger and connect to the socket.
Could someone tell me if this works with the esp8266 too ?
can anybody tell esp32 is not getting wifi after try to connect different wifi
Could u make a device for me
@Tech StudyCell sir what do I need to change in sketch to use touch switch using tp223 instead of push button?
Excuse me, this concerns my college project too. please help, can the manual switch work using time. for example, the manual switch is pressed, the light turns on after a count of 5 seconds or vice versa.
sir are data stream and double data stream same?
Have a little question.
Great project
Is it possible if I will use esp32, 5V 8 channel relay, 12V battery supply to control the solenoid water valve using blynk 2.0?
I want this project without blynk app fully control as amazon alexa or Google assistant any idea for you
'BLYNK_FIRMWARE_TYPE' was not declared in this scope - Hi, how do I fix this error ? (in the Console.h tab)
How is your approach if switches are distributed
HI,