CAN-BUS Explained | B-CAN Diagnosis | Test B-CAN with Multimeter & Oscilloscope

Vložit
- čas přidán 5. 09. 2024
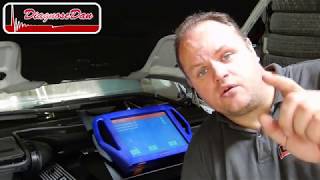
- In this video I explain the B-CAN BUS Diagnostics. In Part 1 I explained the C-CAN (High-Speed CAN-BUS) and how to diagnose that network. In part 2 (This video) I explain the B-CAN (Body CAN or Low Speed CAN-BUS). I Explain what B-CAN is, where you can find it on the car, I explain the wiring diagram, the I show you the main points of the B-CAN to perform the diagnosis, I test the B-CAN with a multimeter, the I show you how to read the B-CAN waveform using an oscilloscope. Then I set a fault on B-CAN to show you how network functions in case of any fault.
You may watch the Part 1 of CAN-BUS diagnostics in the link below:
CAN-BUS Explained | Everything You Need to Know About CAN-BUS | CAN-Bus Diagnostics & How It Works
• CAN-BUS Explained | Ev...
You might be also interested to watch the following videos for other networks in cars:
LIN Bus Explained | Everything You Need to Know about LIN BUS | Local Interconnect Network
• LIN Bus Explained | Ev...
K-Line vs LIN-Bus | K-Line Explained:
• K-Line vs LIN-Bus | K-...
Join the channel for more videos and more support:
/ @automotivediagnosis
Please follow us on the following social media too:
/ autodiag001
/ automotivediagnosis
fix-it-first.com
#canbus
#network #bcm #instrumentcluster #oscilloscope
Disclaimer:
Any information contained in this video is just the understanding of “Automotive Diagnosis: Cars Repair & Training Guides” and it is not an official guide or reference, so everything provided in this video is just a share of our experience and understanding and they are provided as a courtesy for your reference only. So, if you are using any part of this video, use the information at your own risk. We highly advise you to check the manufacturer owner’s manual before performing any act of removal, diagnosis, inspection, or repair on your car to know about what you are authorized to do on your car, what the correct and legal procedure is and what risks might be involved, also viewers are strongly advised to consult a licensed person before any sort of inspection or repair. Due to the factors beyond the control of “Automotive Diagnosis: Cars Repair & Training Guides”, we cannot guarantee against improper use of information or tools or systems, or the procedure provided. “Automotive Diagnosis: Cars Repair & Training Guides” disclaims any damage, injury or loss caused by your decision to follow the steps provided in this video.


You can Watch the Part 1 of this video on the link below:
CAN-BUS Explained | Everything You Need to Know About CAN-BUS
czcams.com/video/bvyHx-C2Xfs/video.html
Thanks for the video 😊
Can you please make some videos of, how you setup the scope, settings for measuring CANBUS
Sure my friend. I’m making another video for CAN-BUS diagnostic, so, I will explain how to set up the scope on that video.
Thanks for sharing
Thanks for watching 🙏🙏
Great video
Thanks 🙏
You are a great teacher.👍👍👍
Thanks my friend. I’m glad you liked the video.
Very clearly explained. Looking forward for more videos like this.
Thanks, will do!
Realy good video and very good explanation...Cheers from Portugal
Thank you very much!
Thanks for yet another great tutorial,may I know the name of the oscilloscope you used in the video?
Thanks my friend. I used Launch Scopebox in this video.
Thanks for your videos sir, to me i have been learning so many things from you
Glad to hear that my friend
Thanks a million, very informative video.
Thanks for watching
Thank u soo much for this video very inforamtional..
So nice of you
How do I get the software you are using for wiring diagram
Hi my friend. This software was KIA OEM scanner (GDS), just search it on the Internet, you can get the scanner with software or software itself.
Newer cars have active terminal resistor such as VW. Cars are always changing rapidly.
Exactly, that’s the fun part of working on the cars. There’s always something new.
when you clicked the connector you got a picture and a diagram is that a feature of your diagnosis tool or it`s a desktop software ?
Hi my friend, it’s just KIA OEM scanner’s software(GDS) which comes with wiring diagram.
Hi boss thanks for sharing with us nice information but I had one kia sorento 2.2 crdi 2016 faultcode p1827 4dw pressure sensor signal short to battery positive and 4WD light on the cluster but ihave also another same car I can use everything from there to here like 4WD ecu 4WD switch and fusebox and cluster also even ican change the pressure sensor but same faultcode is still there I checked the wiring with the multimeter no short no open circuit everything is fine can you have any idea please
Hi my friend. If you have checked the wiring and replaced the sensor, the next possible cause could be the 4WD control unit. But please check the wiring again by this references:
There are 6 wires on 4WD coupling. (Based on the model you mentioned)
Pin number 3 (Blue wire) is signal which must give you 3.8 V when ignition switch is on.
Pin number 4 (Red/Black) wire is power which must provide 5 V when ignition switch is on.
and Pin number 5 (Black wire) is ground.
Please check it again considering the specifications mentioned above.
Hello Boss, I thought CANH and CANL is a differential signal. Either CANH and CANL is short to ground, the information that is sent to the bus by the faulty unit will be a garbage to the recieving unit.
Hi there, the behavior is different on C-CAN or B-CAN. Normally on C-CAN if one line on CAN-BUS is shorted to the ground, the entire CAN-BUS will go off. But on B-CAN having a wire shorted is not gonna disrupt the entire Body CAN. That’s why I presented the waveform when CAN Bus was shorted.
Please can you help me to get the software you are using for wiring diagram
You may also find some wiring diagrams in our online store, we are trying to provided all our diagrams for FREE for all our audience.
Check them here (Many more on the store (Free) and many more to come:
www.youtube.com/@AutomotiveDiagnosis/store