Color Separation with Liquid Diamonds Epoxy Resin

Vložit
- čas přidán 2. 09. 2020
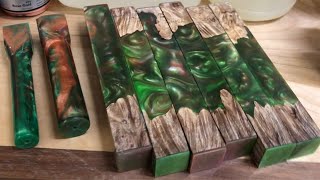
- This week we are learning how to pour Liquid Diamonds epoxy resin with color separation, or not blending the colors together. I get asked all the time how to get resin swirls and without blending colors while resin casting. Liquid Diamonds has lots of working time and claims to not need a pressure pot when resin casting. We put that to the test. I pour the epoxy at different temperatures and then turn them on the wood lathe, sand and polish them so we can see what the resin swirls look like.
I did a similar video for Alumilite Clear Slow resin. HERE : • Color Separation With ...
Pam Harris : / pamharris101
Zac Higgins : / nvwoodwerks
Liquid Diamonds Pen Blanks Video : • Hybrid Pen Blanks with...
How to Sand and Polish Resin : • How to Sand and Polish...
AFFILIATES... Enjoy discounts from the companies that support our channel!
ALUMILITE... Jake10
Jake10 at Checkout: www.p3hfsftrk.com/JAKE10/
MAS Epoxies .. JakeT10
JakeT10 at Checkout: www.p3hfsftrk.com/JakeT10/
EYE CANDY PIGMENTS... Jake15
Jake15 at Checkout: eyecandypigments.com/Northsid...
EPIDEMIC SOUND... Copyright Free Music.
Click here for Copyright Free Music: www.epidemicsound.com/referra...
My Instagram : / jake_thompson670 - Jak na to + styl


Great video Jake and thanks for shoutout. Really does make a difference when you leave it to heat up :-)
I learned the hard way the first time Pam.. it took forever to heat up! 😄😄
Coming back to this video, it's just another example of your excellence. Thank you so much for sharing!
Thank you Steve… And Thank you again 😀
Had no idea that just 10 degrees made such a difference. Thanks for taking the time to show this process. Looks like a lot of fun, about to do my first epoxy pour ever. I'm excited. Going to wait for a laser thermometer now!
Awesome .. you will have fun Calvin
I'm so guilty of pouring too early, and then wondering why they blended. Time to up my game. Thanks for all your videos, Jake. They are great to watch.
Howie Dalious I’m glad you enjoy the videos Howie! I figure if I make a mistake.. others will too.. it’s the least I can do is to try to help people not make the same mistakes.
That was a lot of work for our benefit. Thank you, Jake! I'll be more patient with my pouring. You've shown the proof.
Thank you for watching and leaving a comment Jay!! I’m glad you enjoyed it!👍
I appreciate these videos that show not just the right way, but what happens if one opts to take shortcuts. Many times we think we are doing one thing, (ie. say guess the temp and once it feels warm go for it), and then get poor results. Helpful to see that it's more than just being warm, but an actual temp that makes a huge difference.
Thank you Jen.. I did all of that too.. just guessing or being in a hurry.. and then wonder what happened.. I’m glad I did this experiment too.. I learned that I really have more time than I thought.
Hey Jake. Another great teachable moment. I made the mistake of pouring multiple colors way too soon using Liquid Diamonds and it just looks like poop.
😂😂😂 me too!! I’ve done it for sure
Excellent Jake! You spent a LOT of time and resources to complete that experiment for our benefit. Very informative and much appreciated. Thank you!
Very welcome 👍👍👍
Thank you for all of the time, work and experience that you put in to this. It is greatly appreciated.
Very welcome Danny.. I’m glad I can help out or at least entertain a little bit.. 😄👍
This was a great and very helpful video. Thanks for sticking with it and being so thorough.
Very welcome Suzanne.. Glad you enjoyed.. 😁
That was a lot of work Jake! Thanks for doing this. I've been working with Alumilite, and sometimes that 12 minutes and the heat goes really fast! My last pour was at 145 degrees F, needless to say by the time I got it into the pressure pot it had already formed. My first failure. But like they say, if you don't fail, you don't learn.
I know the feeling Eddie!!! I fail a lot! Lol 😂
I love when you chuckle, it’s like a nervous chuckle.
Aawww lol glad you enjoyed. 👍👍😀
Wow awesome video Jake thanks for taking all of that time to show us this! Very helpful
You are very welcome.. I’m glad it was useful to you! Thank you for watching and taking the time to comment. 👍👍👊
Jake, great demo and experiment! Thanks for taking the time to show us newbies how it's done.
Absolutely David!! My pleasure!
So cool, what a great experiment. I'm going to need a temp gun asap. I usually wait 10-20 mins after I mix to pour but now I'll be checking the temp. Thank you 😊
Very welcome!! I’m glad I could help. 👍
@@JakeThompson 😁😁😁😁😁😁😁
Thank you for sharing your wisdom and knowledge!
Thank you for watching, Charles. I’m glad you enjoyed!
GREAT video Jake! That was very educational, thanks man!
Another great video. Thank you Jake for taking the time and effort to explain things in detail. I learned a lot from this video.
Awesome Michael .. I’m glad I could help. 👍👍
Thanks jake. Between u and zac yall have definitely helped my learning curve
Brads Workbench Zac is awesome.. and super helpful. 👍👍
Thank you for taking your time to share your knowledge @!!
Very welcome Charles!👍👍
great video, learned a lot, thanks for all your time, effort and knowledge.
Thank you for watching ... I appreciate you . 👍👍
Another informative video! Thanks Jake!
Thank you for watching Julie, glad you liked it!👍😄
@Jake Thompson, I really appreciate the time and effort you put into this demo / video. It was just what I was looking for and you explained the process very well. Keep up the great work. Your work helps a lot of us!
Thank you Mark!! I appreciate it.
Your instructional videos are super helpful! 👌
Thank you Jen ❤️🦾
Awesome show! Lots of great info!!
💜💜💜
Very Informative, thank you. I tried to do this with some knife scales i molded and casted for my son, it drove me Crazy waiting for it to thicken up before pouring.
Keeping it all together to heat up faster before separating is a Great tip 👍🏻
Thank you Connie!! I’m glad I can be of help to ya. 😄😄🤓
Great video...just started casting and was excited to pour fast and see my beautiful blanks only to find oil slicks and say WTF...Thanks for cutting down my frustration cycle!! Have watched 3-4 videos and now a subscriber. Thanks again!!
Awesome!! I’m glad I could help.. not sure how I didn’t see your comment till now.. but now I see it.. lol very welcome!! 👍👍
It looks really nice sr. Thanks for the information
Very Welcome. Thank you 🙏
Thank you, Jake. As always, very informative. I appreciate the time you take to show us the proper way to pour resin. I, too, am scared and rush my pours usually.
Thank you Kris!! I’m headed to the post office right now! 👍👍
Jake Thompson thank you!!!!!
Great video Jake! Very informative!
Thank you Dotty 😊
Thank you for taking the time to break it down barney style. I am new to this so your videos are really helping me out. Before you turned these I thought, I really want to see what they look like inside but there is no way you're going to turn all of them, and then you did it. Awesome. Keep on keeping on.
Ryan Friesen Lol Ryan.. I’ve learned to over explain things rather than assume everyone knows something. I’m glad you enjoy the videos. 👍👍
That a “Columbus Day” reference Ryan? Awesome 😊
This is really Super Underrated Channel. Thank you Jake. You saved me frm doing wrong things! ❤️
Awesome!! I’m glad I could help, and I’m happy you like the channel!! 👍👍
@@JakeThompson can you also please explain about swirls when using mettalic colors?
Thank You For all the advice Jake👍
Thank you for watching Steve!! 👍👍👊
Jake been watching your videos and I must say you present the best information .Very informative. I've been buying my blanks but that will soon change thank you Sir.
Awesome... I love comments like yours.. I’m glad you enjoy.. have fun casting your own blanks 👍👍
Thanks for the experiments
Very welcome Lawrence
That's a great video and comparison. This is a solid resource for casters.
Right on Brother!!👍👍
Thanks for the Info! Yes, pretty neat!!!
Very Welcome 👍👍
Thanks for the video. It was the information I needed.
Very welcome Jonny 👍
Getting ready to make my first attempt at casting tonight, using Liquid Diamonds since I don't want to shell out for a pressure pot just yet. Expecting to have plenty of "rookie mistakes" as I learn, but this video was super helpful and I think will help eliminate at least a couple of them. Thanks for sharing, looking forward to checking out your other videos as well!
Awesome.. you will have lots of fun casting.. 😀😀
Experimenting is always fun!
Yes sir!!👍👍👊
Fantastic video thanks for this jake 🤟
Very welcome John. 😁👍
Great test and info. Thanks for sharing.
Thanks for watching Dave!! 👍👍
thank you for all your hard work. This is what us beginners need to see.
Very Welcome .. I’m glad you enjoyed 👍👍
Awesome show as always!!! It's the highlight of the week!
Wrong video Bonnie 💜💜
@@JakeThompson 🤣 I know
Thank you 😊 really cool for you to do for all Us Beginners.
Very welcome.. Thank you for watching! 😀😀
Great video! Very informative .
Thank you Cecilia, glad you enjoyed
Great video. I'm going to have to try making some colored pen blanks now. I mostly just do tube-in clear casting.
Angi MacLaren Thank You.. You will have plenty of fun casting colors! 👍👍
Jake thank you for your videos. I wish I had this how to when I first tried resin casting. One of my best results came from a mistake of letting the temp get so high that it was actually smoking when I poured, it was like sludge but result was amazing.
Lol.. I chicken out every time.. but I think doing this video will make me more at ease too!! 😄😄
Thanks for doing this, and some great tips. I swear, as I was watching it I could nod along to most of the "you shouldn't do that" items because I've done them. :) I love the idea of keeping it all together for a bit to help heat. I'm going to have to do some experiments -- when i started out not long ago, I bought a gallon of Total Boat 2:1 Medium that I'm still using, so need to get some timings with that. Thanks!
John Erjavec Thanks for watching John! I’m glad you enjoyed it. Plenty more to come! 👍👍
Thank you for another informative video.
Thank you Michael!! I’m glad you like the videos!👍👍
Fantastic! Thank you!!
Thank you 😊😊
Your videos are awesome thanks teacher
Thank you Anthony 😄😄
Great video man! Thank you!
Very welcome.. Thanks for watching
Your helped me. Thanks
Absolutely welcome!
I am kind of amazed, your shop must be super well air conditioned. I have been using liquid diamonds myself and found if I don't pour by 45 minutes I am pretty much not going to pour. I do live in a warmer area though. Thanks for this video, as always super fun and informative, you do great work Jake!
Thank you for watching.. I try to have the shop under 75f I can’t always be below that.. so I just watch the temp and know it won’t take as long. 👍👍👊
Thanks for the video Jake. Now I know why my blanks all are purple...lol
👍👍👍
Great video brother thank you for all the hard work!!
Deadrise Wood Crafts Thank you Brother.. I’m glad I can help people!! 👍
Hahaha it goes against all natural instinct to hold off and not pour as it gets hotter and hotter. I like these videos, keep it up, man.
Thank you Sean.. it’s crazy but even when I know it’s the right thing to do.. I still feel like I need to pour it and get it done early.. lol
Great video! I was trying to get swirly colors into a clear base. I did an orangey red, a red, and a teal green. It was into a skull mold I had put clear into. No matter how little color I used- the colors expanded and took over.
I get it that with the pen blanks the idea is to not see the internal parts.. so clear resin would be out. I think I just have to get a temperature gun for knowing when to swirl the colors in. The issue is waiting for it.. waiting too long means it won’t pick up the molds details. But if I get the clear in there and coat it all over and then let it settle it may be ok. Ugh .. so many things to consider! It’s such a great ride .. and so unpredictable too.
Resins gonna resin!
Thanks Jake! This video is exactly what I was looking for 👌👏👏👏💯🎯
Lol.. awesome!!! I’m glad the video helped ya out!! 👍👍💪
Good job Jake!
Whoo hoo Thank you Kelley !👍
Pretty cool!!!
Deborah Martinez ❤️💚❤️💚❤️💚❤️
Awesome info video Jake take care stay safe god bless
Donald Trabeaux Thank you Donald.. Take care and God bless you as well! 👍👊
Great video thanks
Thank you Eddie!! 👍
Great Video...
Manic Maker Thank you Brother!! 👍👍
Good info, well done..
Thank you Tom.. glad you enjoyed it. 👍👊
So good
Doug Butler Thank you Doug!👍👍
@@JakeThompson You are very welcome! You always put out great content. Keep it up brother 😊
Nice blanks and to let you know I've been working on some Walnut shells I found outside doing some sanding filling them up with resin trying to come up with ideas to make some cool pen blanks plus I got a bunch of very small pieces that need to be combined with more resin to be turned into a much bigger blank
THEAPRILFOOL 1983 Awesome!👍👍
Man I always feel like i'm playing a game of chicken against the resin when it comes time to pour. Needless to say I always chicken out first. Great video man I appreciate all the effort, time and $$$ you put in to these videos.
Thank you Dan!! I appreciate that you appreciate it.. 👍👍👊
Much appreciated! I had no idea!
Pam Miller Very welcome Pam.. I’m glad I could help.
Very educational, wondered why my colors were too mixed, thanks a lot.
Awesome. Glad I could help! 👍
Thank you.
Very welcome! 👍
And I love how that thin blank turned out I would love to see more layers added to it and see what they could be turned into later
THEAPRILFOOL 1983 That’s a great idea. 👍👍👊
@@JakeThompson anytime
Acid reflux 🤣 😂🤣😂🤣😂🤣😂you’re a hoot!!
😂😀😀😀
Dude, thank you for this video, I just had an epic fail with this product. It was a multi pour project that overheated, and I’m talking hot foaming resin and extreme cracking.
Deadwood Casting & Turning how big of a pour was it??
Jake Thompson it was a 5.5x5.5x15 inch pour with some cedar in the center of it.
Great job best vid on CZcams no one has explained it the way u did and Believe me I’ve watched a lot of videos one of the best tips is not to separate it till it goes off I just tried to make a pearl A waste of time and materials if I had watch this video before I would’ve been all set thanks One quick question I make knife blanks is a slow cure harder than a fast cure I need the hardest I can find
Thank you, I’m glad you enjoyed the video. I’m not sure which one will be harder.. lots of sites have additional information about the products, like hardness.. probably worth a look.. 👍👍
Something about your videos resin-ates with me.
😂😂😂
Great video, as always!
Educational as well as entertaining!
Curious what effect would be if one color was a different temp? In the purple, blue, orange example, say the blue & purple at 120+° and orange at 90° or below.
Keep up the awesome work!
LessNTwo thank you!! I’m glad you enjoyed it! I’m not sure what would happen .. I think it would bring down the temp of the hot color and blend.. but now I’m curious! Lol
Jake thanks so much for the lesson. I can’t count how many resin project videos I’ve seen and this is the first introducing the relationship between temperature and color separation. I’m wondering how your pour technique changed between the ‘beginner’s mistake’ blank poured at 88 F and the others where the temps were hotter. I noticed at one point in the later pours you mentioned that you were pouring in too much at once.
Thank you! I’m glad you enjoyed! When you are trying to swirl or color separate, it’s better to pour small amounts lightly into the molds. I could have done a lot better job of pouring lightly throughout every temperature.. That’s all I was saying.. I didn’t change pouring technique as much as I should between 88 degrees and the higher temps. 👍👍
What does change is the thickness as it gets hotter . Which causes the colors not to run as quickly allowing you time to add other colors and they wont blend together so easily. Thats where you get your color separation.
Nina Mcrae 👍👍👍
good morning my friend, we can put the colors for epoxy resin in the cactus juise;
Good morning .. good to know. 👍
Jake, I so appreciate these "experiment videos you do!! So helpful for all of us! Is Liquid Diamonds less sensitive to any moisture in a wood? I have really big digger pine pinecones which I can't get all the sap off of. I am quite sure Alumilite CS would react to that, but I'm wondering if Liquid Diamonds might be more forgiving? But do they not recommend deep pours? What do you use for your deep pours? Thanks again!!!
Thank you Amy.. I’m sure liquid diamonds might have less of a reaction to moisture but still react.. liquid diamonds will go a bit deeper than most other epoxies.. coating pieces with resin is also an option. I use either alumilite deep pour or the epoxy resin store has some deep pour epoxy too… You can use Jake10 at either site to save money.
Awesome video Jake. Love the tips. Do you notice any difference in sanding and polishing between Alumilite and liquid diamond? Do think one is better than the other for sanding and polishing? Thanks man.
MrGonzorizo liquid diamonds is slightly softer but as far as being easier to sand.. I didn’t notice any real difference.. they both sand and polish very well.. I did a comparison video ... here ya go czcams.com/video/6z6eHSdqLTQ/video.html
OMG! How long did it take you to make this video? Thanks for the amazing work Jake. Excellent job. I've never used LD but I might be convinced to do so, especially with the open time after mixing. I've done Alumilite, Alumilite Slow but my go to has been an epoxy I get off Amazon. Would you use this again? Overnight in the pressure pot and then you can turn 24 hours later? Again, excellent video!!
It took about a week to make this video.. I do like liquid diamonds. I leave them in the pressure pot overnight and then remold them. At this point they are solid and don’t need to be in the pressure pot any longer, but aren’t fully cured.. I can still bend them if i try. So I let them set for 24 more hours.. Then I can turn and sand them. Thank you for watching. I’m glad you enjoyed it.
Great video on doing color, I WAS going to do color today till I seen your video, since I'm doing 2 or 3 colors should I wait for a while and let the Liquid diamond heat up? I didn't know that would do that? and I have a tempture gun to test it as well,, thank you
Awesome Terry.. I’m glad you watched the video.. and I’m glad I could help ya out.
Good demonstration Jake. I guess the reward comes to those who wait! I take it, if you don’t get too crazy with the torch, the silicone mold doesn’t get damaged?
Turnings by Turner Thank you!!.. Yeah just keep the torch on low and keep it moving!!👍👍
Jake, would this "heat theory" apply to Total Boat epoxy? I'm newer than new in this arena.
Steve Gronsky Yes it will.. but I’m not sure if the exact temperatures on Total boat.
How much should be the temperature?
This is a great tutorial. Have you tried to make a hybrid with LD and no pressure? Will it hold together?
Adam Lopez I have done hybrid pen blanks with no pressure pot.. and I have seen bowl blanks made with it that held together.
Thanks for the reply and keep up the good work!
Thanks for the video comparison. Question is Liquid Diamonds sensitive to moisture when casting wood?
Dominic- Target64 I haven’t done much with this and Wood.. but I’m sure it will be sensitive to moisture the same as others.. I will have to find out.
Another great demo video Jake! These are truly invaluable! I'm just getting into resins and learning a ton from these! When you make those dragon eggs (resin/Wood hybrids), are you using "deep pour", "table top/artwork", or "casting" resins? What is the difference. I've seen people use casting resin, but poured a litre and a half into a bucket!
Thank you very much for the compliment. When I do deep pours like the dragon egg.. That is with Alumilite Clear Slow. It’s a fast setting resin that is capable of doing deep pours.. But you have to measure it by weight and you have to have a pressure pot.
@@JakeThompson thank you sir! What's the difference between a pressure pot and a vacuum chamber? And don't tell me that vacuum chambers suck! Get it!? Vacuum. ... suck! 😆
@@jonathanbrowne8884 lol.. a pressure pot will hold air pressure in the pot squeezing the air bubbles so small that you can’t see them.. a vacuum chamber will remove bubbles from the resin before you pour it..
@@JakeThompson Thanks for letting me pick your brain! Thanks for the advice on the deep pour as well! I poured really deep on my mother-in-law, and there's no decomp smell at all! 😆 But seriously, can I use the vacuum chamber after the pour, to remove bubbles. I'm new to this and my budget was blown about $500 ago! If I don't need another piece of equipment, it would shut my wife up... I mean it would be great! 😲
Great information . Flat pour reminded me of coasters ... LOL How would this be for a trivet to put hot pans on from the stove? What kind of temperatures can they stand without going gooey?
Thank you!! I haven’t tried to put hot things on this resin.. but I would guess it wouldn’t go well.. lol
A clear coat with a resin made for higher temperatures would make it happen. In my early days I made about 120 coasters, to sell, without thinking. Then I sat a cup of coffee on one as the season changed. It stuck. Someone told me to do a clear coat with a high temp resin.. and it worked! So I did a few that week.. well 110 coasters are still waiting 😂 because I’ve moved along to so many things, I can’t get back to them.
Another friend who turns wood said I need to stack them up & glue them together and turn them. I guess 20 or so at a time. Make ‘I Dream Of Jeannie’ bottles or whatever. Many times I almost tossed them in the trash. I’ll probably give them all to my friend in exchange for a nice bottle.
But yah.. clear coat anything like that with a high temp resin ✌️
I was wondering do different resins reach different temperature if they were side by side? I’m trying to follow your video. I am using a laser thermometer seems the temperature on mine drops. All though the temperature is right for pouring. 75 degrees in the house
Yes different resins need to be poured at different temperatures to create color separation..
Jake , I just watched your Alumilite Clear Slow and now this one. If you could only use one resin which would it be ?
Alumilite clear slow… different strokes for different folks though.. some folks are afraid of pressure pots or just don’t want to buy one.. liquid diamonds or the alumilite clear cast would be the way to go then
My piece of resin after cured bends , what went wrong ?!
As temperature increases, so elapses your pot time. How can you tell the isolated effect of temp without comparing, say, a uniform temp like 110 at 0 minutes and 50 min?
The amount you mix and the temperature in the room will change the pt life. The temperatures I show will determine if you get swirling or not.. I use the timer for a rough guide and the temperature gun as a definite time to pour.
Hai sir.. can u make a tutorial how to mix that resin with scale... How much A how much B
I will be doing that soon. Thank you for watching. 👍
I just bought Platinum Clear General Purpose epoxy. You are using powder. What else can you use to color the epoxy. I want to do a multi color lightening strike pattern. Also, what do you use to take the temperature. Can I use a candy thermometer? Thanks for your help.
Thank you.. I use mica powders and some alcohol inks to color my epoxy and some pastes. The temp gun I use is just a infer red thermometer you can get from the hardware store.
Where did you get your molds?
Here ya go www.northsidecustomcrafts.com/new-products
Tx Jake!!! I was wondering , instead of liquid diamond, when in the curing process do we get the best separation with Alumilite Deep Pour?
Alumilite did a video on their deep pour.. I believe it’s around 9 hours but don’t hold me to it.. it’s a long process
@@JakeThompson tx for fast response!
I'm new to this, so I'm sorry if this is a stupid question... How is the resin heating up?
When you add part A and Part B together, the chemical reaction gears it up 👍
Which liquid diamond epoxy did you use. There are several types. I don’t see one with the label that you have.
I have a link in the description that will take you right to it. 👍