Video není dostupné.
Omlouváme se.
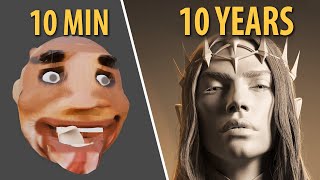
How to paint realistic skin in Substance Painter

Vložit
- čas přidán 15. 06. 2020
- In this video I go over the whole process of creating skin textures, from where to find great reference images of skin and baking maps to texturing
the character and setting up the export for Maya.
Great reference resources:
www.3dscanstor...
texturing.xyz/...
Other then that I found great images looking for diffuse, albedo diffuse or cross-polarized skin images.
Looking for images of skin damage, moles and freckles is also important since most people have a good amount.
Baking maps:
The default settings work very well usually,
but increasing the Ambient Occlusion Samples can give more accurate results. It will take longer though.
Deselect the maps that you do not need. I don't need the ID map here for example.
Color zones of the face:
What I covered is very well summed up by James Gourney:
gurneyjourney.b...
My texturing approach in this video is to add a lot of detail and complexity, maybe more than is actually visible or necessary.
I find that some detail always disappears when rendering with Arnold in Maya. I usually like to go back and forth between
the software for that reason.
When I build up my Layers I like to start off with a lot of procedural textures to save time and I will make then adjustments to the masks manually. I also take advantage of the skin smart material that comes with Substance Painter. I find it to be a great starting point.
I also like to use the maps I was baking in the beginning. Ambient Occlusion and Curvature map to enhance the sculpted detail and thickness map to generate the subsurface scattering.
For more Character modeling, texturing and anatomy tutorials, subscribe to my channel. I always work hard to create content that has a lot of value for you and I hope it shows.


Very helpful. Combined this knowledge with the video from flipped normals to fill in some gaps or add other ways. Thanks for sharing your workflow!
Glad it was helpful!
Great work, and nice of you to detail the steps and not just "paint away" like all those other timelapses/"tutorials".
I watched your video when I was starting to learn 3D. Now, I'm watching your video as a 1 YoE 3D Character Artist. It's still good tips for me ,man!
This is so nice , thank you for sharing , you have explained and done it in a way that has made it look even more simple.Greatly appreciated.
Thank you for this! Been searching SP skin tutorial for 2 days and finally found this amazing tutorial
Amazing tutorial, really easy to folow and to understand. Thanks a lot for it!
Many thanks great tutorial
thank you!! I'm taking a step further on the texture :)
THis is one of the best texturing videos out there! Good job!😆
The best tutorail! Thank you)
glad you liked it
Absolutely brilliant stuff! Thank you for demonstrating this!
amazing tutorial, do you work in a vfx studio, freelance or game studio?
This is amazing quality for a tutorial.
great stuff!
thank you so much! i learned so much from it
That's great to hear!! :)
The best tutorial I've seen! Thank you))
Thanks. I learned a lot from this video.
Great video!! Thank you so much!
Glad it was helpful!
Great tutorial! Thanks for sharing!
So today I learned about color zones... Thanks for this!
But I'm curious about color zones for the body. Do you know of any resources for this?
interesting question, I'm not sure if it's documented somewhere. similar to the face you will probably have more white/yellowish area where skin is close to bone and knee and ellbows as well as knuckles tend to be red. as far as resources maybe check out 3d scanstore for scans, the albedo view is good for that kind of stuff
2:40 hello may i know what settings and brush u used for the face pores pls?
love you. you are my saver.
when you did the cut around 11:00 the blur you just added is gone, and you add a paint layer. For some reason, when I add a paint layer here, there is "no material" and i can't paint any of this detail away like you're doing. I know its 3 years old but maybe you have an idea? :P
Thank you so much
thank you sir! this really helps!
Amazinh video
Very informative, thank you very much
great demo/presentation would love to see how different skintones look in this work flow
This is very nice stuff for beginners like me.
plzz make more.
:)
after exporting the textures i called thoes maps in maya but i was getting different results from that of substance please guide. Because in substance render it looks kinda realistic but the same in maya looks like flat colour. Please help.
Thanks!! 😄
great video. practical, and logical breaking down of layers, in a manageable way that is easy and straight forward to understand as a fellow artist, I thank you for helping me in this. :)
Great stuff man. Nice and straight forward, it was super helpful to me ! :)
Thanks for the feedback! Glad it was helpful!
best tutorial
Huge Thanks!!!!!
Very great.
Can I use xyz texture in substance painter or designer without need to mari foundry?
I believe you can but I havent used texture xyz in Substance Painter yet and from what I know Mari is better suited because it has better Projection tools. I think In substance painter all you could do is use the textures as height information, but again Im no expert here
@@3dsculptingtutorials thank you my friend
Have you try Killer method? Using wrap or zwrap plugin in zbrush to project the base maps then manual painting afterward in your software of your choice.
@@YGODueltainer Yes, ive used that and it is awesome, but I still imported my projection to painter to manually enhance it.
How did you generate roughness map again? I skipped some part.
Bascially using curvature map to add roughness to cavities and then spray painting some areas for variation, but with my latest project i didnt use roughness map at all and it turned out pretty good, driving the roughness just from the skin detail and micro details, which is basically what the roughness map will emulate. So with texturingxyz it wont be necessary In a lot of cases I think
@@3dsculptingtutorials thanks for the advice. I will keep that in mind on my next project. You are truly an inspiration as always!
Ty !!
Amazing Bro you have my respect ,I don`t understand How someone can dislike this video it teaches me alot
Subscribed.
What was the final resolution of the texture map?
I exported in 4k I believe
can i ask if i need to cut uv of noses / ears / lips apart from the head so i can paint easier ?
I prefer to not have cuts in the face because I like to use the blur filter quite a bit and it doesnt work across seams so you'll have the blur cut off. You can fix that manually, but Id prefer not too. That being said the new substance Painter with Udim support just came out and I havent tried it yet. Maybe it works on there, but I dont really see a point in cutting those apart really.
@@3dsculptingtutorials thanks alots !
very nice, I just start doing this right now too.
💙💛 Glory to Ukraine 💙💙💛💛
new sub
0:38 Stefan Sagmeister? :-] Thanks for the great tutorial!
Had to look him up but I dont think its him although I can see the similarity haha. Glad you liked it!
Wayyyy too fast, please do voice over for these video and explain each step.
This is an advanced video. It's better to be nicely familiar with Substance Painter to understand the video.
6666
Thank you a thousand times! Perfect tutorial, keep it up pls!
Thanks! I'm glad it helped! :)