How to Add Side D-Ring Connectors to Any Pouch - Turn a Pouch Into a Crossbody Bag

Vložit
- čas přidán 19. 06. 2021
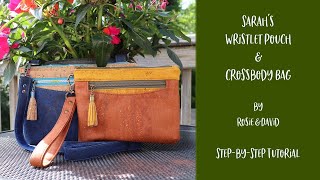
- In this video, I demonstrate how you can add side D-Ring Connectors to any pouch. This is a great way to turn your favorite pouch pattern into a Crossbody Bag. I drafted a simple pouch to show the technique. The video does not cover the construction of the pouch; just the technique for adding the side D-Ring Connectors. I used fabric from the Tula Pink Curiouser and Curiouser collection along with Wovenfuse 2 and Decovil Light. I hope that you find this technique useful and will give it a try. Thanks for watching! Please like and subscribe.
===========================================================
If you enjoyed this tutorial and would like to support me, you
can send a one-time tip via this link: bmc.link/rosiesart
===========================================================
How To Shorten a Zipper, Add Zipper Tabs and Sew in the Zipper with No Dent Sides: • How To Shorten a Zippe...
=========================================================== - Jak na to + styl


The best demo I
have ever seen. Very slow, clear and concise directions. Perfectly done. Thank you. ❤
This is the tutorial I have been waiting for and didn't know it! Thank you Rosie, I *appreciate* all your videos. Thank you for being a great teacher.
Awww…you are very welcome. Thanks for your kind comment and for watching!
Thanks Rosie. I have a bag to try it on now. It's finished & I was trying to think of a new technique to add the D rings. Thank you very much.
You are very welcome. Have fun with the technique and thanks for watching!
Thank you, very nicely done.
Your instructions were fantastic! Not sure I would say it's easy, but it turned out great! Thank you!
Thank you Rosie. Great alternative.
You are so welcome! Thanks for watching!
Hi Cheryl
Wow Thank you Rosie. I’ve bee struggling with adding side strap connectors! You directions are so thorough!!
Nice assembly of the vinyl tab with the reinforcement/lasting integrity of the double sided sticky tape.
Such a great tutorial!! You have given me confidence to try this!!!
I am so glad that the tutorial has give you confidence to give this a try! Thanks for watching!
You are a great teacher. So clear and helpful. Thanks!
Much better than the fabric "tabs" on the side. THANKS!
You are welcome! Thanks for watching!
I should've watched this before I made my last crossbody bag this week! Thank you, alot better than handstitching the strap onto tweed, I love your tutorials 😍
Rosie, you do a beautiful job with your tutorials. Clear and easy to understand. Thanks so much for sharing your “wizard” skills. 😘
Awww….thank you so much for your very kind comment! Thanks for watching!
Thank you for another great tutorial! I bought my rivet press a few months ago and am kind of obsessed with putting rivets on all my bags. Now you've given me a whole new design idea. So cute and professional looking. Thanks again!
Congratulation on getting a rivet press. It is a game changer! Thanks for watching!
Rosie I am a huge fan of your patterns and video tutorials!!! I bought the Sarah's wristlet/cross body pattern as well as the saddle back pouch last night. I'm so excited to get started! I want to use this method to attach the cross body strap. thank you sooo much for all your wonderful patterns and tutorials! I think I have almost all of your patterns.
I love your tutorials, Rosie. They are very direct and to the point, which I really appreciate-and I appreciate your cleverness, too. I had high hopes for this connector, and added it to a pouch style wristlet very similar to yours, and with a similar zipper construction. It looked great when finished, as I’d hoped, but once I put actual straps on, I was quite disappointed in how they functioned. The connectors “lift,” and, if one doesn’t get the connector on quite tightly, the connector actually pivots up. This makes sense in retrospect. I think if I try this again I would actually sew the connector down somehow (and I sure would like to see your ideas about that. On my current bag, I remedied the situation by tacking the D-ring at top and bottom where it was invisible below the connector. But I probably would not try this again without some sort of modification. I’d like to see a hack with a vertical connector. The challenge there is how to attach it if the seam allowance is small. My current bag called for a 1/4” seam, which made it hard to attach a vertical connector over it.
Thank you Rosie for another fantastic technique. Love your videos!
Perfect! Thank you
You are welcome! Thanks for watching!
Thank you for your kind comment. The thickest paper I have used in this is 80 lb. card stock. Thanks for watching!
Fabulous techniqueconvertible sling / backpack but I find that I prefer a crossbody strap instead. This is the perfect way to retrofit my bag. Thanks so much!
I LOVE watching your videos. I learn so much from you and love your patterns also. Please keep those wonderful tutorials coming!!!!!!
GREAT video and love the technique. Thank you so much!
You are so welcome! I am glad you like the technique. Thanks for watching!
Hello how are you
Thanks so much! This is a great tutorial! I appreciate the concise instructions!
What a great idea. For pouches that are finished & I don’t mind having the rivets visible on the inside, I can use this technique too. Thanks so much for sharing.
You certainly can do this technique with a finished pouch. I would just recommend using a hand tool to set the rivets because it would be difficult to get the rivet press into the area where the zipper tab and pull is. Thanks for watching!
Wow, what a great tutorial! All of your videos are so beautifully done. Thank you so very much! Jo Ann
Thanks so much Rosie. I can’t wait to try this!! I don’t have a rivet press but I do have the other tool. Which I’ve been hesitant if to use. Love the Tula bag. I do use your hacks and ideas! Your Fantastic!!
You are very welcome. I am very happy to hear that you are using some of the techniques. Have fun with this one and thanks for watching!
Love this technique Rosie. Thanks so much for showing how to get it accomplished. All your videos are fantastic!!
Awww…thank you so much. I am glad you like the technique. Have fun with it and thanks for watching!
Another winning idea!
Love this idea great video thanks for sharing, Barb
You are so welcome! I am glad you like the technique and thanks for watching!
Hello how are you
Thanks for sharing.
Hi Linda
You are very welcome and thanks for watching!
Thanks so much, I was hoping to find a tutorial. It was great!
Excellent video! What a great idea! It looks so neat when finished! I am going to try this on my next project! Thanks so much!
Great video!
Thank you so much!!
Great video! Thank you.
Thank you for your kind comment and for watching!
Hello
Hi Rosie! As always your tutorials are clear, concise and easy to follow. "X" marks the spot! Excellent technique! Thank you for sharing your talents!
You are so welcome! Thank you for your kind comment and for watching!
This is awesome thank you so much for sharing!
You are so welcome! Thanks for watching!
Thanks!
You are welcome. Thanks for watching!
Hello 👋
That was so cool I really enjoyed watching this tutorial I never said it done that way❣️✂️🧵🪡💕💗💖❤️
I am glad you like the technique and thanks for watching!
Thanks!!
You are very welcome! Thanks for watching!!
So chic. I'm going to add this to my next zippy clutch
Paylaşım için teşekkürler 😊👋
You are welcome. Thanks for watching!
This is exactly the tutorial I was looking for !! Thank you so much for sharing !! but I’m wondering if this technique would work with fabric and not leather as you used ?
Thank you for the tutorial. I appreciate your teaching style, very detailed. Rosie, I’m returning to sewing after several years away. I would like to sew a large mesh beach bag with a detachable, private wallet or small crossbody for my daughter, and gift it on Mother’s Day. Do you have a tutorial which meets the criteria? 👍🏼🧵🪡
Beautiful. Exactly what I was looking for. Thanks! Now I want to do something similar on the front to slip in a sunglasses temple. I think I need a separate strap. I don't think it would fit easily in with the D ring. What do you think? Thanks again.
Thank you so much for this tutorial. I have a handbag done that I would love to add a crossbody strap to. Would I be able to make these tabs using WPC instead of vinyl or leather? And if so, should I reinforce them inside first with a strip of grosgrain ribbon or Decovil Light?
I love your videos. They’re always so clear and easy to follow. Thanks
I am glad that you are liking the tutorials. You are welcome and thanks for watching!
Love this idea. Will try it for sure!
Wonderful! Have fun with the technique and thanks for watching!
Hello how are you
I love this idea. Would you recommend doing this method on a full sized handbag?
Hi Rosie, thanks for this great tutorial!! I can't wait to try it! Have you ever tried setting the rivets through the outer and lining once the bag is complete?
You are welcome! Yes…you can definitely put the rivets through the lining and exterior. Thanks for watching!
Love all your videos! Please tell me what size are your rivets?
Hi Rosie, thanks so much for the great video. Different subject than the tabs, is your faux red border overlayed on top of your main fabric or joined as a piece? I love this look. Is there a pattern for this pouch that you can share?
Thank you for this great idea! Do you have tutorial for this pouch?
You are very welcome. I drafted up a quick pouch to use as a demo in the tutorial. It was not meant to be a pattern, but you could use this on most pouch patterns you already have. Thanks for watching!
Thank you again Rosie for another clear explanation of your methods. Almost all pouch patterns call for a No 3 zipper sewn in with a quarter inch seam allowance. Is there some some simple “fits all cases” adjustment if you prefer to use a No 5 or 4.5 zipper? When you say you “always set my zippers in three-quarters of an inch”, do you mean if you are using a No 5 zipper? Other adjustments I’ve read about say to increase the seam allowance from one quarter to three-eighths of an inch. Another pouch pattern designer says to enlarge her pattern on both sides by a quarter inch if you want to use a No 5 zipper. I’d love to know if there is a universal rule. I’ve searched and searched for one.
Hi, Gilda. If you look at the video at 1:56 and about the next 5 seconds Rosie is showing the top view of the pouch. There is a gap between the zipper and the side edge of the pouch of 3/4 of an inch. She is not referring to the seam allowance for sewing in the zipper. If your question is about the seam allowance for a #5 zipper, yes, you are correct, it is 3/8" rather than 1/4". Rosie, please correct me if I'm wrong!
@@pumalibrarian Thank you do much. That’s cleared up my question.
Good evening
Same to you
Hi
How long of a river do you use?
Where do get your double sided tape from ?
Where did you get that top fabric
Hi Judi
Has anybody tried this with heavy duty snaps instead of rivets? That way, I can remove the D ring if I don't want to use it for the crossbody. I think I might give it a try even though snaps scare me... Might as well get my money out of my press.