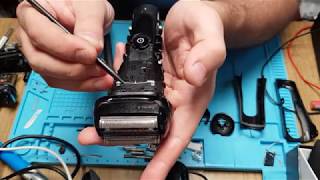
Complete teardown of Braun series 7 shaver, repair of trimmer

Vložit
- čas přidán 7. 12. 2019
- Complete disassembly and assembly of Braun series 7 shaver for cleaning. Repair of the trimmer when it doesn't fold down completely.
If you would like to share some support for the channel or pour a beer as a thank you for successful repair: paypal.me/LetsFixItGarage
These are affiliate links, so if you buy directly from them small amount will be provided for channel support
Soldering iron set
s.click.aliexpress.com/e/_AOsIIp
Soldering Iron tips
s.click.aliexpress.com/e/_9gjV6V
Screw driver and bits that I use
s.click.aliexpress.com/e/_9wYDWJ
Screw driver and bits that I would buy now 😊 s.click.aliexpress.com/e/_ANI5D9 s.click.aliexpress.com/e/_AAZ275 - Jak na to + styl


Thank you so much for the detailed video! One tip during re-assembly. The 4 screws (T8 head) are fragile, so don't torque them too hard. I broke one and had to glue the head to the enclosure so it wouldn't come off and possibly rattle around .
You're right the plastic is quite soft and you need to be carefull in not to overtighten. The rubber seal will take care of waterproofnes so stay calm ;)
Thanks so much for this! I was having the problem with my trimmer not staying closed - followed your directions and popped the spring back into place and now all is good! :-)
Glad it helped and thanks for taking time to give feedback :)
Thanks a lot! My trimmer didn't stay all the way down anymore and with your tutorial I was able to fix it without any issue! Good work!!
Same thing happened to mine! I was just closing the trimmer as usual when I was done using it and I heard a clicking or snapping sound and now it doesn't properly close all the way and stays out a little! Did you have a similar experience or did it happen over time?
@@M1sterFancyPants Mine did the exact same thing as yours. A click and now a flappy trimmer door :)
I've been using Braun razors for 30+ years and love them. What galls me is the last time this happened a number of years ago on a previous razor (had no idea how to fix it), I took it to a Braun dealer and got charged $85 to fix it.
Apparently, all he did was take it apart (probably way less than this video and reset the spring) grrrr
Anyhoo, I am going to break mine down and see if it's just the spring popped out. Great video, right? :)
Thank you! The trimmer on mine came apart ages ago. I still had all the pieces but never any luck getting them back in. Your video helped get everything back. Not to mention cleaning it while it was apart. Amazing!
Thanks for a good word! spread the knowledge :)
Thanks a lot for this excellent teardown video, which gave me a clue how to open the shaver without cosmetic damage (other teardown videos use a metal screwdriver to pry off the rubber back)! After replacing the drive unit my shaver is like new. :-)
I had no idea it was this easy to break down these shavers. Thank you so much and I am glad I found this video! :)
Great tutorial. Thanks to him I have been able to replace my trimmer. I recommend looking at it carefully so as not to make mistakes that harm the shaver. thanks for her input.
Great video for getting access to the shaver, saved me pushing and pulling to get the back off, so good in fact my 9 year old managed to follow it, I had to change the battery , works like new.
This tear-down was quite helpful. I had TWO Braun Series 7's that needed new trimmers, but after reassembly NEITHER of them would turn on. (No, I didn't leave out the clear plastic piece.) The blue light behind the on/off button would come on, but no buzz. I'm not completely sure which of the following were important, but to get them to buzz again, I had to be sure the motor was getting power. I slightly bent out or up all the (phosphor-bronze?) tabs used for electrical connection to the motor and charging pins, I made sure all had at least some of the clear lube Braun puts on them, I inserted the bottom part of the cover first because there is a plastic knob that will bend the charging tabs if you don't, and I made sure the motor was firmly pushed in before I clicked the top of the cover in place, then, while holding the cover in place, I put in the screws that hold in the motor, then the other two. Buzz Buzz!
BTW, the lube is Teflon (or PTFE) spray. Works wonders here.
Nice work, yes sometimes at disassembly some of the cooper legs could get bend so do check that you have good contact when assembling and if it doesn't work, or charge, these legs would be the first suspect ;)
The trimmer on my eight year old Series 7 model 5962 recently broke. Not believing this was repairable and in the need of a good shave, I purchased a Braun Series 7 model 7075, but quickly learned newer isn't better. In fact, there were a few features missing on the 7075 that I really enjoyed on my 5962, one of which being the trimmer itself. This led me to wonder if it was possible to replace the trimmer. 'lo and behold I learned I could buy the Trimmer and your video provided me with the guidance to replace it, as well as to give my 5962 a thorough cleaning. The end result is that the 7075 went back into its box and is in closet, while my eight plus year old 5962 works like new again! Thank you very much for providing this video. It was well done.
Quick follow up question? I purchased Braun Series 7 Cassette 70S (9000 Series) (Basically replacement blades) and was wondering, theirs gotta be a way to sharpen/or send out to get sharpened my old Braun blades. Please Braun Series 7 people/customers/professional Braun Employees/Engineers , this is such an amazing product , please incorporate a blade sharping business that goes along w/ the sell of the new Cassette! You guys figure that out , literally any he best product ever made!
Not a Braun representative but I assume that mesh of the casete get holes not long after the blade gets dull..
Thanks for the fantastic video. The trimmer on mine no longer retracts, but in watching the tutorial it made me realize that trying to fix it myself will only result in me needing to buy another razor! Lots of teeney, tiny parts (that are quite fragile) to work with here...
:)) my intention was opposite, to show that it's doable.. but saved time is value as well :))
Actually, if your trimmer suffered some damage that is not reparable, you can buy the part for $25 USD off of Amazon. It doesn't look that hard to replace. In fact, it looks like it may be possible to detach the trimmer from the body without disassembling anything else.
Another Series 7 trimmer spring fix here (and very much needed clean-out!) due to your video. I also learned that it'll be simple to replace the battery when the time comes. Many thanks!
Glad it helped! And thumbs up for Braun - for a serviceable shaver :) nice to see not soldered batteries and glued in housings :)
@@letsfixitgarage What type and capacity battery is req'd?
Sorry don't have exact measurements but it is quite specific Braun battery it even has these pins on both ends for easy inserting and removal so you should look for a battery for your specific model..
I've had my 790cc for over 8 years now, used alternatingly with a Norelco triple head shaver (to give shavers a break from the rigors of daily use). At one point, I misplaced mine and the battery ran down to deep discharge. But it charged right back up and still holds a decent charge level. Braun used quality batteries in these units.
Just as a feedback, I did install the new cutter and it works great. However the issue was the contact to allow for charging and cleaning. It took about 15 minutes to solve that by aligning the contacts on the inside of the shaver and then screw on the cover to get it all working!
Thanks! Replaced my trimmer watching this. Only suggestion, list tools needed at beginning of video.
Thank's for your suggestion! When you have all kind of tools at your hand its not a first thing that comes to your mind... I will try to remember it next time.
Many thanks, your video helped me very much in fixing my shaver's trimmer spring. Thank you so much 👍
Very clear video thanks, but how do you get the final trimmer piece to separate from its casing? You just showed it already disassembled, then reassembled it.
To add, as you’re reassembling it, your hands move off camera, and I haven’t yet figured out how the trimmer is locked in place. About 10:40
@@ReTracer thanks for your questions. It was quite dirty to dissassemble it on camera.. maybe I should refilm only that part on close up.. in principle at 10.40 you just slide in the trimmer blade in to it's housing.. and why I took it of camera, is because you need to align the leaver in to it's place on the blade and at that angle it is impossible to see where it's going.. aside from that it's just sliding in.. and rest of the disassembly is just the reverse of the assembly on the camera, after you disengage the springs it will be very easy to get it in parts..
Thank you for this! It showed me the CORRECT way to get the outer rubber handle off (start at the bottom). I used a No 5 Torx driver on the screws, which fit perfectly. I don't know why others call for 8 torx. I also had trouble getting it to turn on after reassembly. The trick was to make sure the upper screws pass through the correct holes in the copper tabs. The shaver head keeps trying to squeeze upwards, forcing a misalignment, so look from the side angle and verify the screw goes into the correct hole in the copper and also the housing. And now my shaver is like new!
thanks for your additional input. when you are making a video you forget some things, some seems obvious, but are of course not obvious to everyone and it's impossible to correct it afterwards.. that's why I really like comments like yours that explain some points that I have missed. Glad you found this information useful and gave a try at DIY! nice job!
Video was extremely helpful. I fixed the trimmer and put the springs back. When everything was back together the light was on but the razor did not turn on and buzz. What might I be able to do to fix this?
Check how you inserted the control board or maybe you have bent the metal legs.. it should touch the motor unit.
Hello, and thank you for your video! What is the lubricant you use on that small piece? What I hear is Fuji fitch spray? Can you give us the exact name? Again, thank you!
It's ptfe spray or teflon spray, it's not as messy as regular oil. I think i bought it from lidl, haven't used a lot of these - so no brand recommendation for now ;)
Can you do the cleaning station? A small circular piece of metal was shaking around in it and I have no idea where it came from
Good idea, will do!
Great video of the inner parts of this shaver!
Mine is just 4 days old and already has waterdroplets on the inside of the blue powerbutton. Is this normal?? I use it for wet-shaving using cream.
As far as I can remember power button just sticks on top of the casing so it shouldn't be affected by water. just check out this video one more time.. especially the assembly sequence, main task is to keep water away from electronics..
Water inside or behind the button should-not-hapen. After 8 months of use brown rustwater emerged from my Braun. The trimmer got rustspots all over. It was repeared under warranty by replacing the body. No water behind the power button anymore!
Thank you very much. Your exceptionally clear video saved me from scrapping my 760cc because of the trimmer.
i dont mean to be so off topic but does anyone know of a method to log back into an Instagram account?
I somehow forgot my login password. I love any tips you can give me
@Colby Timothy Instablaster :)
@Jabari Ulises thanks for your reply. I found the site on google and I'm in the hacking process atm.
Seems to take a while so I will get back to you later with my results.
@Jabari Ulises it worked and I finally got access to my account again. Im so happy:D
Thanks so much, you saved my account !
@Colby Timothy glad I could help :)
Very helpful. I discovered that the small plastic piece (tiny stub) shown at 9m53s had not only broken off (that you point to), but also the triangular plastic post that the other tiny plastic piece slots onto. So I need to buy a $28 trimmer replacement, for a 25 cent plastic piece? Ugh.
Yes spare parts are unreasonably expensive compared to new unit price..
although you need to take in to account warehouses and so on.. difficult to judge, but manufacturers do love new consumers more than selling spares that's for sure.. you can look in eBay for a spare unit.. but this trimmer is a week point of this shaver..
Great video but have you ever disassembled the head from the motor?
I have mine a part and it is ready to put back together but there are 2 big springs which don't seem to fit anywhere obvious.
Do you have any pictures of how it fits together? or do you know?
I assume they fit either end of the dirve shaft as it moves back and forth.
Well I solved it, they neded to be under extreme tension to put back in. The only problem is now the springs from the release button are rubbing on the hinge when it moves so I'm not sure what I did wrong.
There is a real lack of documentation on this stuff.
I only disassembled series 9 head once and sadly after that it was impossible to get it back together.. it seams that you need some special tools to have all the springs under compression and be able to assemble it.. so I have it in a plastic bag maybe in some time a solution will come up but for now disassembly of head is a big no no for me :)
Trimmer wouldn't retract but the video showed how to take apart and reset the spring. Brilliant, thank you.
thanks for the video! do you know where the trimmer parts can be ordered? since I broke couple of them accidentaly :(
Sadly no.. my source is eBay :)
@@letsfixitgarage found one in UK online store. And will rewatch your video soon, when iy will come to install the new trimmer part. Cheers :)
Great video. I managed to fix my side trimmer but now the shaver wont operate. Blue light goes on and off. Green power remaining lights come on, but the motor does not run. Help !
Did you disassembled it up to motherboard and battery? It could be that you have bend some of the metal pins of the casing as its just pressing in.. check it one more time..
Great video - I replaced the beard trimmer as it wouldn't retract. Many thanks !! Any chance you will do a video on repairing the beard trimmer ?- the spring has disconnected and I don't see how I should put it back together ??
It's already some time when I repaired these need to get one on my hands to make a video :) but if I remember correctly sometimes some plastic holder/leg brakes off that's why it doesn't hold..
This was very helpful, thanks man
Any chance you could do a video about disassembling and assembling the trimmer only? My trimmer fell apart. Thank you very much
Trimmer or shaving head? Trimmer is done in this video, shaving head lays on my table disassembled I think it needs some special tools to assemble it..
Trimmer! You take it out, but you do not completely take it apart. You even mention that it would have to be glued if taken apart. Thank you very much
@@davidgove1999 needed to check the video as I already forgot how it was done :) yes I haven't shown step by step how to take it apart but you can get the steps of the trimmer assembly from roughly 8 minute.. it's always easier to take things apart as to assemble it back together :)) and if yours falen apart and not only closing it could be some plastic parts on the frame.. then only exchange of trimmer can help as there is no spare part as frame only..
Brilliant video, I made one nice shaver from two of my defunct S7's....thanks a lot
Thanks! This has helped me a lot. I am also glad my shaver is not as dirty as the example you used. I‘ve not been able to get the long hair trimmer reassembled to retract correctly, and have ordered the replacement part at this point. It is indeed quite tricky to get the little actuator arm in to the slot, whiteout the spring jumping off one of the posts. I might try again out of personal ambition, but for now grateful I can take the shaver apart and reassemble, and save me $400 to buy a new one. I’ve only had this one about 8 years.😊
these are quite reliable and powerful shavers! even s9 fails behind with reliability.. glad it was helpful and thanks for the beer ;) hope you will succeed with ambitious project ;) in that case you would have a working spare for quick exchange.
where to buy your star screwdriver number 8? looks cool
this particular electric scredriver came from china :) aliexpress has lots of suppliers with this screwdriver. Quite handy, altough you press the buttons quite often unintentionally when you want to use it as normal screwdriver..
Torx Number 8 is the one
Hi I have a 7865cc I bought it used but the guy said it was brand new it shaved great but I’m not sure about the lcd screen when I’m changing it or shaving 1 side I’d full green and part is half green & the other thing is like a quarter green should they all be full green ? Also the screen in the middle is green also does that mean I have to change it? I can’t find anything about the lcd screen can anyone please help ??
Send me a photo or a link to the photo.. there is a lot of screen modifications on the 7 series..
Great video! One more question - on the shaver head there is a release button on the left and a lock button on the right. My lock button fell out. I tried to reinsert it but it’s loose and keeps falling out. How do I get it to stay in place?
Sorry haven't tried to take the head apart.. only on series 9 and haven't managed to get it back together... Very delicate work... After that haven't tried to get in to series 7 head :)
Thank you for creating such a detailed video. I just fixed my 7 series shaver with a broken sliding trimmer. Braun sells the exact trimmer for $26. Your video made it really easy!!! Thank you!!!
Thanks for sharing and your feedback!
There is a clear plastic piece sitting on your mat that I believe goes on the switch? Probably would be good to show it works once done. Otherwise very helpful video!
Nice catch :) yes, you are right, after filming it and cleaning up I saw it laying there, had to disassemble it one more time to insert it in to the turn on button.
Hi 19:28 you say the head has the side pieces that are not recomended to be taken out as they ahve springs to release the shaving head - one of mine came off when I dropped it, and I cant see how to reattach - pressumably the springs need to be correctly relocated somehow?
I have seen videos on CZcams on how someone takes them apart and reassembles them.. sorry don't have them on hand but they are there... a lot of very delicate work..
btw, could you please provide a make and model number for that awesome little electric screwdriver? I definitely want one!
Bought it from china, try to google wowstick it's quite handy and quality is up to the price i really like it :)
I was about to ask the same thing.
What battery does it take ?
An excellent tutorial! Wiht the trimmer, I had to get a replacement as the plastic part that slides was broken internally!
Keep up the good work buddy! Here to give some support for a small channel. My Mate Vince gave you a good bump.
Important to note that some also have a screw inside the charging port. Just look where the cord plugs in and see if there is a screw head clearly visible.
Thanks for the hint. I think it's comon on series 9 maybe they changed the design on some of series 7 as well
Know how to replace the battery in the electric shaver?
When you open the case the battery simply pushes out of holding clips. But replacement battery needs to be exactly for this model as it has some special tips spot welded to it..
Aswsome video! It helped me a lot when I needed to disassembly my Braun Series 7 in order to replace a broken long hair trimmer. Thanks for sharing!
Thanks for your Feedback!
Question. What size hex screw are you using? Thanks in advance.
That's quite some time ago, sorry but I don't remember and if I'm not mistaken it's torx screw's not hex..
@@letsfixitgarage Ok thanks. I'll figure it out but that helps.
Where do you order replacement parts?
I'm a private diy'selfer so no secret supplies :( aliexpress and ebay is where i look for spares..
Many thanks for this video! Where I can order the spare parts? Thanks in advance!
Sorry no idea.. I usually get my things at eBay but haven't seen there new parts. Maybe try to contact official distributor service department. Sometimes they can help with parts as well.
TYSM for the trimmer tip. Opened it up, the spring ends were not secured under the plastic. Tucked both sides under the plastic (and did a cleaning of the trimmer), reinstalled the trimmer and now the trimmer stays secured!
Good job 👍 one more unit saved from the electronic land fill. These expensive electronic devices are build to last we just need to share the knowledge!
All this teardown and I still don't know how to replace the Battery ☹️
Is the battery soldered or can it just be pulled out?
Simple pull out. When you get to the pcb you just pull it out. Ofcourse the battery that you buy needs to have these special pins on both sides..
@@letsfixitgarage Do you know where I can get the battery at? Thanks for your help and reply. Just subbed.
Not sure where you live but there are plenty on ebay or other specialized servicing sites. Even aliexpress has them :)
@@letsfixitgarage Yes Found it on eBay. Thanks alot. Loos pretty easy. 👊
Such a detailed explanation of how to fix the side trimmer.
While putting mine back together I knocked out the loaded spring in the side cutter.
Can you do a video on how to load the spring. Thank you.
Need to look if I have some of the old parts. I do remember that there is a small plastic hook, that if broken, spring tends to jump out of its place...
Hi! How can i remove the walls of the shaver’s head?
Great teartown! The contacts to charge my Braun Series 7 stopped charging from the base. Pulled it apart - it looked like the copper contacts that go to the battery weren't touching those little silver points that go from the inside of the unit to the outside (which then touch the charging points on the base). Put it back together - made sure I sanded and cleaned all the points and voila! All working again
Thanks for a good word ;)
Здравствуйте! Спасибо за ролик! Подскажите как разобрать плавающую головку на модели Braun sycro 7785.Хочется почистить ее, так как со временем она стала хуже двигаться. Хочу почистить и смазать ее.
I tried only with series 9 and failed to reassemble it.. but I have seen videos on CZcams of someone doing it. So it's possible but extremely difficult and time consuming.. don't recommend, especially only for cleaning..
thank you! super helpful and the only video out there.
Helpful video on how to disassemble the shaver! Mine was rattling loudly and stopping so I opened it and unfortunately the rubber seal seems to have failed and allowed moisture into the shaver (I don’t use it in the shower and use the cleaning station to clean it after shaving, so it must have been condensation from being in the bathroom over the years. It’s a shame because I really liked this shaver. I don’t want to risk using it with water damage though, this is the second electric razor I’ve lost to water leaking in. Neither had ever been dropped, so it’s very frustrating especially since they are supposed to be waterproof. I am going to stick to a safety razor from now on, but I hate how much time those take.
My suggestion would be to take out the cartridge out after cleaning. Solution is alcohol based and has a lot of evaporation that comes right up to the shaver.. normal water humidity shouldn't be a problem for them..
Informative video, but with one drawback. On a couple of occasions the task went out of view off screen, but one to guess what was happening. Also, the audio wasn't all that audible, but apart from these minor issues, the instruction was invaluable. I'm so glad I found you as, frankly, I really had no idea how to do the fix. Thanks big time.
Yes sorry about that, audio is improved in later videos, but with the staying in shot it's more difficult then it seems :)) thanks for the feedback!
Thanks a lot For the instructions to teardown the Braun Series 7 so I could repair trimmer
Super Video. Ich habe das Teil bei mir auch wechseln müssen. Dank deiner Anleitung hat es wunderbar funktioniert. Dankeschön
Freut mich zu hören :)
I was able to fix the trimmer so that it'll lay flat. The design appears to be a little flawed... in that it's not as robust as it could be. If you flick the trimmer open and closed quickly and with firm force, you can cause those spring ends to dislodge. So the best practice is to always raise and lower the trimmer with care. That seems to be reliable, at least in my tests so far. BTW, if you ever get a used shaver that didn't come with a cleaning station or the previous owner just didn't use it, that trimmer frame can trap a TON of whisker debris. I took a chance on a used shaver and the debris was so tightly packed inside the trimmer (above and below the frame), the trimmer flap couldn't be fully raised! A total mess. It's amazing how some people can be so negligent and uncaring of the equipment that they buy.
Hi what is the name of the product that you sprayed onto the shaver? It sounded like PKFA
PTFE spray if I'm not mistaken.
Thank you so so much for your help. My shaver was driving me insane. Thanks for the tutorial.
Good to hear :) and thanks for the feedback!
great video sir, this saved me some $$ in parts replacement. My 760 shaver had a few problems on the trimmer. A thorough cleaning and reassembly did the trick. Your video did skip the disassembly of the trimmer itself, would have been nice to have this to be a complete disassembly video. Much thanks though.
Very comprehensive breakdown, thank you for sharing this :)
Thanks for the feedback and your welcome ;)
One thing I'd like to add. In some videos I've seen, the repairer shoves a thin metal screwdriver into a slight groove between the lighted power button cowling and the black plastic frame of the switch, then twists to cause the switch to move up/forward for removal. This is not reliable. I had tried to do that at first, thinking I could escape the full shaver disassembly, but I ended up causing some gouges to the plastic. After that, I decided full disassembly was the only way to go, and I followed your instructions on slowly working the trimmer switch out by pressing and pulling on various places. I think the problem is that shaver whisker debris gets inside and then creates extra friction. The process is tricky. I found that upon tapping the piece a few times after moving the trimmer assembly a little back & forth, some debris came out that then allowed the switch to move out. Like you said, that trimmer switch frame is fragile, so best to take it slow and be gentle. And you need fingers grasping in multiple places that wouldn't be possible without a full disassembly of the shaver body.
For cleaning compressed air is a good option. cleanes out all kind of hair much better then the cleaning station! But do it outside ;)
@@letsfixitgarage For the most part, I just use a good cleaning brush. I also wiggle the head back & forth without the cassette installed first, as well as rap the cassette against the inner wall of the sink. and follow with a brush. And occasionally, I'll run a jet of water over and through the cassette for general cleaning. About once every other month, I'll use the Braun cleaning station so I fully refresh the shaver. I always clear out the whisker debris first, which significantly extends the life of the cleaning fluid. I replace it about once every two years.
Well, I'm having mixed success with this trimmer. On one of my Series 7, it's fine. But on the other, the spring peg keeps slipping out. Is there a trick to fixing this that you could recommend so it's a longer lasting fix? Thanks!
Check both trimers when they are disassembled side by side. There is small plastic part that holds the spring in place and it can be that one of the plastic bits is broken off that's why it's not holding in place.. you need to recreate the plastic holder with hot glue or something else..
@@letsfixitgarage Thanks, good idea about comparing the two. I didn't see any apparent broken pieces, but perhaps the problematic one might have some plastic erosion that's allowing slippage. I'll give it a go with some glue and if that doesn't do it, I'll have to source a new part. I'll post results later -- cheers!
@@letsfixitgarage OK, my first attempt failed. I used "Super Glue" but that didn't work for this application (it cracked). Instead I used Shoe Goo. It dries firm, but is still slightly flexible. It provides just enough staying power to keep the spring peg from slipping out. Of course, from here on out, I'll be very gentle and slow with moving the trimmer, but so far, extending/retracting a dozen times... seems to be holding.
Spare part code of the trimmer? Thank you
Sorry, no idea.. haven't used any spare parts service, just eBay with additional series 7 for spares..
You helped me to repair my grandfathers device, thanks!
Nice job! Hope grandpa is proud and happy ;)
Hello, can you tell me where I can order such a blue mounting plate? Or what is the name of it? Kind regards André
Muy buen tutorial,me fue de gran ayuda para solucionar un problema con el cortapatillas.los subtitulos en Castellano Español muy bien,gracias y saludos.
Thanks! and for subtitles thank you Google ;)
was able to fix my trimmer thanks to your video man!
Great job
I did this repair in 15 minutes but when done the springs unclipped again. Any advice?
Could be that plastic clip is damaged/broken try to add UV glue or epoxy to make better holding point for the spring
@@letsfixitgarage Thanks, I bent the ends of the springs toward each other and now they stay in perfect
Huge thanks for your informative video. was able to fix my beloved series 7 shaver.
Just wanted to add that "beloved" is a good way to put it. The 7-series is a terrific design. I've seen the newer models and frankly, Braun didn't make any real notable improvements. They just keep changing the styling and maybe some tweaks to how the motor works. But frankly, this shaver is a top design as-is. I was a long time user of the previous model the 360 complete 8900 series, which was a terrific shaver for its time. But the body is a little slippery to hold and the motor is a little weak. The 7-series helped reveal those flaws by providing a super strong motor and phenomenally grippy rubber backing. I think I'll end up buried with mine when my time comes. LOL!
It is a really good design with head fixing it's even better then series 9 that has its infamous loud noise where plastic head is fixed with metal arms and plastic wears out.
@@letsfixitgarage Good to know this. I had been toying with the idea of picking up a used Series-9 to play around with it, fix minor problems, etc... but sounds like it's not worth bothering about. Btw, one good indicator of abuse to a Braun shaver is the bubbling or erosion of the outer coating (e.g. silver, black) along the back edge just below the shaver head. This usually means the owner dumped alcohol into the cleaning solution to try saving money. That alcohol can cause degradation of parts, not just cosmetic but also mechanical.
Not sure about this as original cartridges contain a lot of alcohol as well.. so even with original cartridges you will get this problems if you will use the cleaning station like after every shave.. this is the weak part of series 7. I believe there are some black series 7 that don't have any coating on the frame these don't get the problems in cleaning station, but silver or glossy surfaces tend to peel..
@@letsfixitgarage Good to know. Yeah, I think the main reason why I don't see it happening to my shaver is the infrequent cleaning station use. I run it about once a month or two, and perform manual cleaning in between. I replace my cleaning station cartridge about once every other year!
Great teardown. Thank you for sharing.
Glad it was helpful 👍
Super video. Helped me take the shaver apart and get it fixed.
Thanks for your continued demonstration on repair of variety of electronic gadgets.
Thanks for a good word ;) if possible share the knowledge!
I have a question/an idea ! I purchased Braun Series 7 Cassette 70S (9000 Series) (Basically replacement blades) and was wondering, theirs gotta be a way to sharpen/or send out to get sharpened my old Braun blades. Please Braun Series 7 people/customers/professional Braun Employees/Engineers , this is such an amazing product , please incorporate a blade sharping business that goes along w/ the sell of the new Cassette! You guys figure that out , literally quite possible the best product ever invented! Please and thank you.
buenas tengo una pero tiene problemas funciona pero no corta. le puse la hojilla nueva pero tampoco corta. pregunto que podra ser. gracias 🇻🇪
Well you will need to open it up, as in this video, and inspect the internals. there is no magic cure for something not working ;)
Thanks
Really appreciate it, Thank you!
Nice , thx
Thank you very much
Thanks a lot! I could easily understand, how to repair my trimmer!
I had ordered a new one - now i got one spare! :-))
Great! thanks for sharing :)
Thanks 🙏 this really helped me!
Thanks This was great.
Glad you enjoyed it!
German products are outstanding until they break down, lol 😂!
sadly to much thin plastic.. trimmer frame could really be from metal then again to reliable is not what manufacturers want in this time..
Yes, if the components made from metal or more solid material would be much better, But to be honest, I found part of the plastic trimmer broken. But after reassemble the trimmer, it worked perfectly! 😀
@@letsfixitgarage absolutely right
A little frustrating on some sections where you were talking about what you were doing, but your hands and the part were mostly out of view. But, you provided a lot of very useful info nonetheless. I have just one issue with my 790cc, after 8 solid years of 100% reliable service--the trimmer doesn't lay flat. It suddenly became loose while I was cleaning around the trimmer, and I suspect a little pressure caused one of the spring parts to come loose. I'm hopeful that the retainer part is still intact and I can put the spring back in place, rather than spending $25 on a new part.
Thanks for the feedback. And hope that it's only jumped out spring and not broken part. Although even if some plastic comes off it's still possible to fix it in place with some hot glue.. good luck and hope it works out!
@@letsfixitgarage You're welcome. Actually, my issue was a little more complex. The plastic fuse-tabs that hold the silver part to the switch panel (it sticks through with those curved bits of different sizes) had somehow deteriorated and broken up. This loosened the switch enough so that one of the spring ends slipped out of the retainer and then the trimmer wouldn't lay flat. When I took my shaver apart, that sliding switch panel completely came apart. I was then lost about how to put in that lever and spring. I had to freeze frame your video a few times to finally figure it out. The first trick was realizing the orientation of the lever. I could see one end was like a raised plug, where it looked like a spring would attach. After getting the orientation tested, I applied several dollops of epoxy glue at the 4 adhesion points, inserted the lever into the silver part, then lowered the silver part into the switch panel. After it dried, I was able to attach the spring. One tricky thing--there's a little magnet that's essential! Mine fell out. I figured out where to put it before lowering the silver part into place. I got the rest of the switch into place, anchored the spring ends, and now the switch is working properly. I was going to wait until tomorrow to finish assembly, but I decided to give it a shot, and it went smoother & faster than I expected--all working great! Thanks again for your video help.
Awesome, thanks a lot!
Good but you forgot to put the little white plastic button controller in. I worked it out but some people may not.
Yes thanks for pointing it out. I found it after I made the video. I think I added some text in to the video that this part was forgotten but I'm not to sure.. maybe it was left out...
I like all the detail in the video, however, my Series 7 shaver has a problem with the Lock lever on the right side of the head. It came out while in the case during travel. I don't see any way to get it back in, and your video does not address the head.
Sorry haven't tried to take the head apart. At least on series 9 there are a lot of springs that are a pain in the a** to put back together.. my suggestion would be either look for a used or broken series 7 shaver and Exchange the head or of course there is possibility to contact Braun and get a new head.
Thanks, my trimmer got loose: fixed!
Klasse - Danke - Half mir beim austauschen des Langhaarschneiders
This trimmer is very easily not function well , thanks for sharing
Not a complete disassembly, the thing that holds the shaver attachment can still be disassembled.
I think I mentione that it's possible to disassembly it but I was not successful in assembly :) so do it at your own risk, but then again I saw few videos where it was done so it is possible.
@@letsfixitgarageYep, springs(all under load) and a bunch of small parts that tediously need to be put back together. It sucks.
@@Astromyxin exactly.. I'm not patient enough for that :))
Küçük plastik parçayı unuttu ama yerine yerleştirmeyi.!!!!!!
Yes you are right! Needed to re do it off camera when I spotted the mistake.
If you have a bag of disassembled braun series 7 5671-74 parts because you took the bottom of the head apart see this czcams.com/video/zgyB2dBy2PY/video.html
The volume is too low and sounds like there is all lot of self talking!
sorry about that. it's an old video, some improvement are there but I'm still learning from bigger channels and their quality..
Chello, great tutorial, helped a bunch. Thank you so much! You where looking for a disassemble /assemble video? I found one but it's not so good as you either see only his gloves (yes, he uses gloves 🤣) or the cam doesn't catch what he's actually doing. But I guess it would give you enough info to (hopefully) make a better one yourself? 🙏
m.czcams.com/video/zgyB2dBy2PY/video.html
Sorry, forgot to mention for the head of course
Thanks for the link. But why do you need to take apart the series 7 head? It doesn't have problems as series 9 tends to have.. or do you have some break down in the series 7 head?
I've took it apart and cleaned the shaver and also got a new blade unit. But my problem - if trimmer is engaged the motor-unit makes extreme rattling noise (but only when the blade is attached, without no problem). So my guess is that the problem lies within the head unit. I have ordered a new head unit and will see if it fixes the problem. But I wanted to save myself the 40EUR though
Interesting defect.. well if you took apart the trimmer and cleaned it then it could be the head unit... And as said in video I would pay for a new one :) reassembling the series 9 head is a pain. Maybe s7 is easier haven't tried it.. anyway when you will have a new one you can always take the old one apart maybe make a CZcams video? ;)