
- 13
- 359 527
Engineering Workshop
United States
Registrace 17. 03. 2010
A channel that combines engineering and woodworking to build unique projects.
3D Printer Project: CNC Dust Hose Clamp
Build video for a 2.5” dust hose clamp for my Shapeoko Pro XXL.
Shapeoko CNC dust Hose Clamp, 3D Printing File:
www.etsy.com/listing/1214417775/shapeoko-cnc-dust-hose-clamp-3d-printing?click_key=d48cf23bb6f9072ccfa1a6eea3c2fc0826957072%3A1214417775&click_sum=6515a0b6&ref=shop_home_active_1
Build Plans for my CNC Enclosure:
www.etsy.com/listing/1025271503/cnc-enclosure-xxl-build-plans?click_key=74cb99e540032dab181381f7950a363adebfe12f%3A1025271503&click_sum=f1452046&ref=shop_home_feat_1
Items used in this build:
1. MagiGoo: amzn.to/3uKdbL2
2. HATCHBOX 1.75mm Black PLA 3D Printer Filament: amzn.to/3KZR4Ww
3. Creality Ender 6: amzn.to/3viSjtC
zhlédnutí: 3 751
Video


CNC Project: Drawer Organizers
zhlédnutí 144KPřed 2 lety
Build video for drawer organizers that fit into my CNC enclosure. I build two complimentary drawer organizers, each 12 inches wide by 20 inches tall. Two drawer organizers side by side are 24 inches wide. Drawer Organizer Plans and CNC Files: www.etsy.com/listing/1190674814/cnc-bit-work-holding-drawer-organizers?click_key=db26de8f3879fbfc3febcb3791f00e5d6c191a8a:1190674814&click_sum=2dd92121&re...

CNC Project: Woodworking Mallets
zhlédnutí 5KPřed 2 lety
CNC video using the Shapeoko Pro to create woodworking mallets. Build plans for the woodworking mallets are available on Etsy: www.etsy.com/listing/1137844414/woodworking-mallets?click_key=70290b1bf5d68d75b0e82e1b2e41e7cb70799022:1137844414&click_sum=afb28191&ref=shop_home_active_2&sts=1 Build plans for the featured CNC enclosure are available on Etsy: www.etsy.com/listing/1025271503/cnc-enclos...

CNC Project: Special Forces Detachment Logo
zhlédnutí 2,2KPřed 2 lety
CNC video using the Shapeoko Pro to create a wooden logo for SFOD-A 0326. Build plans for the featured CNC enclosure are available on Etsy: www.etsy.com/listing/1025271503/cnc-enclosure-build-plans?ref=shop_home_active_1&crt=1 Help the channel out with these affiliate links for the CNC Enclosure: Smart Home Products: Google Nest Smoke Alarm: amzn.to/3pRns61 Google Nest Cam Indoor Wired: amzn.to...

Vertical Scrap Wood Cart
zhlédnutí 1,7KPřed 2 lety
A build video for a vertical scrap wood and special project wood cart / organizer. Check out the build plans! SCRAP WOOD CART: www.etsy.com/listing/1090669558/scrap-wood-cart-build-plans?ref=shop_home_active_1 FLIPTOP CART: www.etsy.com/listing/909891949/extremely-versatile-flip-top-cart?ref=shop_home_feat_3 Help the channel out with these affiliate links: Casters: amzn.to/3mvS8HZ Titebond III ...

CNC Enclosure: All the features
zhlédnutí 60KPřed 2 lety
Build video for a complete enclosure for a bench-top CNC; the Shapeoko Pro XXL. Build plans for this enclosure are available on Etsy: www.etsy.com/listing/1025271503/cnc-enclosure-build-plans?ref=shop_home_active_1&crt=1 Help the channel out with these affiliate links: Smart Home Products: Google Nest Smoke Alarm: amzn.to/3pRns61 Google Nest Cam Indoor Wired: amzn.to/3Bu6Kfl Hue Smart Plug: amz...
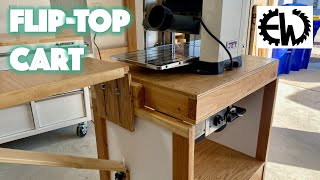
Extremely Versatile Flip Top Cart
zhlédnutí 81KPřed 3 lety
A build video using the engineering design process to design and build a flip-top cart for a 13" JET Helical Style Bench Top Planer (JWP-13BT) and a Porter Cable 5 Amp Bench Top Sander (Model #PCB420SA). Build plans available on Etsy: www.etsy.com/listing/909891949/extremely-versatile-flip-top-cart?ref=shop_home_feat_3 Help the channel with these affiliate links! Casters: amzn.to/3mvS8HZ JET 13...

iVac Pro Programming Tutorial
zhlédnutí 4,8KPřed 3 lety
This video quickly details how to program the iVac Pro Tool Plus, iVac Pro Blast Gate, and the iVac Pro Switch. Tables from the iVac User Manuals are shown in conjunction with diagrams on how to flip the internal switches within the iVac Pro components.

Over-Engineered Miter Saw Station - Part 3
zhlédnutí 12KPřed 3 lety
A build series that works through the engineering design process to design and build a miter saw station. This miter saw station was built around the Bosch 12" dual-bevel glide miter saw (GCM12SD). For a more details on the miter saw station and build plans, visit my Etsy Shop! Build Plans: www.etsy.com/listing/855941689/over-engineered-miter-saw-station?ref=listing_published_alert A better way...
Cleverly Simple DIY Computer Desk
zhlédnutí 1,5KPřed 3 lety
This build is perfect for the DIY'er or hobbyist woodworking looking to make their own computer desk. This desk's cleverly simple design uses only four easily producible unique components, and can be built in an afternoon for under $100. Build Plans: www.etsy.com/listing/867222514/cleverly-simple-diy-computer-desk?ref=shop_home_active_4 This design uses materials commonly found at your local Ho...
Over-Engineered Miter Saw Station - Part 2
zhlédnutí 6KPřed 3 lety
A build series that works through the engineering design process to design and build a miter saw station. This miter saw station was built around the Bosch 12" dual-bevel glide miter saw (GCM12SD). The design leverages the strength and cost effectiveness of construction lumber to produce a miter saw station that can survive multiple shop moves and hard regular use. This station was designed to ...
Over-Engineered Miter Saw Station - Part 1
zhlédnutí 12KPřed 3 lety
A build series that works through the engineering design process to design and build a miter saw station. This miter saw station was built around the Bosch 12" dual-bevel glide miter saw (GCM12SD). The design leverages the strength and cost effectiveness of construction lumber to produce a miter saw station that can survive multiple shop moves and hard regular use. This station was designed to ...
DIY Bumper Plate Storage
zhlédnutí 25KPřed 3 lety
Using the engineering design process to build bumper plate caddies for Rogue Echo Bumper Plates. Build Plans for Bumper Plate Caddy: www.etsy.com/listing/848628143/diy-rogue-echo-bumper-plate-caddy-build?ref=shop_home_active_1 Build Plans for 2x4 Half-Rack: www.etsy.com/listing/834727252/diy-2x4-half-rack?ref=shop_home_active_2
Best moment of the video: planer drops on stand to the beat. Prove me wrong.
Great video & cart…but the damn music is WAY too loud (and distracting)….but if I turn the volume down, your voice is barely audible/understood. Suggestion: if you really want to have the distracting music throughout your videos, at least learn to adjust your audio input levels during editing…..so there’s no need for viewers to keep lowering and raising the volume (over & over)
Good Morning 6-1-24, First thank you for your service from an old Marine, '66/'69. Just received my Shapeoko 4 and before assembly I want a mobile base for my small wood shop and stumbled across your video. Way more than I plan to do for what I need but very much enjoyed watching your work and the fact you are straight up about your mistakes and cures. Subscribed as a Thank You for your service and look forward to following you as time moves along. On this one video I did not see your service branch but regardless, Semper Fi
I'm U.S. Army, branched Special Forces (previously Infantry). I'm a Green Beret that now serves in the U.S. Army Reserves.Thank you for your service and for the channel support. Good luck with your new CNC!!
Interesting, Hunter. Brings back memories of Okinawa in the early '70s and the wood inlay plaque depicting the 1st Group flash that I made as a plaque to carry a metal casting of the SF crest as a departure presentation for Colonel Charles M. Simpson in 1971 as he departed command of 1st SFG. Simpson, an SF trooper from the earliest days, was the finest officer with whom I served during my 7-1/2 years in the Army.
Half-lap joints have another advantage; they result in less wood used because you don't have to double up your 2x4's to get the half-lap effect. Not only do I like your cart design and building method, Hunter, but upon noticing your wall in the background I find that we are brothers. Early 1970's 1st SFG for me.
Hello, which vacuum did You use?
Nice build. Your choices make sense to me, and the outcome fits your needs well. Your music selections are awesome. The thing made listening harder for me, is that the sound of the music was very full compared to the sound of you speaking. I had to keep cranking the volume to hear you, then dialing it back for the music. Anyway, great build. Thanks.
Very cool! I wonder what it would have looked like if you'd painted the top of the MDF first? I bet a two-toned design would look really good.
I love this build! I especially like the support wings. Lighter weight but the framework provides stability and strength. And the break-away support is a very elegant solution. My only question is regarding the power strip. Granted, it's not something that should happen very often, but what do you do if the onboard circuit breaker trips? As it's built, it requires the removal of at least one tool and the mounting board. I think the simple but far less attractive solution is mount it on the outside and drill a couple of holes for the cord ends to feed through. Or replace it with a multi input adapter with no surge suppressor and keep everything inside as shown. Again, it's probably not a high occurrence issue. But it will only take once before it's a major work stoppage. All in all, still a very cool design.
Great Work...!!! LOL @ "Fire Protection Measures"...
Great build - awesome dust collection hood - will be purchasing plans and thanks for your service!
First and foremost - thank you for your service - much appreciated. Second - Just retired from Goodyear Tire and Rubber (IT Manager) and getting my shop in order. Been doing hobby woodworking for close to 30 years but now get to do it on a regular basis. FIrst project is a miter saw station and then an outfeed table. Going to your Etsy site to see if you have plans for your dust collection hood. I have spent the last three weeks looking for flip cart design and gone through dozens and dozens of videos and have stopped my search with yours. Awesome work and will be purchasing your plan for this. Lastly - looks like you are (or have been) stationed about 45 minutes away from where I live so welcome! PS. Also subscribed to your channel. Best wishes!
War crim1nal🤬
They did call me “War Crime White” 😂
Love your design, especially the CAD model pre-production verification!
Bloody brilliant!!
looked at several best so far
This is a problem I’m currently trying to solve. Great idea and model🤙
Hi! I see that you use a second wasteboard over the T Track wasteboard. Is there a special reason? What would be the benefits? Thanks.
I just got tired of cutting into the OEM waste board because there is no easy way to flatten it - the CNC can’t reach the edges. Also, I never want to hit the aluminum t-track underneath. With another waste board on top, I can flatten it occasionally, use an angled corner stop, and have extra protection against hitting the CNC underneath.
Sehr coole Idee! Danke für das Video!
What happened to your plans to print this clamp? I see you offer a fully printed version of this item, but had hoped to just buy the plans and print it myself. Is there another site that I can purchase the print files? If not, I gotta say it is a very cool idea. Great idea mounting it above the Z-Axis motor, You are right, Carbide should offer this type of accessory. Maybe you can sell the idea to them.
Hey, I’m no longer offering the DIY plans for the dust hose clamp; sorry to disappoint. I did a complete redesign of the product and I think Gen 2 is much better than Gen 1. To be fair, the functionality is probably the same, but aesthetically I like Gen 2 a lot more. I hardly sold any of the digital plans, and didn’t want to compete with my physical product. I can’t say enough about Gen 2 though, you should definitely get one.
"Let's put on some background music you guys can complain about in the comments." ROTF. Subscribed.
What was the tool you used to make all those slots? Thanks.
Damn dude. Bad ass. The tongue and groove support makes me nervous but the rest is amazing. I will surely be using this design.
If you wanted the weight to go straight through the frame, then you should have placed a stile directly in line with the bearing right in the middle. This is how houses are built when you want to transmit the weight of a heavy structure directly through the house and into the foundation (also called a point load). At the least you could have used a heavier support at the top, like doubling the stiles (kind of like a header).
First off thank you for your service! Funny thing I just purchased the Shapeoko 4 xxl and I went through the same thing with some of the switches weren’t working and it was very frustrating lol but Oscar at Carbide 3D was awesome and he got me up and running! I’m very interested in your plans for your enclosure.
Thank you for the video it was by far the best one ive found to explain it
“And I don’t see any smoke, that is surprising “. Confidence restored. 😂👍👍
You didn’t miss a beat with this enclosure. Outstanding work. 👍👍
Will this enclosure work for a longmill MK2 48 x 30?
Love it! Nice job! Thank you for your service to our country!!
Excellent craftsmanship. Very nice work!
Is there a way to get detailed plans/bom for this
Had to stop watching it because of the annoying background music. it adds nothing, so why put it in.
I wanna watch your video so badly right now. I’m making a cut on my machine in my apartment and it’s way loud rn. And your audio is quiet in so many places. I’ll be watching again!
Measure twice.....
Like it, and appreciate that you allowed for wanting enough density to be good for hammer strikes and your other thoughts about plywood.
Great work and great design
Great work !!! So clean....
Very nice and neat job! Thanks for sharing and thanks for your service!!
"boring operation" - great! 😁
Love the comment that you built! I noticed you have a desk collection in the drawer, What type is that with the extra container?
I'm using a Festool CT15 dust extractor with a thien baffle system on top of a 5-gal bucket (chip separator).
@EngineeringWorkshop_hvw Thank you. I intend to order the file for the cabinet and the drawer. I am waiting for block friday for the shapeoko five pro
Nice work. The surprised look on your face when the electrical actually worked reminded me of me. Thank you for your service.
Thank you for sharing this. Very impressive. Follow-up question if you happen to still check this - does the Festool do OK heat-wise in the closed drawer?
I haven't had any issues so far. I did install a small computer fan in the back of the enclosure cabinet to get some airflow back there. I just wired the fan to my auxiliary switch on my control panel. I'm not sure if this was needed - I ran it for months with out the fan - but it makes me feel better.
Thanks@@EngineeringWorkshop_hvw. That's good to hear, and good tip on the computer fan. I'm thinking I'll try something like that or a bathroom exhaust fan and pipe it outside. I just finished an adapted wider version of your enclosure, and while this project absolutely kicked my butt as someone new to woodworking, your plans and instructions were really well done and kept me on track. The only issue I've had is the front-top not wanting to slide back... but I suspect it's because I did two drawer slides on the top and probably need to re-align / reinforce for sagging on the back half. Or I just didn't get that piece square, which is very possible. You mentioned this in another comment, but for anyone else looking at this, I'm also pleasantly surprised at the sound reduction. I'm sure it's not anything like the soundproof-designed enclosures you see on here, but it's completely possible to have a normal level conversation or watch a TV show next to the enclosure while it's running. Thank you!
Enjoy as shop building and organization will make all your projects much more rewarding. Simply enjoy! Thanks for sharing.
So this has been up an runnign foe some time. Is there any update to the dust collection or the station in general? How is the dust collection working?
Wow, your methods and application your use and placement of fasteners it right on point.
Just found this video, and I like the build you have. Wanting to build a flip table for the planer and this one looks awesome. I wonder after 2 years now if you have reinforced the wing supports with metal as the tongue and groove looked pretty sketchy.
Thanks! Honestly the tongue and groove has worked really well. I figured with frequent use they might become looser, but they are still really tight and solid. The tongue and groove is actually the most solid part. I get way more wiggle / play out of the hinge on the wings than I do the joint or sliding adjustment. I never liked the hinge out support with a single threaded bolt for adjustment. That solution never seemed as stable. There is a much greater contact area with the tongue and groove than an edge of plywood or bolt head. If I were going to do it again, I would use a piano hinge or machinist hinge to take all the play out of that joint.
One day, you're going to need to take those trays out of the drawer, and you're going to have a very difficult time prying them up with that double stick tape on.
Well done! Thank you!
Great stable I’m building now but I need to know what bit do you use for router your frame I’m no profesional I’m beginner Thanks